This tutorial is outdated. We're currently working on an updated version. In the meantime, for instructions on building a chat app using CometChat, please visit our documentation.
Tinder is a dating application that was introduced on a college campus in 2012 and is the world’s most popular app for meeting new people. It’s been downloaded more than 340 million times and is available in 190 countries and 40+ languages.
Tinder is a place built on a world of possibility. The possibility of forming connections that could lead to more. If you’re here to meet new people, expand your social network, meet locals when you’re traveling, or just live in the now, tinder is the right app for you.
So why build a clone?
Tinder takes advantage of a very simple concept that brings the whole idea of the application to life. Simply clicking Nope or Like instantly connects you to someone, and the amazing thing is, if you are a match ( the use you Liked does the same ), you can instantly start messaging and connect.
So in this article, I will try to replicate that feel by using Angular as the frontend framework and Express for the backend. I will not be adding the express codes to the article for the sake of being minimalistic and not making the article long, but you can clone the repository and then kickstart the backend.
Prerequisites
For you to fully follow and understand this tutorial, you should be familiar with the below-enlisted technologies as this tutorial will not be covering basic use cases of these technologies.
The Angular CLI installed
CometChat account
Setting up a server
Before we dive into building the frontend of our tinder application, we will first touch up a little on setting up the server-side so we can consume our APIs and connect to the database.
For the database, we will be using MongoDB and we will connect it to our server-side (Express) application. To use MongoDB, you will first have to create an account. When you are done creating the account, you can then get the link to your MongoDB database to be stored later in your .env file.
Below is what the link will look like:

MongoDB url link example
Next, you can go ahead to set up your server-side using express. I have already created an express application for the server-side and I won’t document it in this tutorial to shorten it. But you can clone the files on GitHub using this repository link.
When you are done cloning the GitHub repository, you will install the package file required on package.json using npm:
npm install
When the installation is complete, you can then create a .env file to store our environment variables like port and our MongoDB link along with Cloudinary requirements for storing images.
Here is an example of what mine looks like:
The next thing we will do is set up a Cloudinary account which we will be using to store our images and save the link as a string to our database for consumption in our APIs. To create an account on Cloudinary, simply click on the link.
After creating an account on Cloudinary, you can copy the cloud_name, api_secret, and api_key and add them to your .env file:
Next, you can add a random access token for JWT in your .env file. It can be anything random from your name to a combination like password.
_ACCESS_TOKEN_SECRET=JWT_ACCESS_TOKEN
_
And you are good to go on the server side of things.
Let’s start and keep the server running:
npm start
Getting Started
To begin with, we need to create a new instance of Angular using the Angular CLI. To do that, simply open up your terminal and input the below code:
_ng new tinder-clone-app
_
Once the dependencies are installed, you can then step into the directory tinder-clone-app which has just been created, and kickstart your application.
To do that, use the following codes:
cd tinder-clone-app
ng serve
Install CometChat
Next, we install comet UI in our application using:
npm install @cometchat-pro/chat@2.2.1
Open src/main.ts and get rid of the snippet below:
Still inside main.ts, let’s import CometChat and configure it by adding the following code:
To get your appID and region you have to create an account in CometChat and copy the details from the dashboard.
After that is done, we can then get the CometChat UI Kit from this repository and copy it to our src folder in the application.

For styling the application, we’ll be copying the styles directly from the GitHub repo and add it to src/styles.css. Also, we’ll pulling in Bootstrap, Font Awesome and JQuery from CDN inside index.html:
You will need to get the images from the repo.
We can then install @ctrl/ngx-emoji-mart using:
npm install @ctrl/ngx-emoji-mart
Then add our style files in angular.json to use the compiled CSS for our UI Kit:
Note: For those using Angular 8 and greater, you will have to turn off some tslint configurations for strict TypeScript codes.
To do that, simply go to your tsconfig.json file and change the boolean declarations for some cases:
And that is it, we can then begin to use CometChat UI Kit in our application.
Layouts
After the installation is complete, we will create layouts for our application. Layouts are basically what will remain constant in a page based on if a user is logged in or not. For example, a blank layout can be used for the login and welcome page.
So we will go ahead and create our layouts page:
ng generate component components/layouts/blank
ng generate component components/layouts/default
The blank page will contain the look of the welcome page while the default will contain the look of a page when a user is logged in.
Next, we create our welcome page and write some code to give it an astonishing look.
ng generate component components/pages/welcome
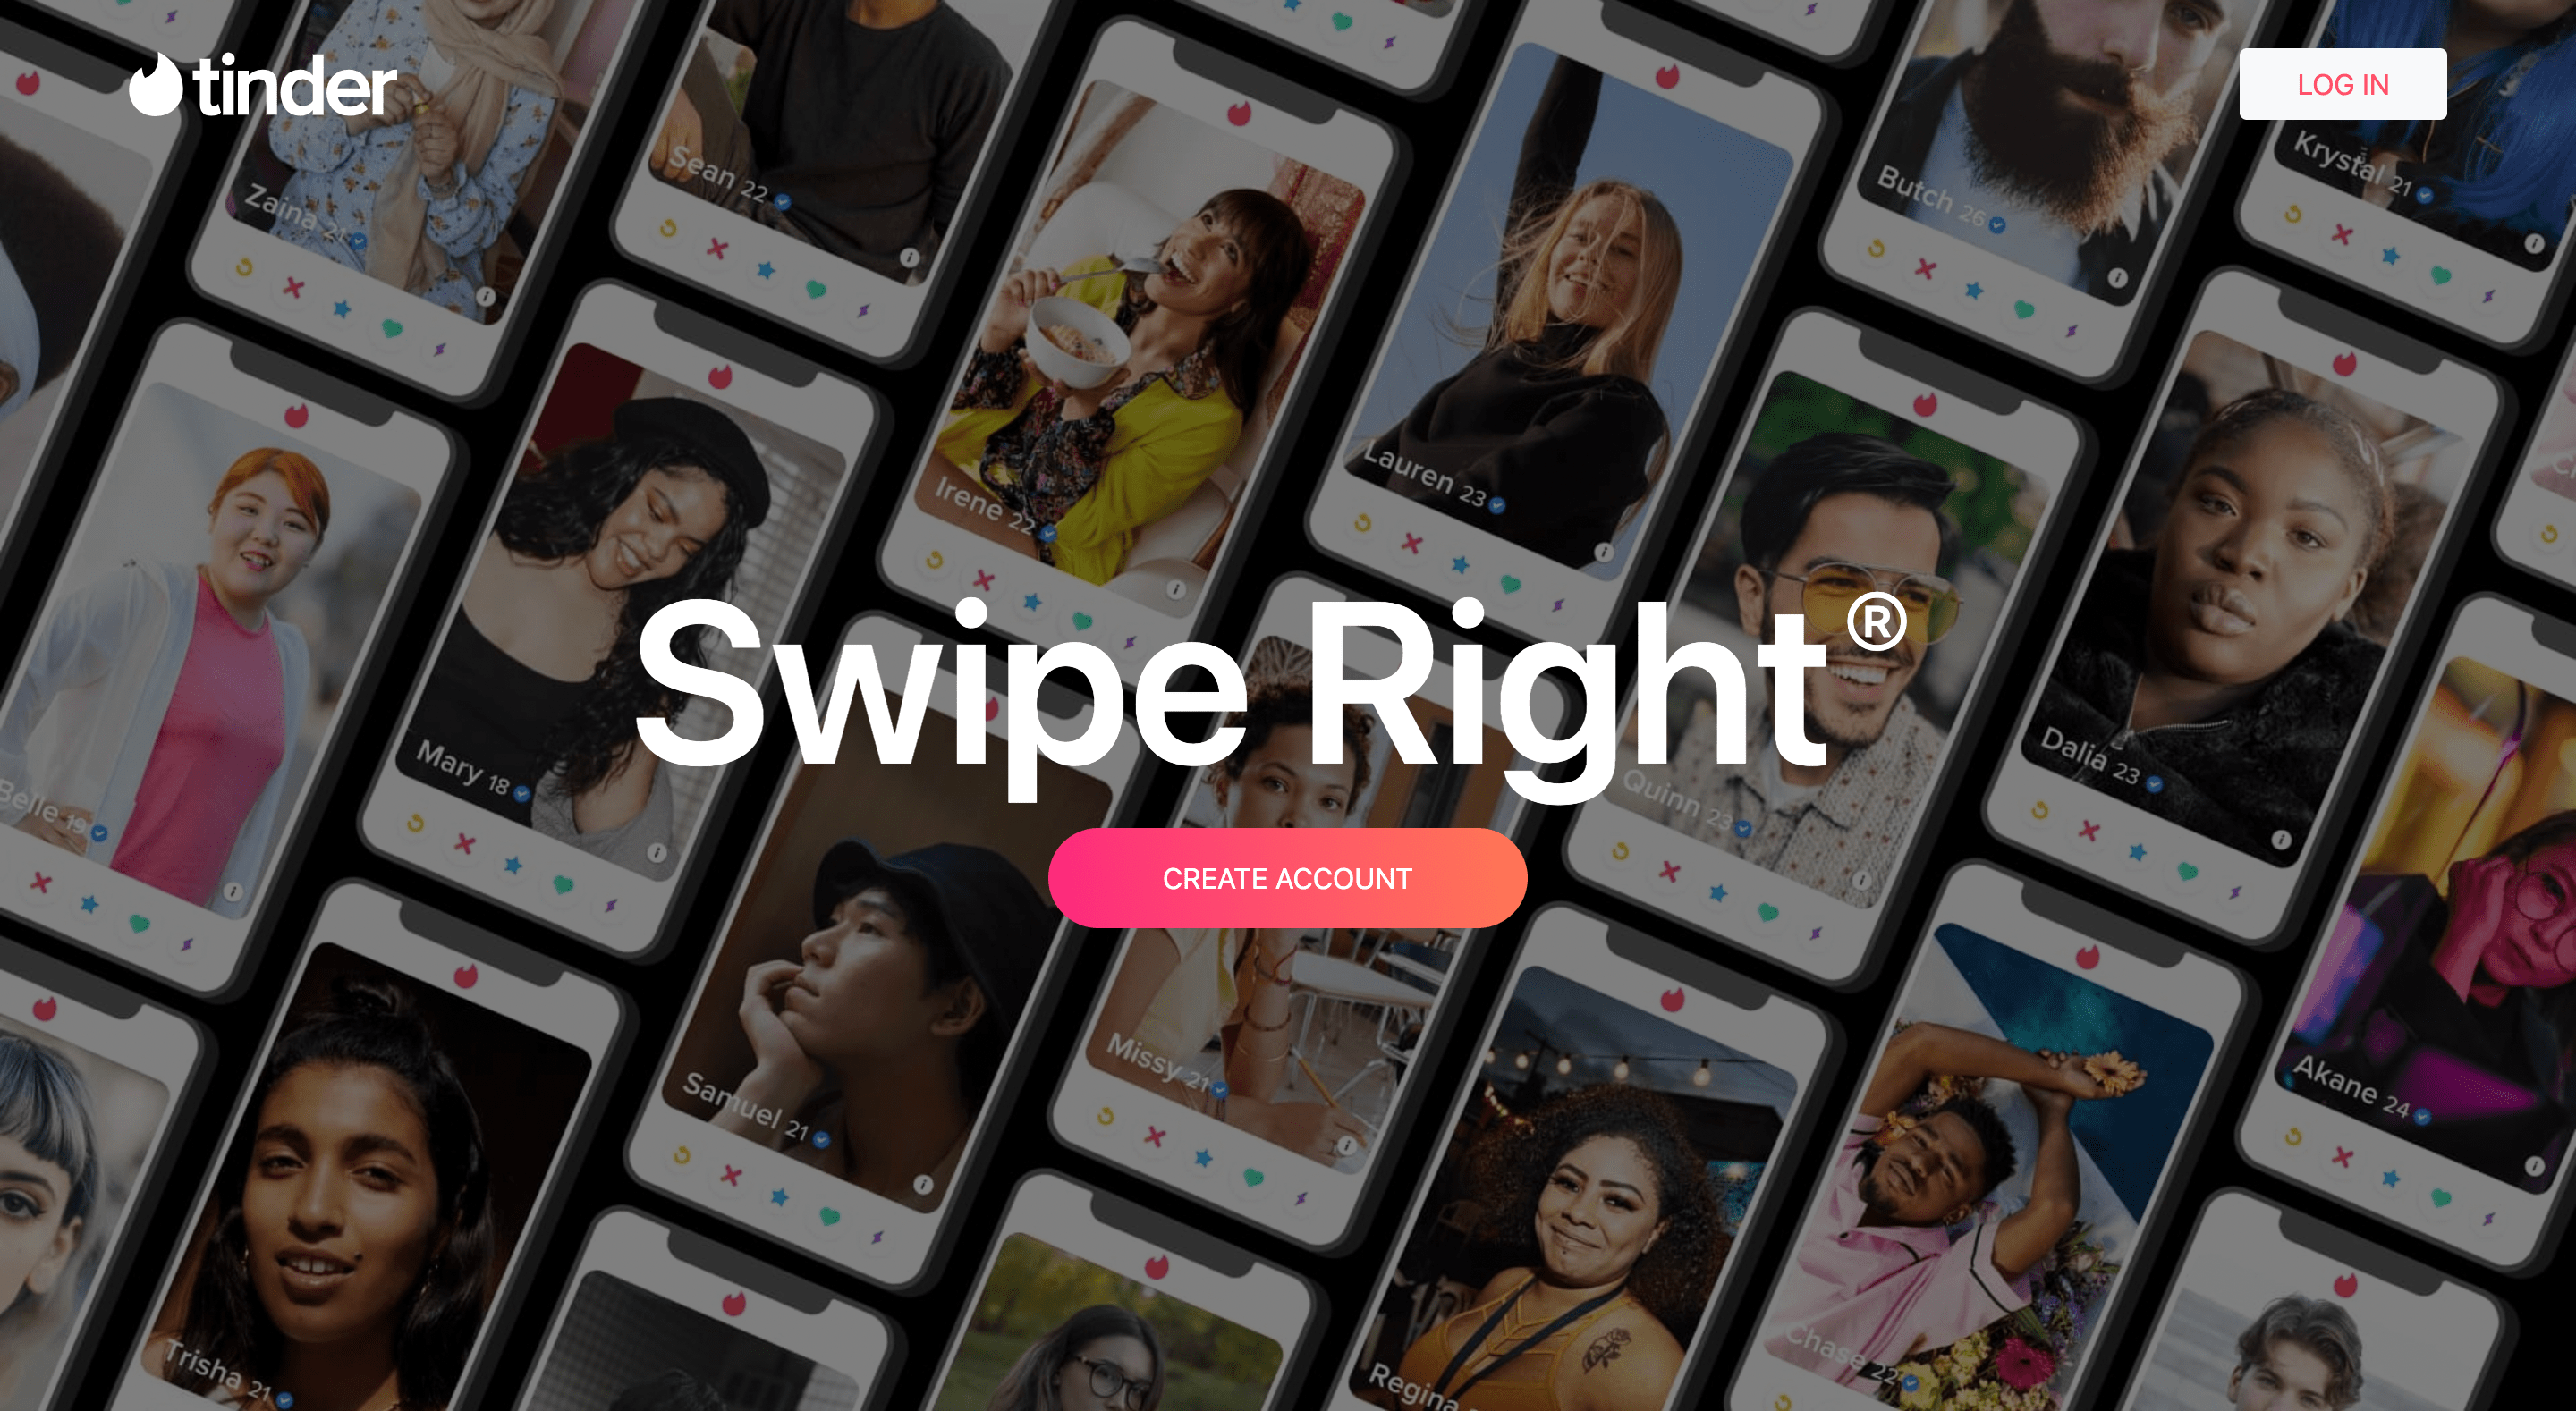
Home Page
We can then add our layout logic in app-routing.modules.ts to differentiate page looks.
Then in our blank.component.ts file, we will add router-outlet:
<router-outlet></router-outlet>
Then clear our app.component.ts file, leaving only the router-outlet tag:
<router-outlet></router-outlet>
Loading indicator
After we are done setting up our layouts, we will create our loader service. The loader intercepts http requests and adds a loader to the clicked button to show the user that their task is being performed.
To add the loader, we will first create our loader service. To do that, run the below command in your terminal:
ng generate service services/loading/loading
Then we add our logic:
This will simple observe for change in the interceptor we will create and either activate or deactivate the loader.
Next we create our loader interceptor:
ng generate interceptor interceptors/loading/loading
Then we write our function to listen/intercept our http requests and call on our loader service every time there is a change.
After the intercept function has been added, we then call on the interceptor as a provider in our app.module.ts file:
After we are done with our interceptor, we can then create our loading component and call on the loader service to interact with it
ng generate component components/loading
After the loader component has been generated, we then call on the loader service in the component and add our loading function
Then in the loader component html, we can then add loader
We can then add our loader components in our form to indicate when our request is pending
Error Handler
In every application, it is important to have an error handler to throw error messages so the user can know what is wrong and contribute to fixing it. So in our application we will add and http error handler and display error messages in our forms.
To start, we will generate our message component in our terminal which will contain the message to be displayed if an error is returned.
ng generate component components/message
Then in our message.component.ts we can add our message object which will display our message and it’s color code
Then we create our bootstrap alert in message.component.html
Now that we are done with the message component, we can generate the interceptor to handle our errors and send them to the message component to be displayed in our application.
ng generate interceptor interceptors/http-error/http-error
Then, we update our intercept function in the newly generate interceptor. This will intercept all requests and get the errors to be displayed in our message component
That is it for our error handler, we can then go ahead to add the message later in our tutorial to our forms.
Register
Now, we will go ahead and create a new user and do that we will generate a new service and a guard to check our authentication.
First, we generate a new service for authentication and we will call it auth which will make an API request to our server.
ng generate service services/auth/auth
Then we can go ahead and make our API call to both our local registration API and also CometChat registration.
First in your environment file, we will add our baseURL that will be pointing to our express application:
Next, replace the content of auth.service.ts with the following:
Remember to replace APP_ID and API_KEY with your details.
In the welcome component, we’ll call on our auth service and send our form data created in our registration modal. When the requests go through, we can get back our accessToken that we will use to keep the user logged in.
We will first call on the in-built FormBuilder which allows us to add files to our post request:
Next, we add our registration functionality, which will fetch data from our form and send it as a request to our server:
After that, we will create our login function to log us into our newly created CometChat account, and also our application.
We can finally create our registration modal. One major thing to note is that you should include ReactiveFormsModule in app.module.ts to use the form builder globally across the application.
Let’s add the registration modal to our welcome page:
Our inputs uses formControlName to get the name. For our profile image, we are using an $event listener to get the file and add to our form data.
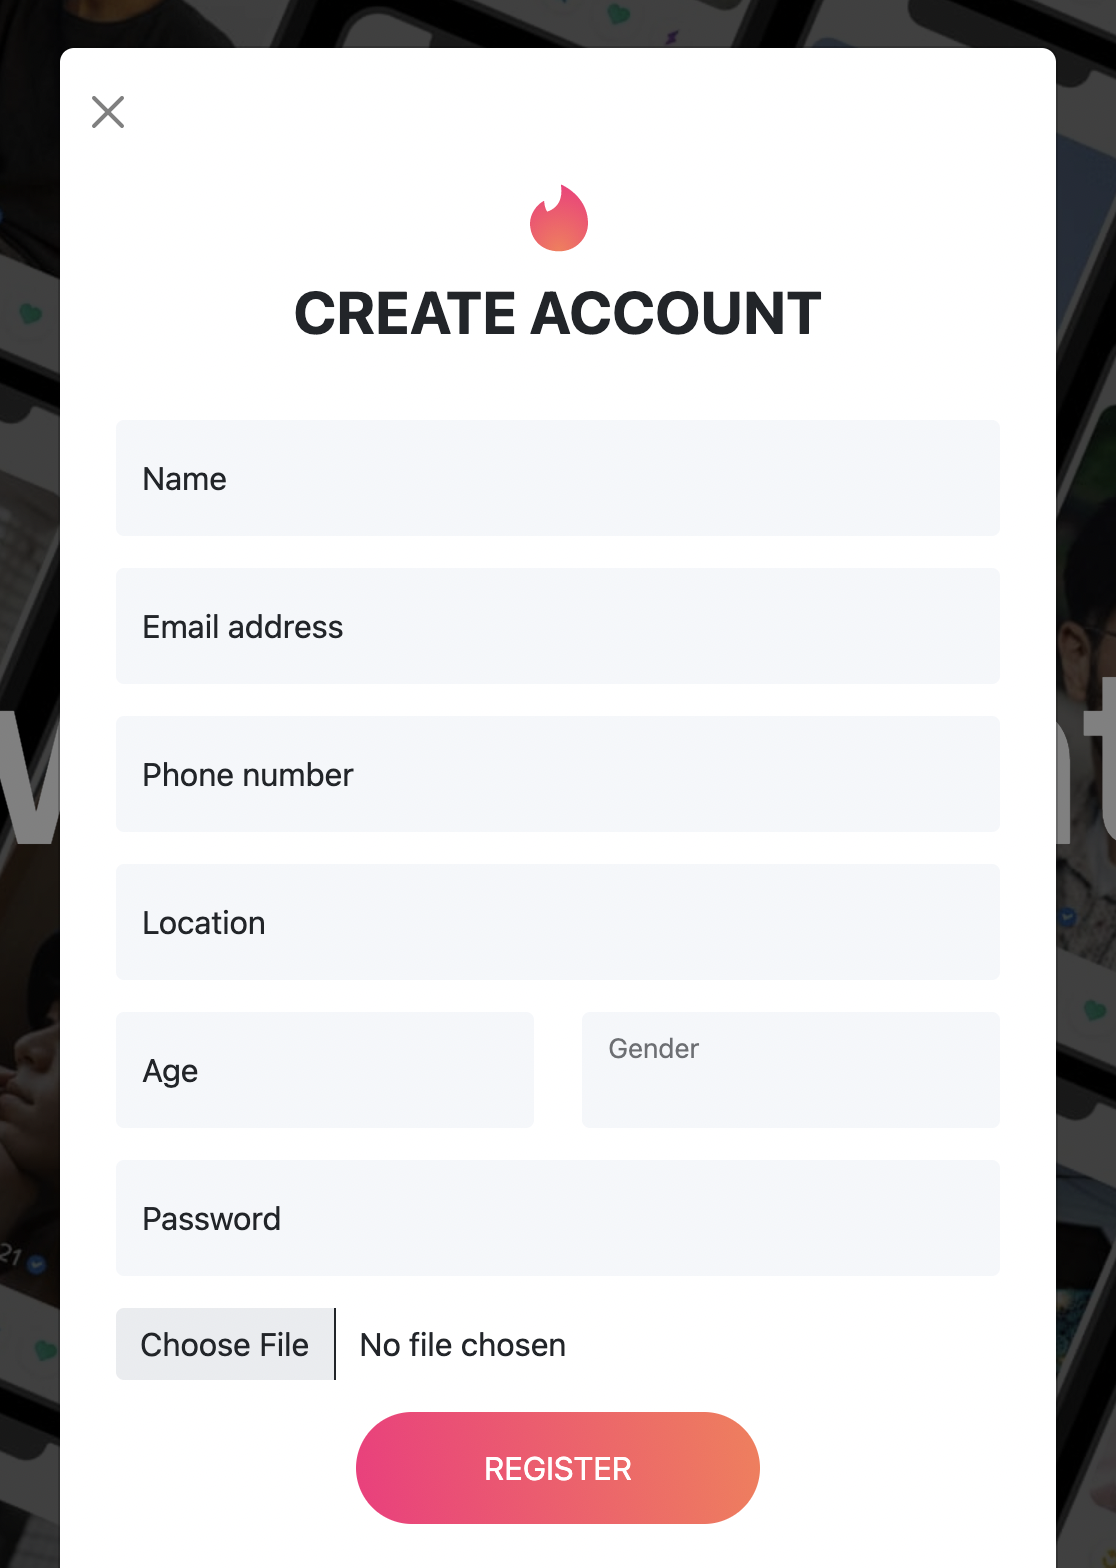
Register Modal
Auth Guard
After we do that, we can add our authentication guard which will check for our accessToken and log us in.
For that, we will generate a guard and name it auth:
ng generate guard guard/auth
Select canActivate from the prompt.
In the guard, we can access our userService and check if our user is logged in. This just checks if our token has been stored in the localStorage.
Next, we create our homepage which will show our matches and users for us to give a like or not.
ng generate component components/pages/home
Next, we can then modify our app-routing.module.ts to add our authentication guard in the home route:
Login
Here, we need to get our users from both express application and also CometChat. To begin, we will create a login function which will interact with the authentication service. And once we call the user successfully, we need to call the CometChat login function to get user details.
So in our service, we can go ahead to add our http functions:
Then we create our login functionality in our welcome.component.ts file:
We then add our login modal to our welcome page:
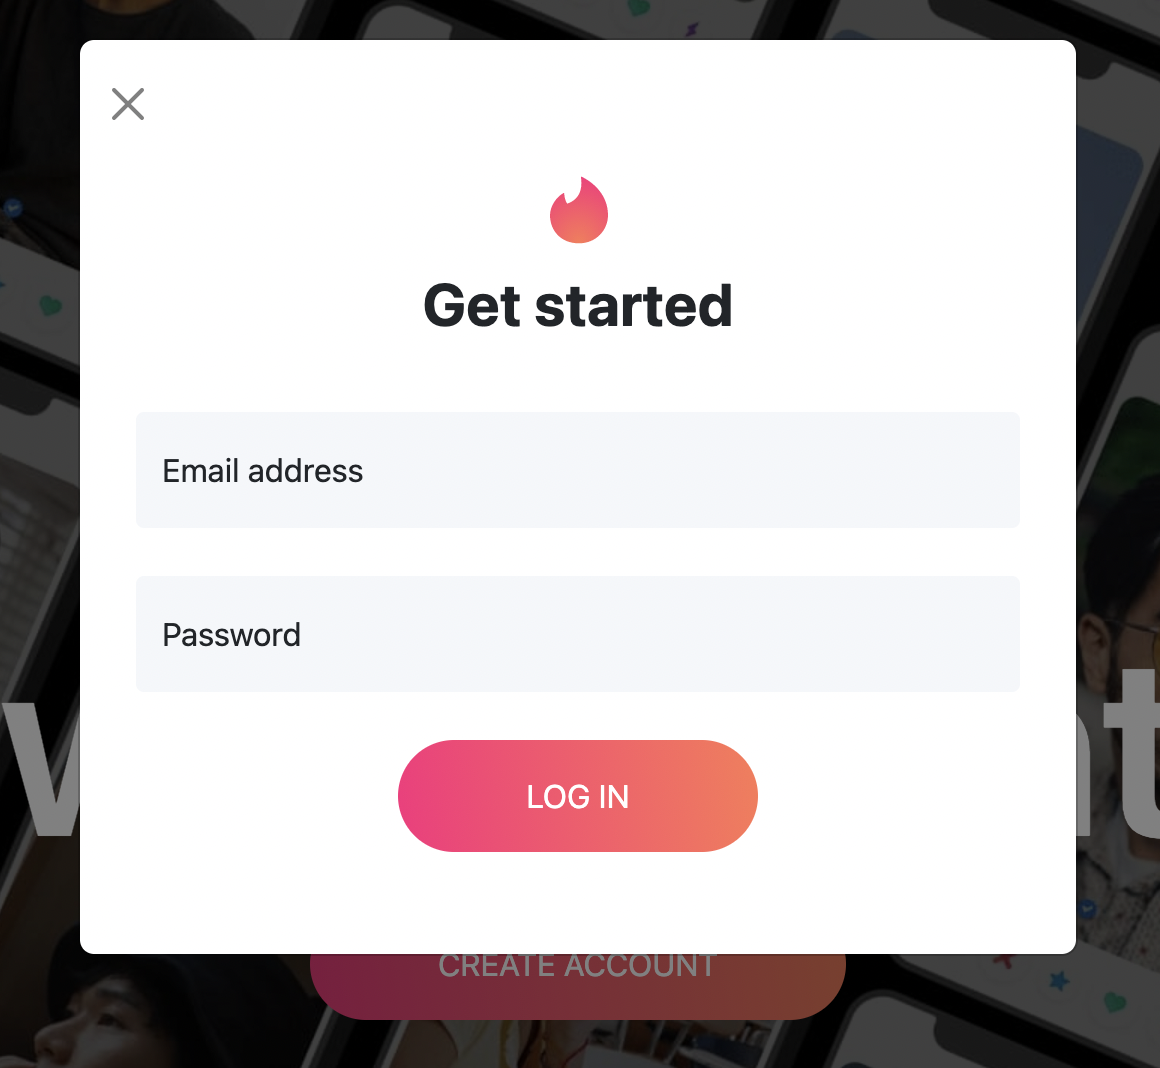
Login Modal
Then, we create our side component to hold the sidebar that will contain matches.
ng generate component components/partials/side
Next, we modify the default layout to add the side component to our home page:
Logout
We will add the logout functionality before going ahead to setup our side component, because it will come in handy when we add our custom html for the side component.
So in our side.component.ts file, you can go ahead and add the below command, which will delete the accessToken from local storage and route back to the welcome page.
Matching
The uniqueness of tinder is in its match-making. You see, for you to be able to message or communicate with a user you like, the user has to like you back. In that way, you both have a shared interest and this allows communication to come easily.
To get the matching started, we will add the matching functionality in the side.component.ts file to get our user from local storage and using that information, get users he/she has matched with. Now this functionality relies on the user first liking users of opposite gender, which we will cover later in the tutorial.
We will create a users service to get all our matches and handle other http requests:
ng generate service services/user/user
Then, we will add the match service in the newly generate service:
After that is done, we add our matching functionality which will communicate with our service and get matched users. Update side.component.ts to include the following:
Customizing side component
In our side.component.html, we can then add our navigation for matches and messages, along with other links. The match section will show a list of users you have matched with while the messages section will show a list of people you have messaged.
The messages section uses the CometChat “user list with messages” UI Kit to display the list of users to message.
Also, in the sidebar, we will have the link for users to log out, which will be tied to the logout functionality.
This will allow us to toggle between the messages and the matches tabs when .matches and message-button are clicked, respectively.
Next, we have to include the CometChat user list UI component in our app.module.ts file:
Now, let’s add the JavaScript. Inside src/assets, create a new script.js file, and insert the following code in it:
Next, we add the script file to our index.html file after JQuery and Bootstrap script:
<script src="assets/script.js"></script>
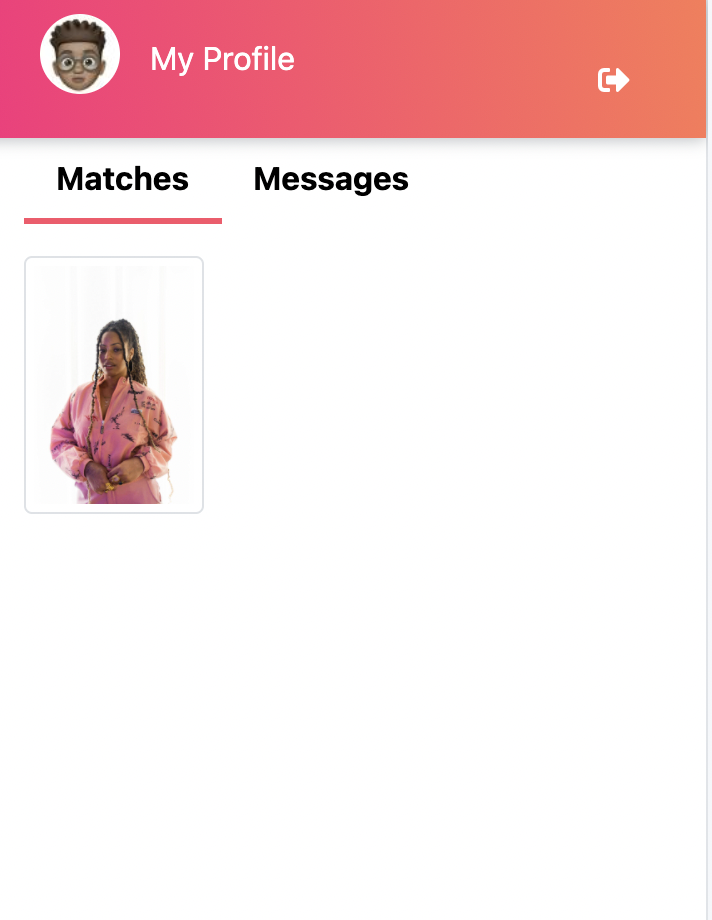
Matches section
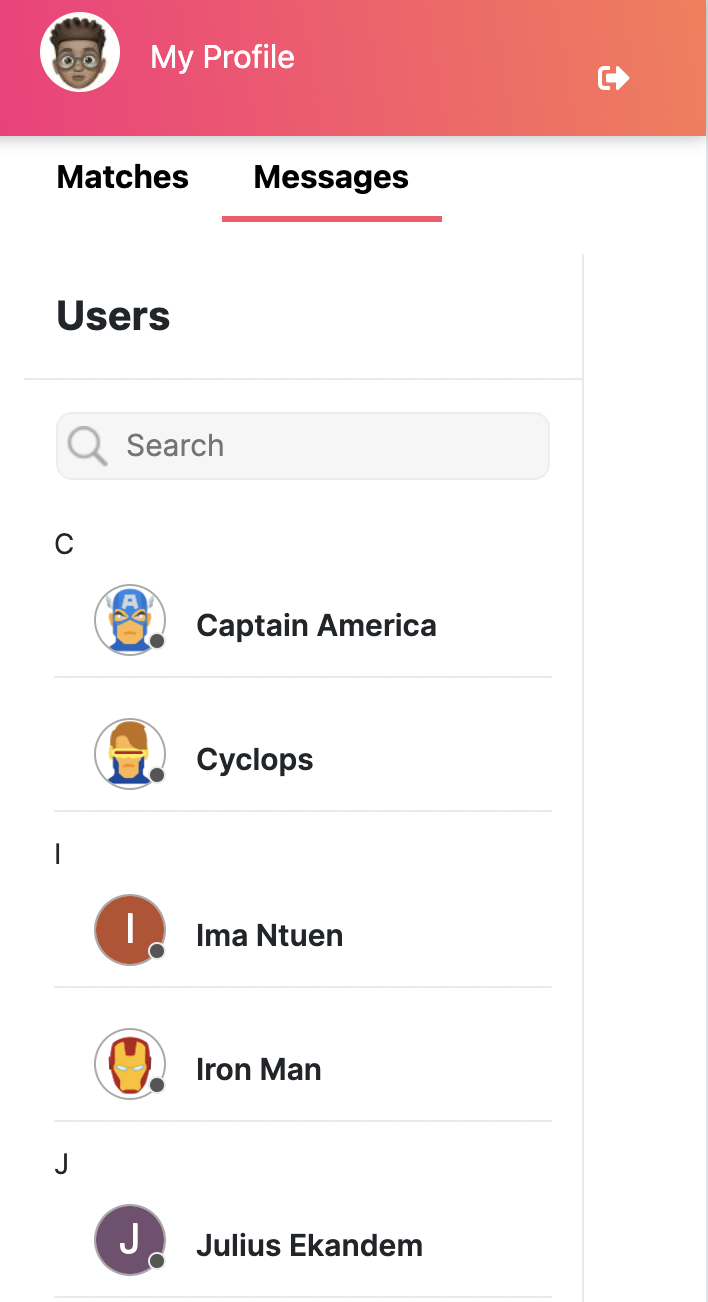
Messages section
Like
Let’s move on to the next important aspect of Tinder — the like functionality — which allows you to interact with people whom you like. If it’s a match, it connects you with them.
To like, the logged-in user is shown pictures of the opposite gender and he/she can give a thumbs up, therefore, like the person.
First, in the home component, we add the function to get all users based on if you haven’t liked them before, and then randomly get a user and display.
Next, add our all service in user.service.ts file:
Then in the home.component.html, we can then fetch our randomized user
Note: To get a randomized user, a user with the opposite sex has to be registered on the application. That is, if the logged in user is a male, a female user must have created an account on the platform. In my case, I created multiple accounts.
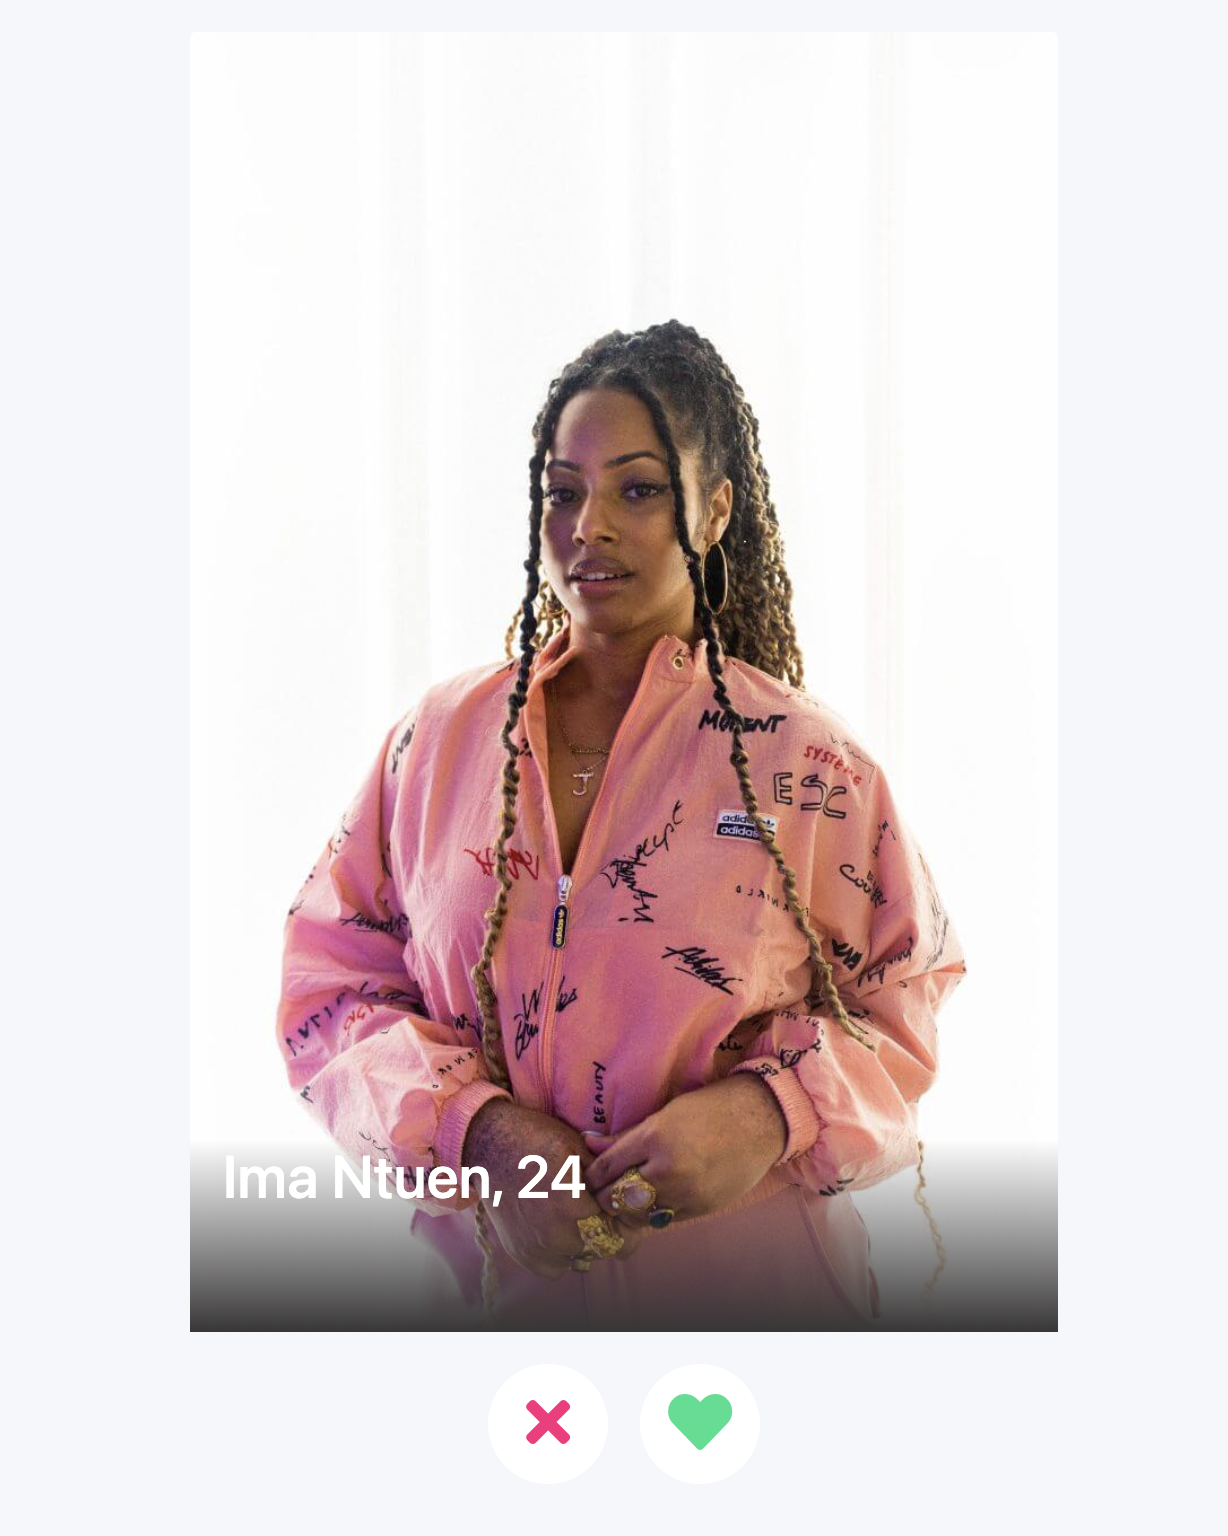
Matches card
We have successfully gotten our random user whom we can choose to like. If so, we can go ahead and create the like logic.
In our home component, we create a like function to listen to our API endpoint through our service, get the logged-in user id, and then the user that has been like.
Then we update our like button and include our function:
Conclusion
As pointed out above, you will clone the express application that contains the APIs used in this tutorial for you to build your application effectively. You can get the express application repository here. You can also go ahead to clone this tutorial on GitHub and configure it as per your requirements. To do that, simply click on this link.
In this tutorial, we have covered what Tinder is and how to use Angular along with CometChat UI Kit to build a clone of Tinder. Moreover, this tutorial covered how to go about creating the famous Tinder welcome page, log in, and registration to log in the user on both application and CometChat, along with matches, messages, and also the homepage to like and dislike users.
About Author
Chimezie Enyinnaya is a software developer and instructor with passion for teaching and sharing his knowledge. You can learn more about him here: https://adonismastery.com and https://twitter.com/ammezie.

Chimezie Enyinnaya
CometChat
