This tutorial is outdated. We're currently working on an updated version. In the meantime, for instructions on building a chat app using CometChat, please visit our documentation.
Almost every mobile application has a chat feature nowadays, from health and education to, of course social communities and online marketplaces. However, that does not make it any less difficult to implement in your project. If you're struggling to create a competitive chat app that matches up to your users' expectations, it might be better to rely on a prebuilt chat SDK and API to help you obtain the best result.
In this tutorial, we'll show you how to build an iOS chat app using CometChat's Swift UI Kit. CometChat makes it easy to add chat functionality to your project, and offers three ways you can do just that:
Add a CometChat Chat Widget to your application. These offer limited customization and are only available for web and WordPress, but also require the least effort, as they're created directly in the CometChat Dashboard.
Use CometChat's iOS UI Kit, a bundle of view controllers that provide chat functionality for iOS. The UI Kits are a little more difficult to implement than the widget, but they offer significantly more customization.
Implement the CometChat Chat SDK, which is available for Flutter, Kotlin, and React, among other platforms. Using the Chat SDK requires more work, but allows a lot more customization.
You can find all the code for this tutorial in this GitHub repo.
Setting Up CometChat
The first step is to create a free CometChat account. As soon as you've created your account, you'll be asked to add a new app.
Add real-time chat with minimal effort using CometChat
You'll need to complete the apps details: name, region, and technology used (such as Swift or Android). You also need to select the CometChat version(version 3 is used in this tutorial). Additionally, you can specify the use case, such as gaming or livestreaming, for your app. For this tutorial, you'll be using Swift, since it's a basic implementation, you can select Other as the use case.
Click on Add App to be redirected to your CometChat Dashboard. This is where you'll find all the necessary information for the initialization of the CometChat SDK. You'll want to make note of the following:
App ID
Auth Key
Region
In the left sidebar, you'll find a list of options where you can customize and edit your app from the dashboard. For example, the Users and Groups options allow you to edit or delete users and groups inside your chat app. However, it is preferable to handle this type of scenario programmatically by creating server-to-server calls, so the users of your app can manage their profiles and groups.
Adding CometChat to Your App
Let's get started by adding CometChat to your app. The interface for the Xcode project should be Storyboard, and the language should be Swift:
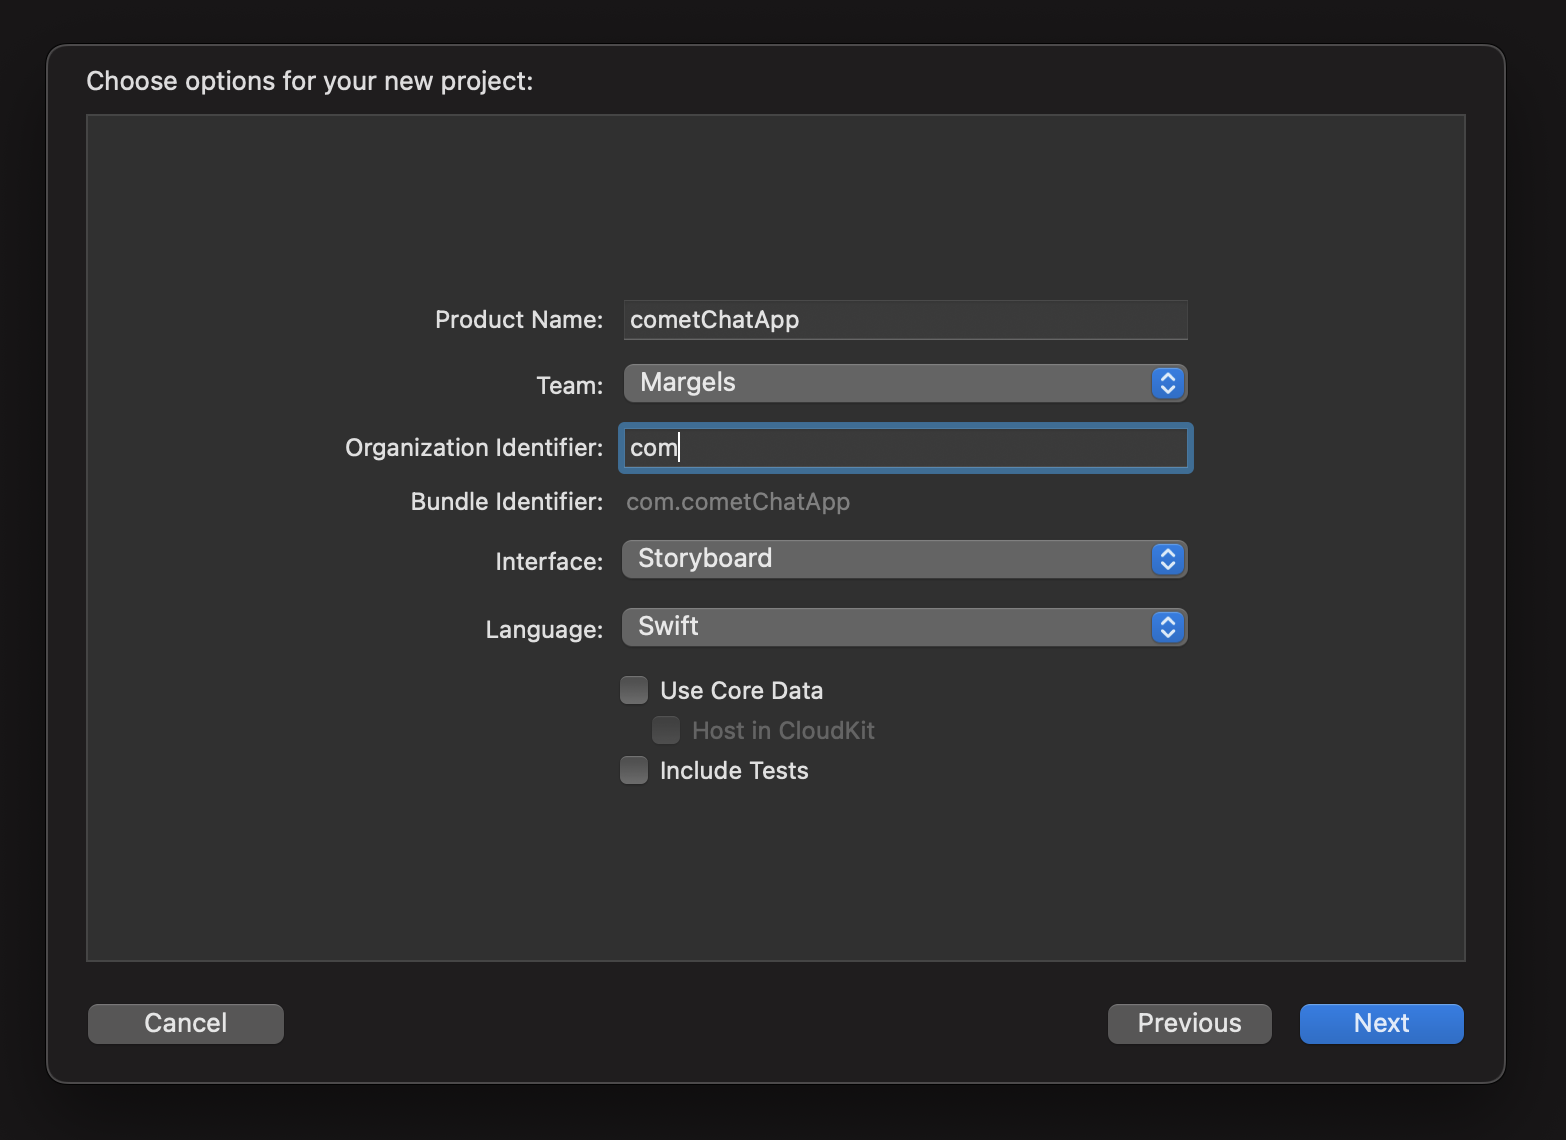
Once you have created your project, follow the steps below to add CometChat using CocoaPods:
Open your terminal and navigate to the root directory of your Xcode project
Run pod init to add a Podfile to your project
Type ls, and press enter to list the files in your directory
Run vi Podfile to open and edit the Podfile that is now in your directory
Find the use_frameworks! line in your Podfile, press the i to start editing. Add pod 'CometChatPro', '2.2.2' under this line
Optionally, if you want to make your app unavailable on devices running older versions of iOS, you can change the minimum required iOS version of your app by replacing platform :ios, '9.0' with platform :ios, '11.0'
Press ESC, type :wq then press enter to save your file.
Run pod install to install the CometChat dependency to your app.
From this point on, you should always work on the .xcworkspace file, which you will find in your directory. If your project was open, close it, then reopen it using the .xcworkspace file.
Before continuing, head over to your target's build settings, select “All” and “Combined” tabs, and make sure that the following entries are correctly set up:
Search Always Embed Swift Standard Libraries and set it to Yes.
Search Header Search Paths and select $(SDKROOT)/usr/include/libxml2.
If you're using XCode 12 and above, search for Build Active Architecture Only and set both entries, Debug and Release, to Yes. Below those entries, Excluded Architectures should also only include arm64 in the debug.
Open info.plist. If you don't immediately see the info.plist file, click on the name of your project in the Navigator panel. Select your target, and navigate to its Info tab to find the Custom iOS Target Properties section.
Add the following privacy usage descriptions to your info.plist file. The user will need to grant these permissions to have full use of the app's functions:
Privacy - Camera Usage Description (NSCameraUsageDescription), with value “$(PRODUCT_NAME) needs access to the camera in order to update your avatar.”;
Privacy - Photo Library Usage Description (NSPhotoLibraryUsageDescription), with value “$(PRODUCT_NAME) needs access to your photo library in order to send Media messages.”;
Privacy - Microphone Usage Description (NSMicrophoneUsageDescription), with value “$(PRODUCT_NAME) needs access to the microphone in order to connect audio/video calls.”;
Privacy - Location When In Use Usage Description (NSLocationWhenInUseUsageDescription), with value “$(PRODUCT_NAME) needs access to your location services in order to share your location.”.
Once done, you are ready to set up a SDK installation. Open the AppDelegate.swift file and type import CometChatPro to initialize CometChat.
Then, add your app details by by defining them as constants:
Define a constant for your App ID: let appId = "APP_ID"
Define a constant for your App Region: let region = "REGION"
Next, inside the function didFinishLaunchingWithOptions(), add the following statements:
This creates a settings object, then calls the initialization function for CometChat Pro.
Now, build the app. If you've followed the steps, the console will display the message CometChat Pro SDK initialized successfully.
Logging Your Users In
Now it's time to log in your users. You will use demo users that CometChat provides to make the testing process easier. In your initial view controller, import CometChat again by adding import CometChatPro to the very top of your file like you did in AppDelegate.swift, and add the following statement inside the viewDidLoad() function to pass the app's auth key and the uid of the user to the login function:
Make sure to replace ENTER AUTH KEY with your auth key from CometChat’s dashboard.
Run and test your app. In your console, you should see your user’s data.
Implementing CometChat’s UI
Download the iOS Chat UI Kit here and move the folder "Library" into the Frameworks folder of your project. Make sure to follow these settings:
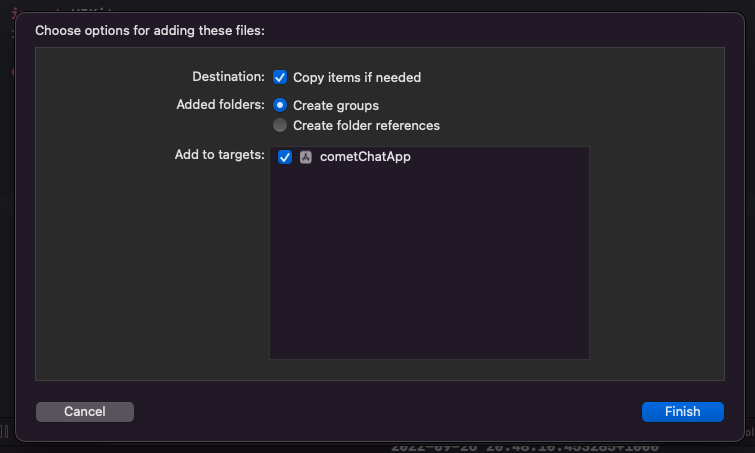
Create a new method named openChat(), and add the following statements to add CometChat's prebuilt view controller to your app for a full-screen chat UI:
In viewDidLoad(), add self.openChat() after the line print("Login successful: " + user.stringValue()) to call the method you just created:
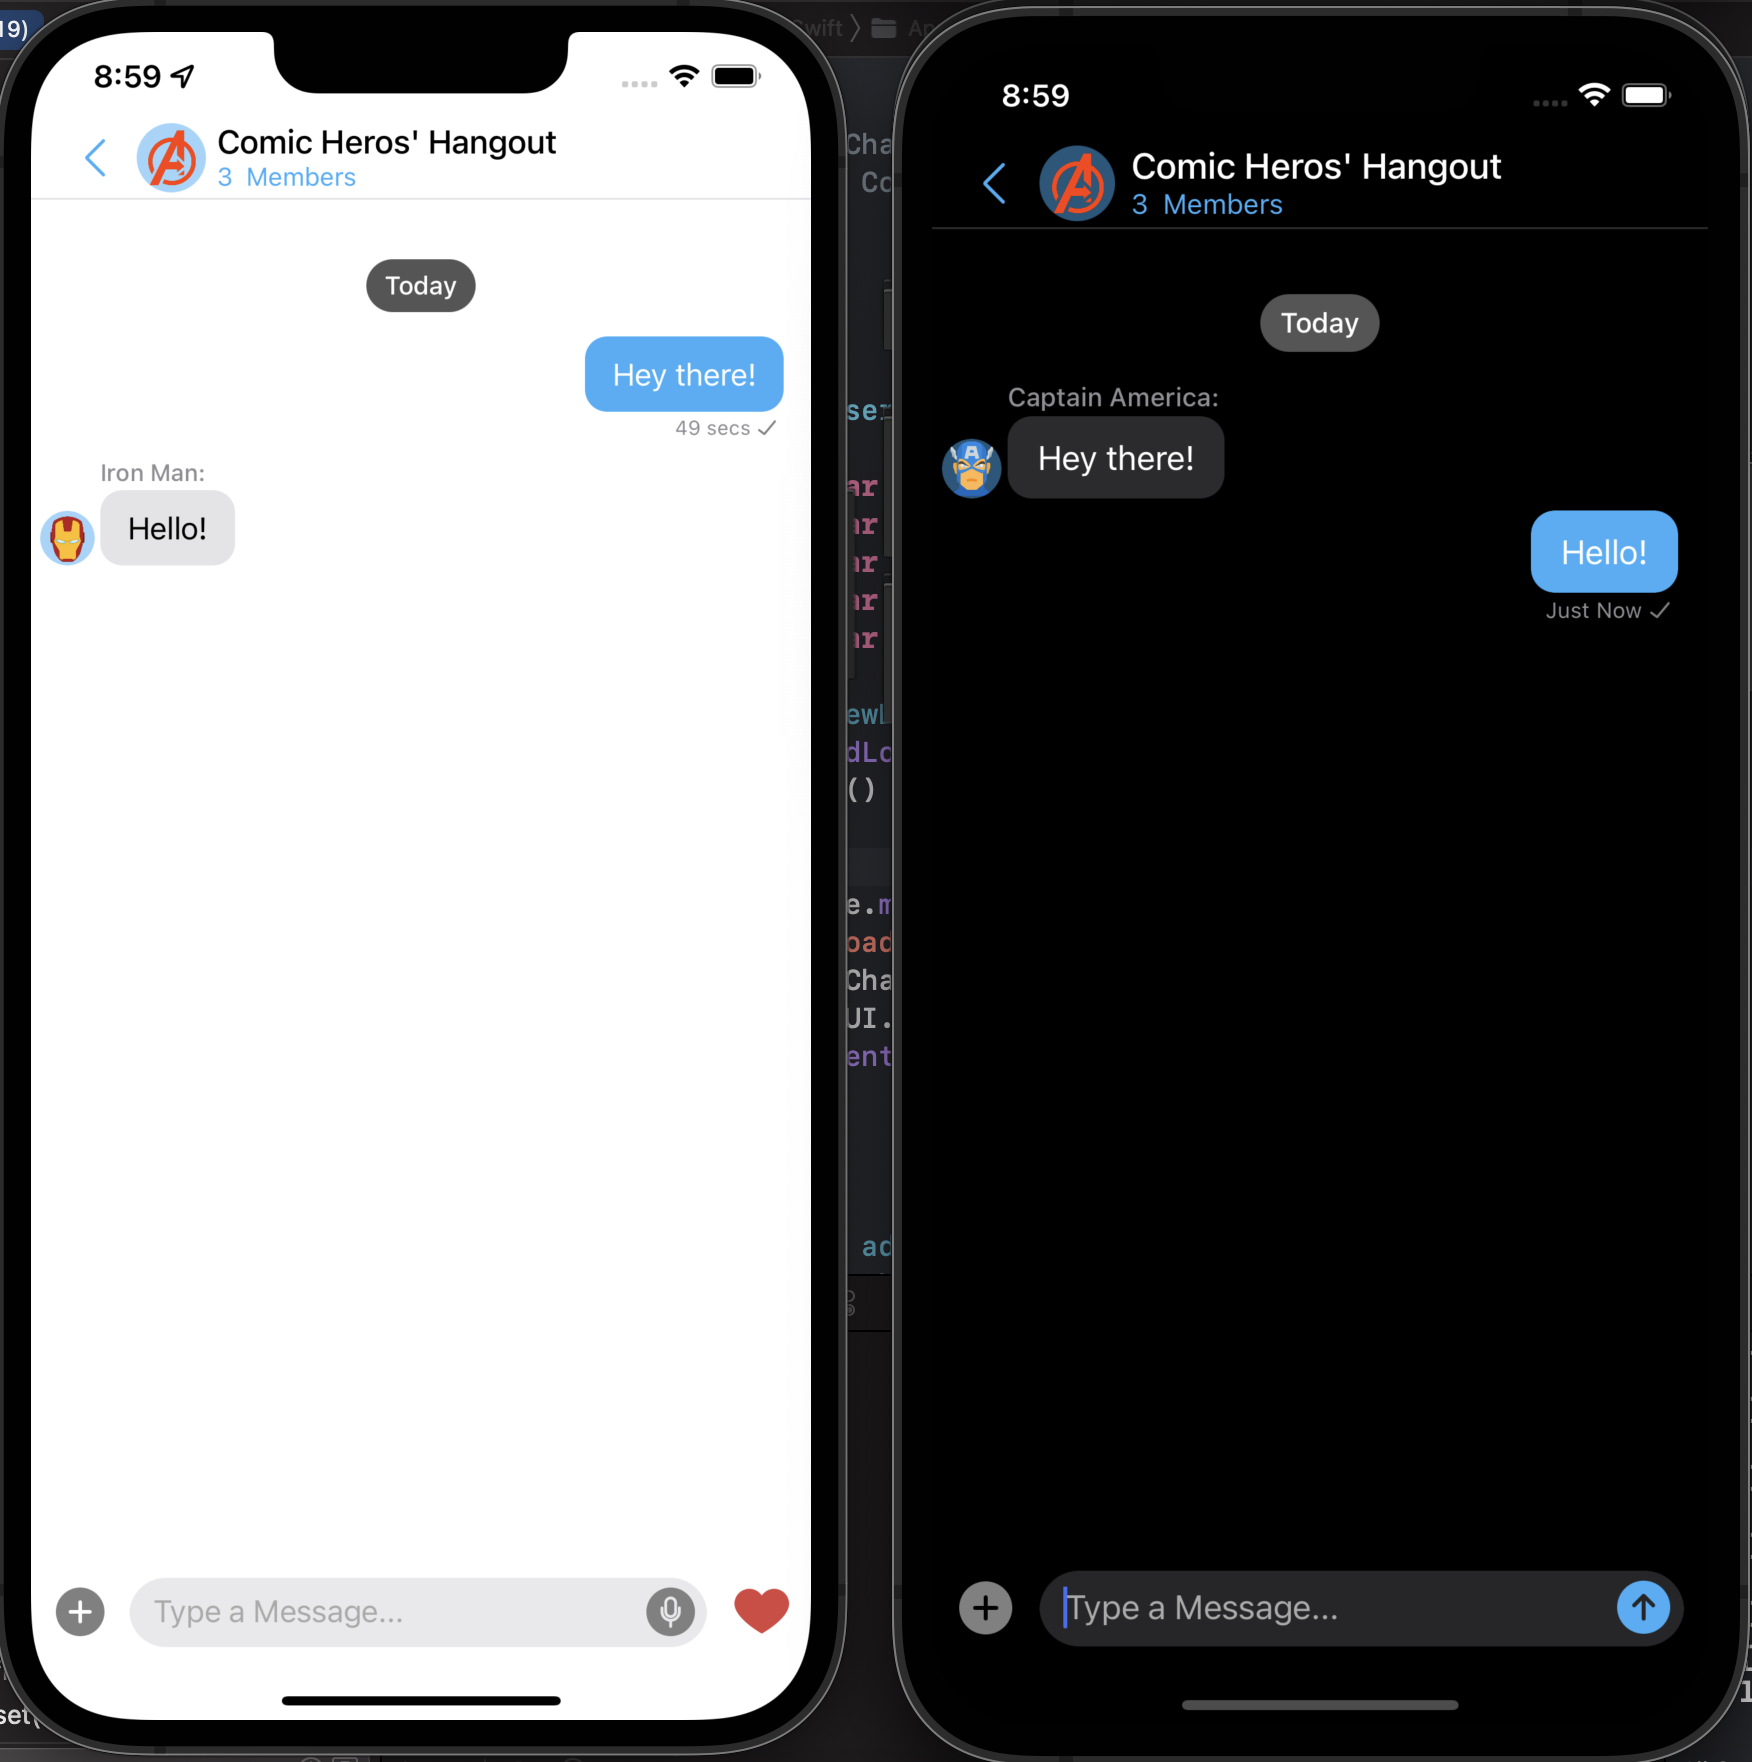
Run the app, and you will notice that your view controller will automatically open the chat view. This is a prebuilt view that CometChat includes, and it immediately gives you a full-featured interface where the user can open chats, calls, groups, and more.
To see what it looks like with two users talking to each other, you can change the uid property to "SUPERHERO2", then run the project on a different simulator. Send a message from one user to the other, and you'll see that you have a functioning chat app already:
Additional Features
CometChat offers a wide range of ways to add functionality and customization to your application.
Extensions
You may want to add additional features to your chat app, and CometChat makes that easy with extensions, which can be installed with a single click to add great functionality to your app. Head over to your CometChat dashboard and have a look at the Extensions section on the left to see what you may want to include for your users. For example, you may want to include emojis, stickers, or even reactions.
With the Stickers extension, you can allow users to send and receive stickers. CometChat offers fourteen sets to get you started, and you can select which stickers from those sets you'd like to make available to your users. If that's not enough for you, you can also add or remove your own stickers from your dashboard.
The Profanity Filter allows you to block potentially objectionable words or emoji from being used in your app. You can tell CometChat to drop the whole message containing the word, or to mask the word, which means that users will see asterisks instead of the word.
The Reactions extension will allow your users to quickly add an emoji reaction—or a lot of emoji reactions—to a message.
Some features, like Stickers and Profanity Filter, can be further customized. From the Extensions page, go to your Installed tab. Some of the extensions will have a Settings option, which you can click to customize your extension. This is where you can upload custom sticker sets, or create a customized list of words you'd like Profanity Filter to avoid.
Color Schemes
If you want to change the chat's color to match that of your app, you can use UIKitSettings object as shown below:
UIKitSettings.primaryColor = .systemRed
Media Sharing
Another feature that's popular with users is the ability to share photos and videos. You can easily enable this functionality:
UIKitSettings.sendPhotoVideos = .enabled
Group Video Calls
Text chat is great, but sometimes it's not enough. Group video calls allow you users to connect face to face in real time, and you can implement it with a single line of code:
UIKitSettings.groupVideoCall = .enabled
Mentions
Whether your users are collaborating on a work project, a community that's formed around a common interest, or just friends who want to talk, it's useful for them to be able to call for the attention of a specific member of their chat group. CometChat allows you to easily add the ability to mention (or "at") someone:
UIKitSettings.mentions = .enabled
Sending GIFs
Sometimes, a chat can leave you speechless. Perfect time to send a GIF! Easily done with CometChat:
UIKitSettings.sendGifs = .enabled
Enhancing Specific Use Cases
While chat functionality is a great feature for many types of applications, CometChat also provides a number of features that help add value to specific use cases.
Live Events
You may want to add a chat feature to your app for live events. With CometChat, this is easily achievable. Follow CometChat’s instructions for how to let your users create a new group, or use the built-in UI Kit to let your users create as many groups as they want.
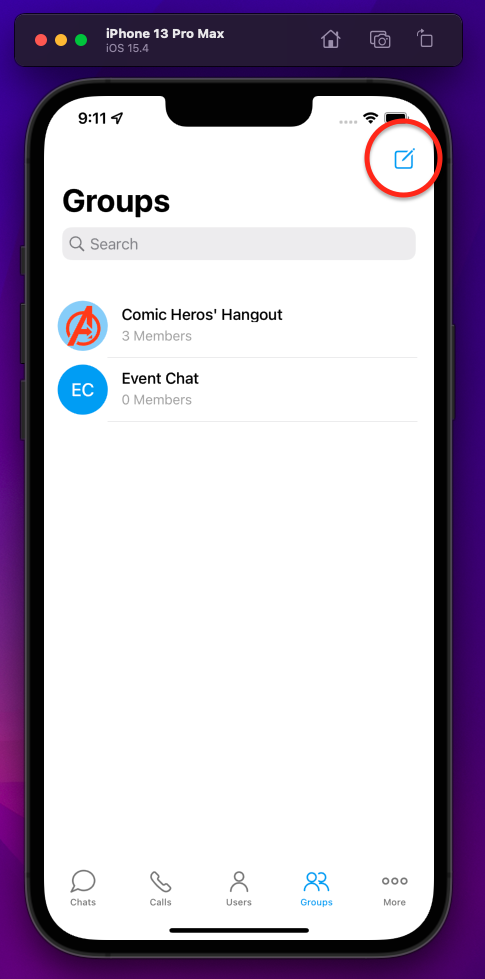
Extract the group ID, and you can open the group chat with just a simple function:
Healthcare
Another use case for chat applications is in healthcare, and apps that let doctors and patients connect. The way we interact with healthcare providers has changed a lot in recent years, and offering in-app chat can really enhance the patient experience, and make things easier for their providers, as well. Patients might use it to ask a question about medication, or as a convenient way to share test results and healthcare documents. CometChat is HIPAA compliant, so it's easy to build a chat app that meets both patient needs and legal requirements.
CometChat isn't limited to just text-based chat, either. There's a built-in video call feature that can be implemented in minutes and used for online consultations. It offers all the functionality that you expect in a video calling app, such as the ability to disable the camera, mic, and speaker.
Community App
The most common use case for a chat app is a social app. While chat features are optional for most apps, they're a must if you're trying to build a community with your app. As before, you'll want to be sure to check out the extensions that CometChat offers. Adding things like polls and link previews are easily implemented ways to enhance your users' experience with your chat app.
Customized Tab Bar
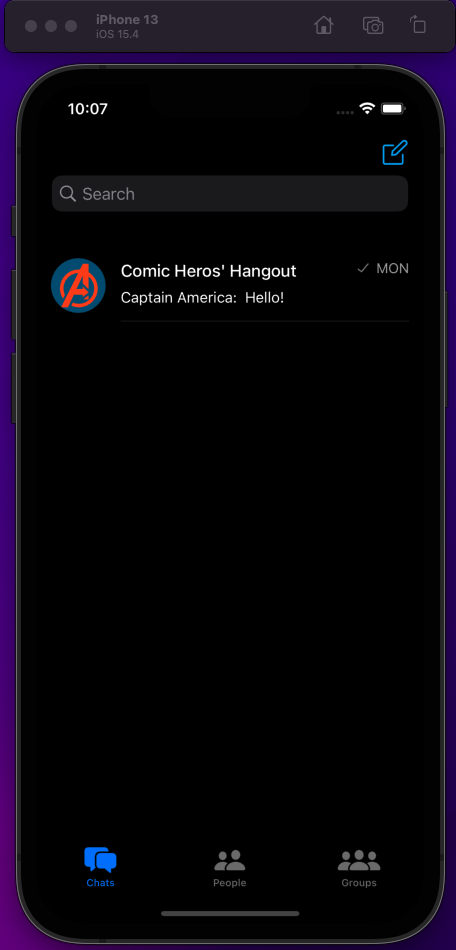
CometChat also lets you customize the tab bar: you can define which view controllers the user will be able to access from it. CometChat comes with predefined view controllers that you can attach to your tab bar, so all you have to do is connect them.
Here is an example for a tab bar where the user can access chats, contacts, and groups views. You can implement this by simply adding the following code to your tab bar class, then customizing it to set its behavior:
Run your project and start testing to see the result.
Group Chats
CometChat comes with a lot of options. Users can create public, private, or password-protected groups to quickly connect to each other and reach a larger group of people. Groups come with moderation functions, where the moderator can dictate whether certain members should be removed or banned, so they won't be able to join the group again later. This action can also be undone on CometChat's Dashboard.
Messaging Options
Users expect to be able to do more than just send and receive messages. With CometChat, users can start a message thread, reply to a specific message, or even translate a message. Another cool feature is editing a message: if the user wants to make a correction in a message they previously sent, they can edit the message and the recipient won't know the difference.
Conclusion
Modern chat apps allow you to do and share almost everything. Trying to create even basic chat functionality from scratch is time consuming and complicated, and implementing a chat feature in your app that meets the expectations of your users can be an uphill battle.
CometChat offers a secure and full-featured chat experience that will satisfy your userbase and require minimum effort on the developing side. Try Give CometChat a try today. You can install this Swift UI kit in minutes, and if you need something completely custom, check out the iOS chat SDK, too.

Margels Caccamo
CometChat

