This tutorial is outdated. We're currently working on an updated version. In the meantime, for instructions on building a chat app using CometChat, please visit our documentation.
Does using push notifications feel intimidating? When used well, push notifications are a low-effort tool that can enhance your marketing efforts and help keep your users up-to-date. Without needing to share an email address or other contact details, your users can receive targeted messages from you and your team instantly. After the user agrees, they can be invited back to your site for a sale, breaking news, or any other exciting piece of content you want to share. There are a number of studies that show a remarkable improvement in click-through rates for push notifications when compared to email.
In a related article, you learned how push notifications work and some push notifications best practices to employ when creating and sending push notifications. In this article, you'll learn how to use CometChat to set up your push notifications. CometChat helps removes the complexity regarding push notifications, letting you focus on creating your content and reaching users.
Implementing Push Notifications with CometChat
To implement push notifications with CometChat, we need to use the CometChat UI kit. The CometChat UI kit handles the work of creating and maintaining a service worker, interacting with a real-time database, and managing your users:
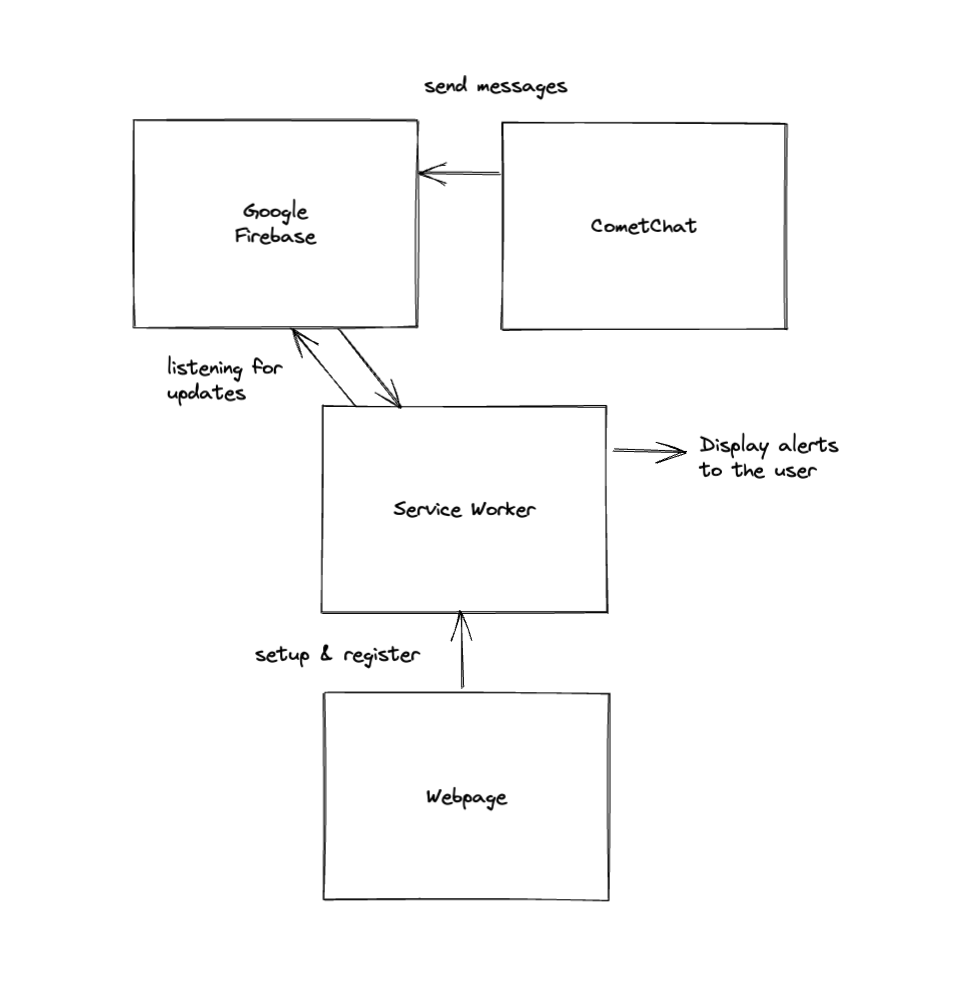
In this tutorial, you'll set up a CometChat and Google Firebase account (if you don't have them already). In addition, you'll write some code to add push notifications to a plain HTML site. You can preview the final result in this GitHub repo.
Set Up Firebase
To begin, you need to set up an account with Firebase Cloud Messaging (FCM). FCM is a cross-platform messaging solution that allows you to send messages at no cost. CometChat uses this solution as the backend for its push notification service.
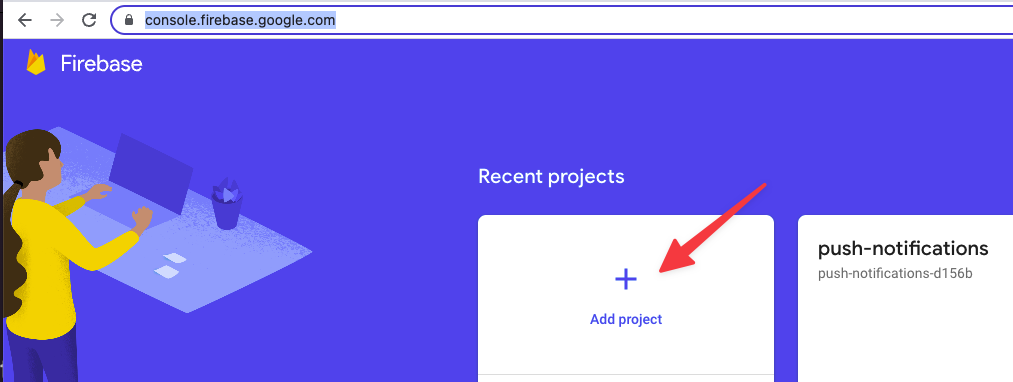
Navigate to the Firebase console and select Add project:
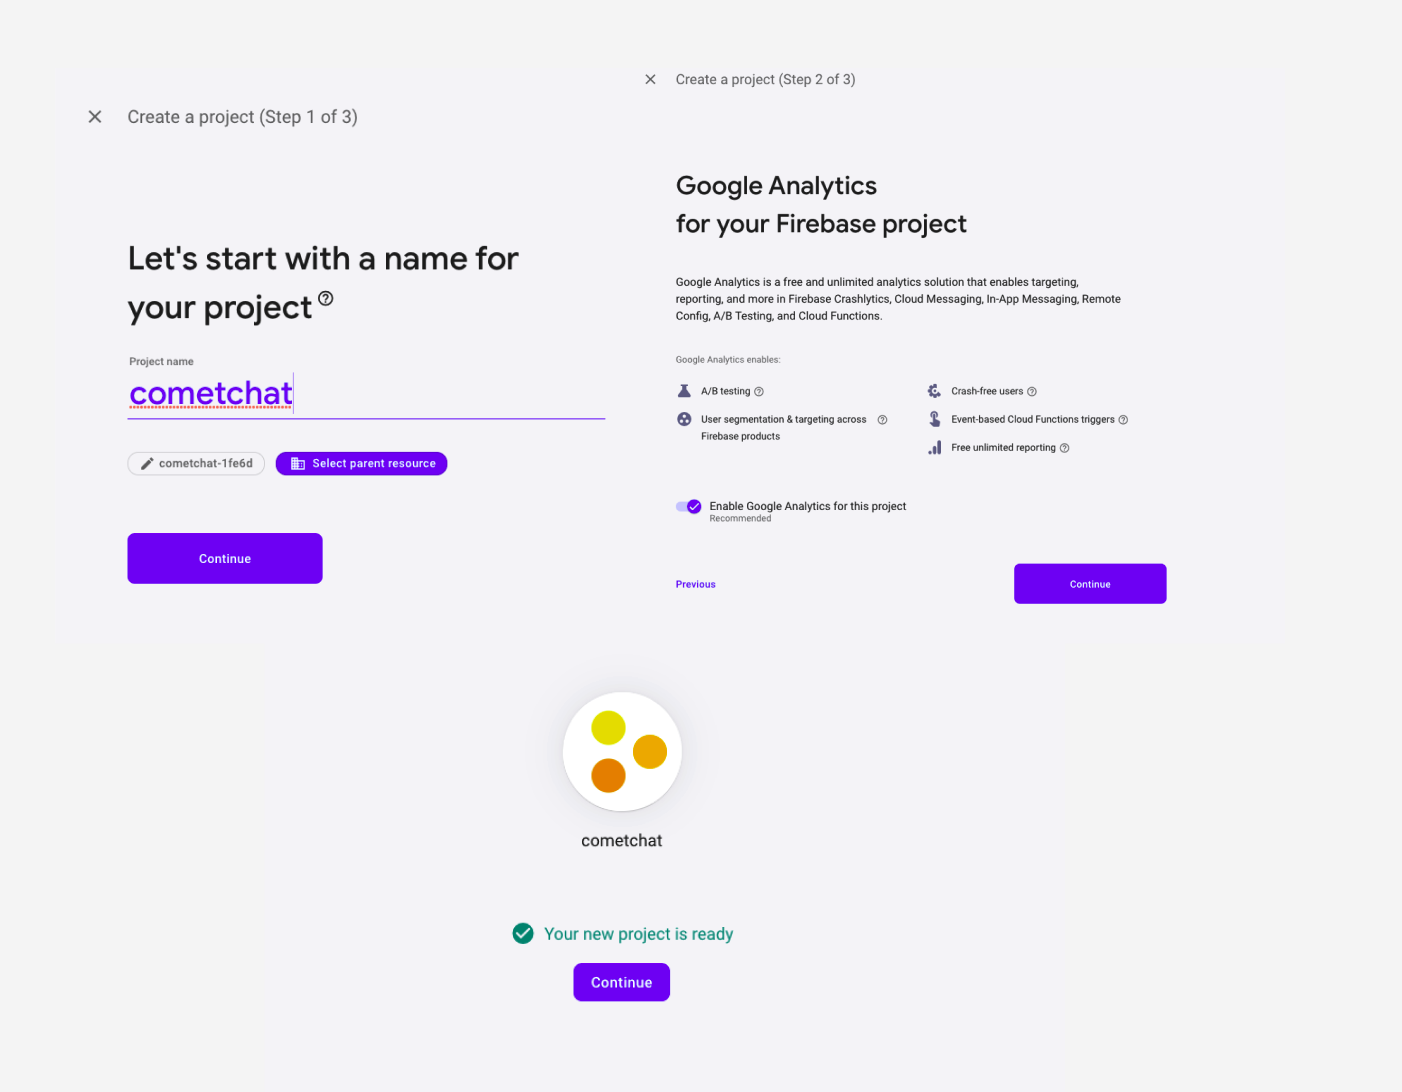
You'll need to give your project a name, decide on whether you'd like to activate analytics, and associate it with an account. You'll be able to track all our messages through CometChat, so it's not necessary to add another analytics layer here.
Once completed, Firebase will set everything up and let you know when it's ready:
Because a Firebase project can have multiple applications, you need to create a new app by clicking the web button highlighted here:
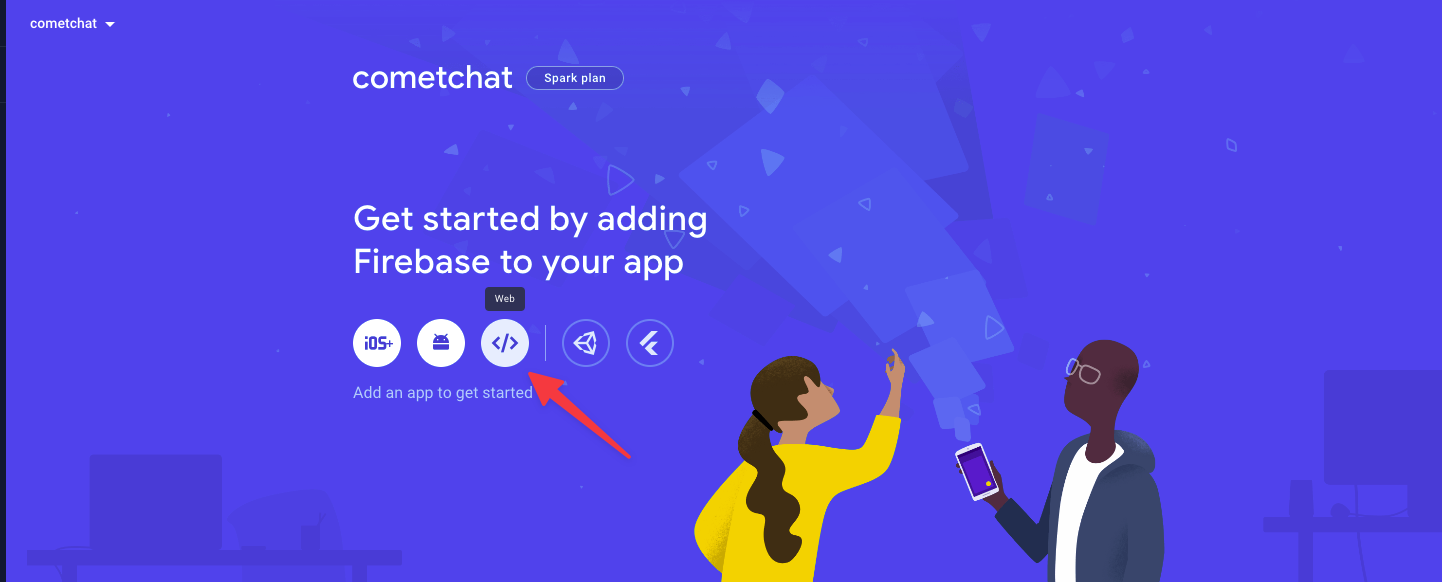
You can name your app and register it on the next screen. In this tutorial, you'll only be using the cloud messaging solution, so when the registration screen offers hosting, say no. Once registered, select Continue, and you'll be taken back to the dashboard.
Gather Necessary Information
In order to configure push notifications, you need to gather two pieces of information: the FCM server key and the Firebase configuration code.
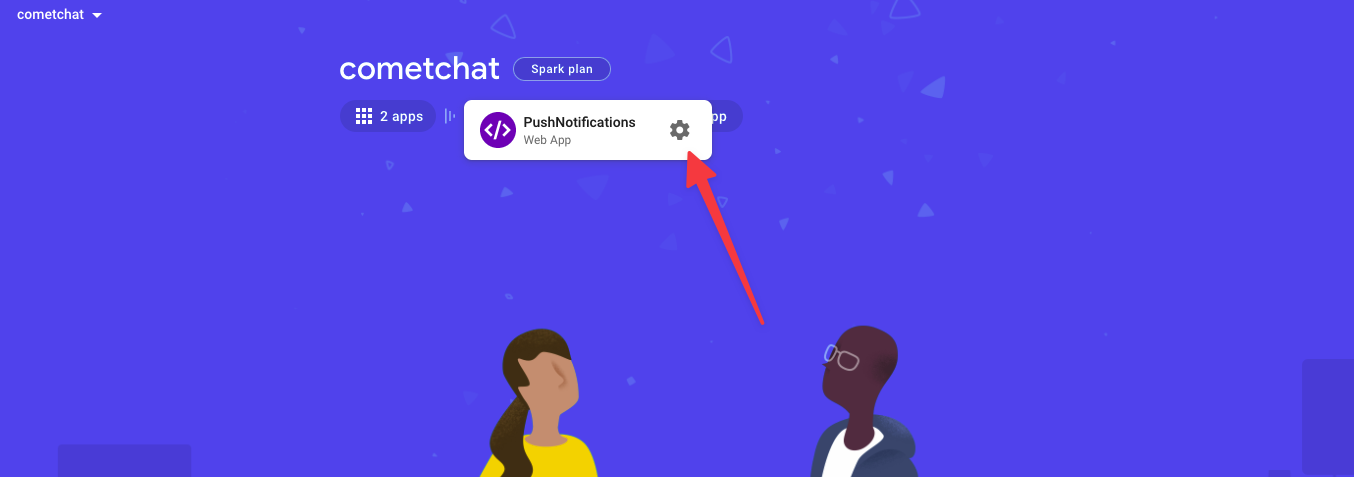
To obtain your server key, click the settings cog highlighted on the following picture on the Firebase dashboard:
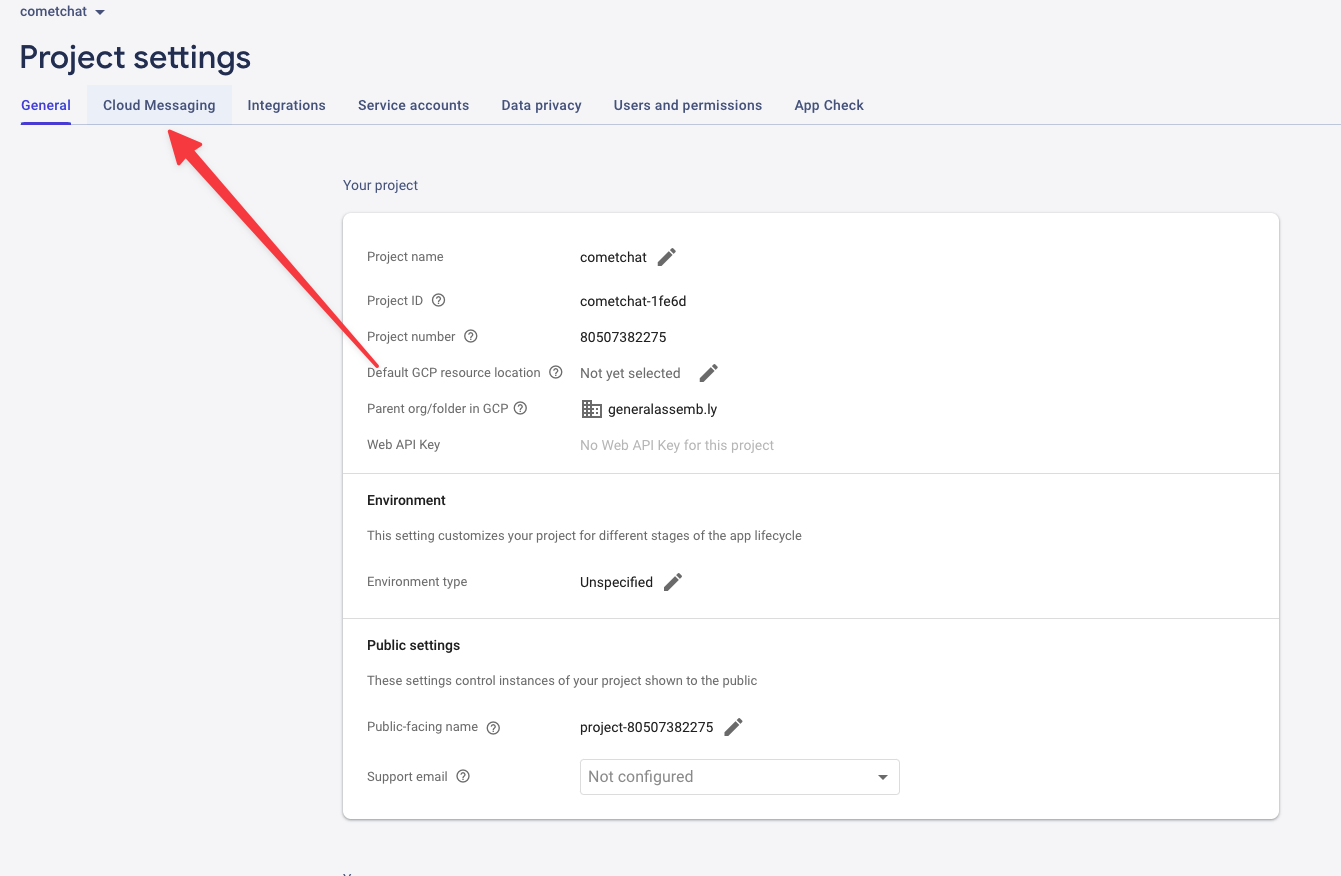
Then select Cloud Messaging at the top left of your screen:
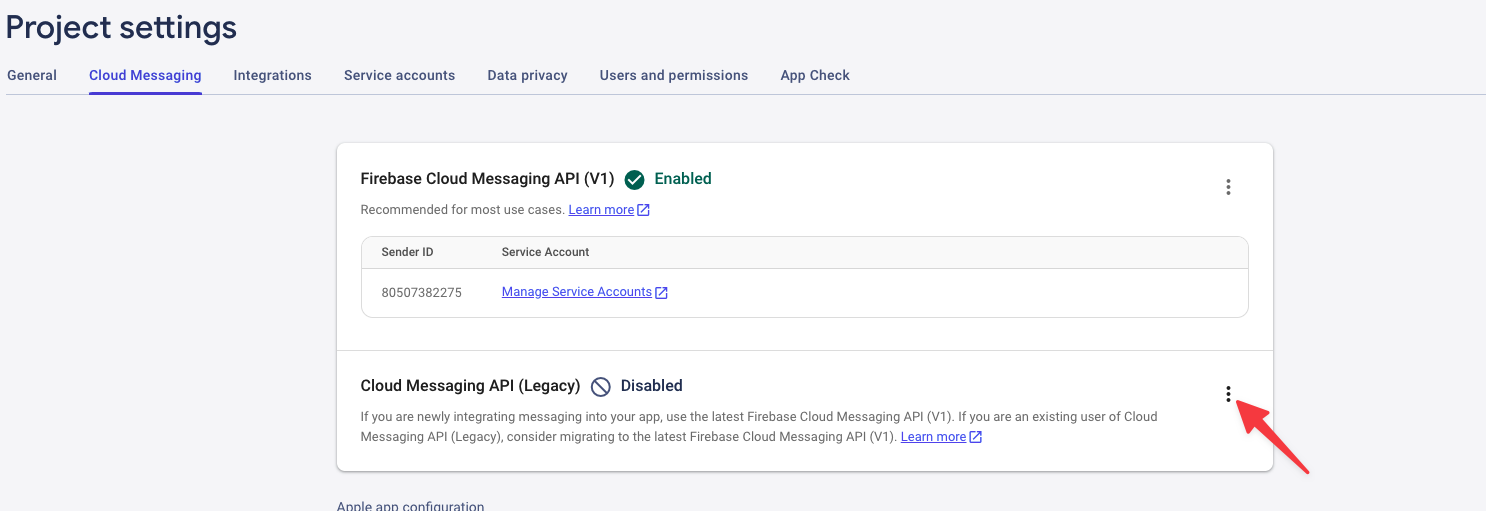
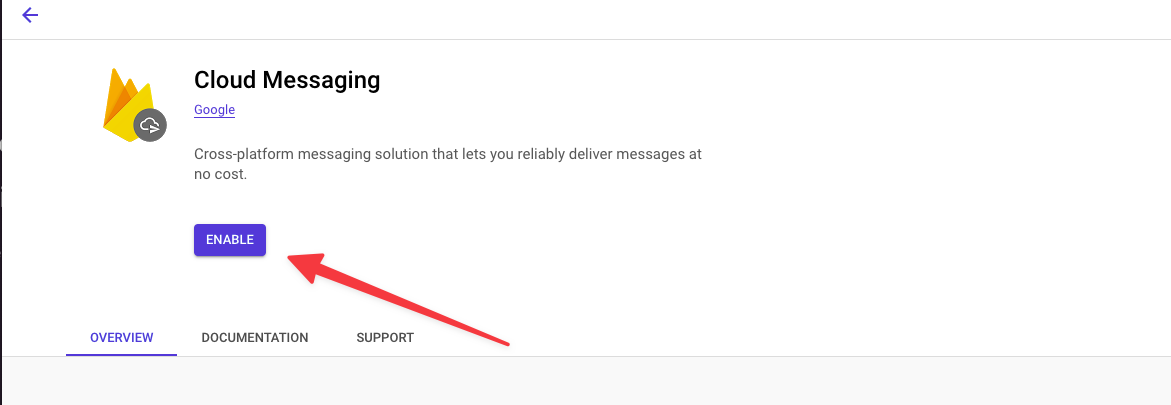
The CometChat UI kit uses the Cloud Messaging API, which Google has marked as legacy. This is still fully functional and does everything you need it to, but needs to be enabled. Click the three dots to the right of the panel (as shown subsequently), and you'll be taken to the Google Cloud Console:
Click ENABLE to enable the API:
Refresh your Firebase project settings page, and you should see a server key:
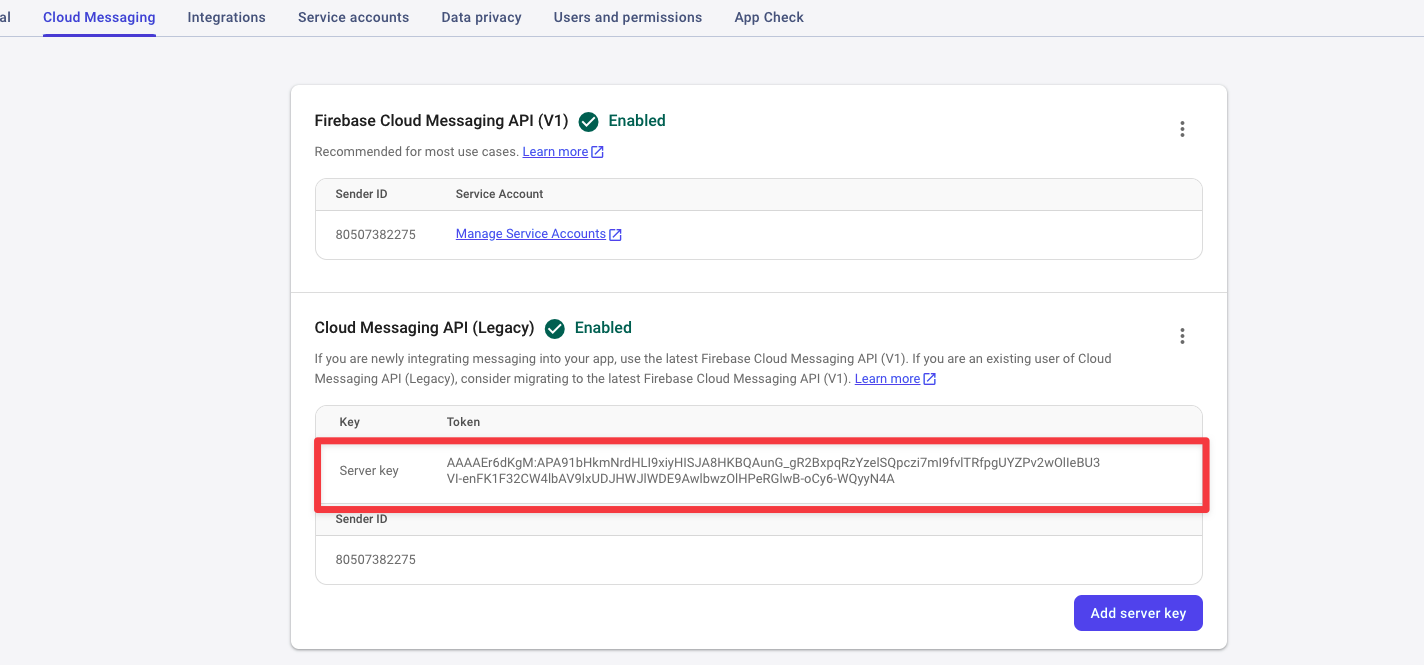
This key lets CometChat use your Firebase instance and eliminate any possible push notification costs.
Now that you have your server key, you need to obtain the configuration object. Head over to the General tab under the Project settings tab, as shown here:

Scroll down to the SDK setup and configuration near the bottom of the code. Here, you'll see the firebaseConfig object being defined:

Copy that, and you’ll have all the information you need from your Firebase console.
Please note: You should keep all these details private. The accounts used in this tutorial have been deleted prior to publication, which is why it's safe to share that information here.
Set Up CometChat
Now, it's time to head over to CometChat and sign up for an account. If this is your first time using CometChat, you'll be greeted with the Add New App modal as soon as you log in. Give your application a name and select the region closest to your users. Here's what the setup will look like:
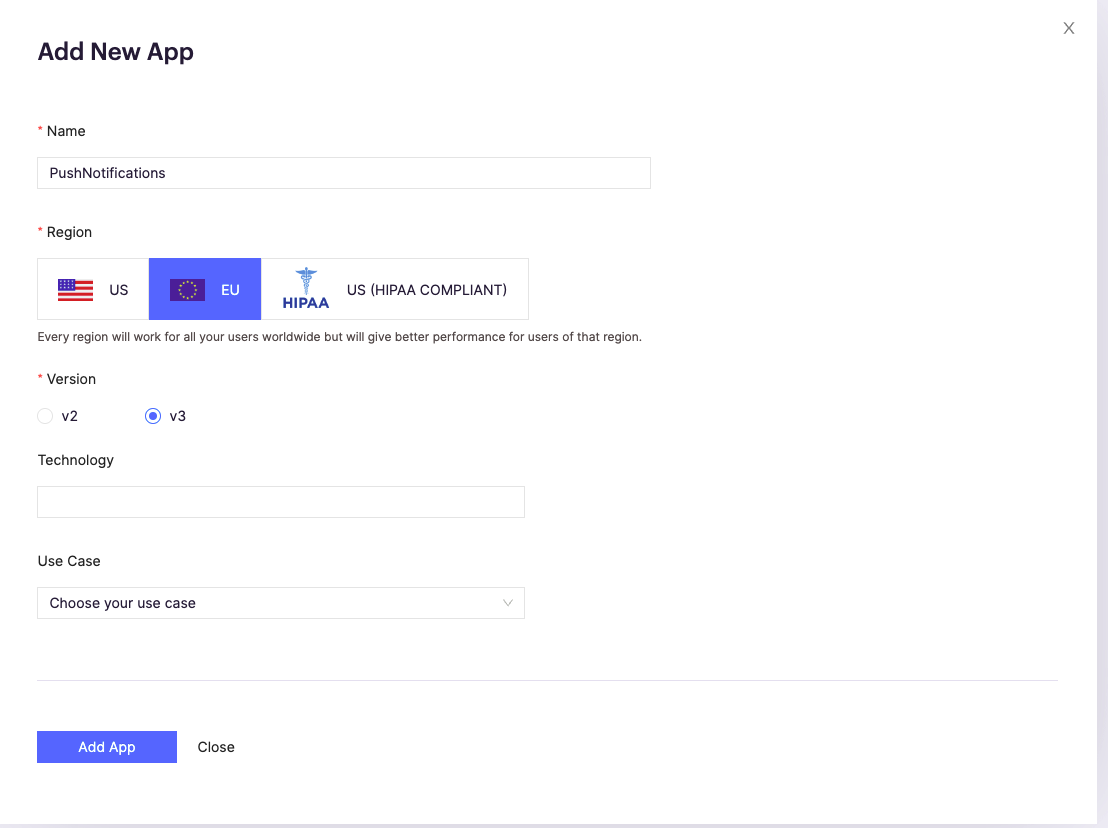
Currently, there are two versions of the CometChat API. Version 2 is gradually being phased out, so it's best to choose version 3 for your application.
CometChat will create your application and take you back to the landing page. You can use CometChat to enhance your application in many ways, such as adding live chat or collaborative whiteboards. In this tutorial, you'll be focusing on push notifications; however, there is additional documentation available for other use cases.
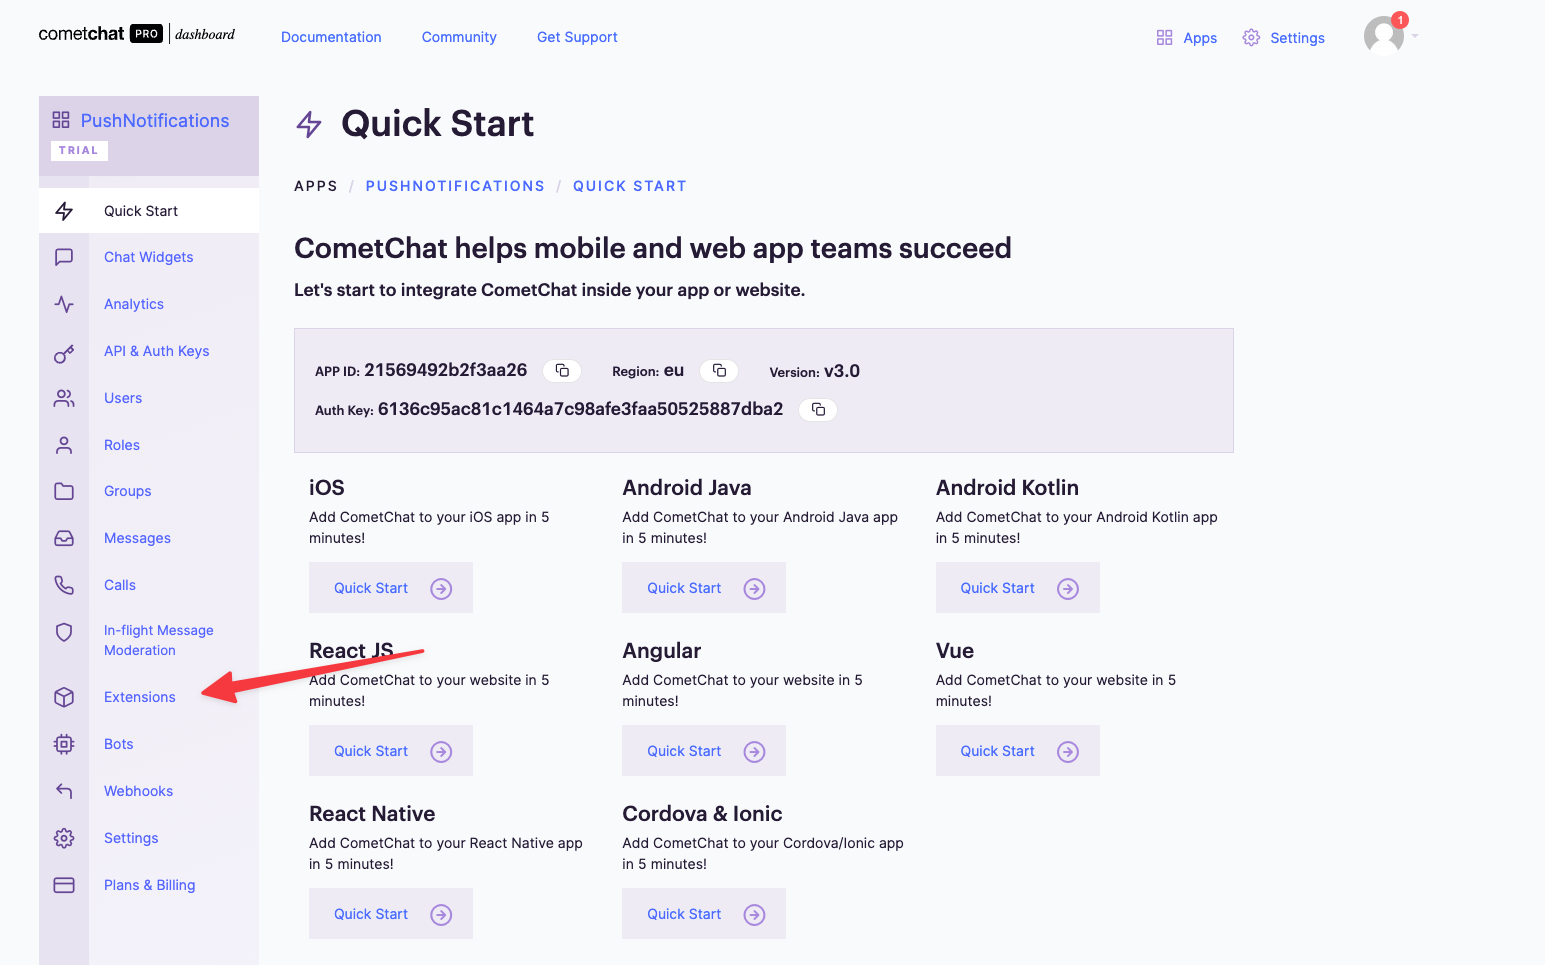
In the CometChat dashboard, you need to enable the push notification Extensions. This extension will manage the communication between CometChat and FCM. To do this, click the Extensions tab in the left-hand navigation:
Scroll down to Push Notification and toggle the switch highlighted in the following image to enable it:
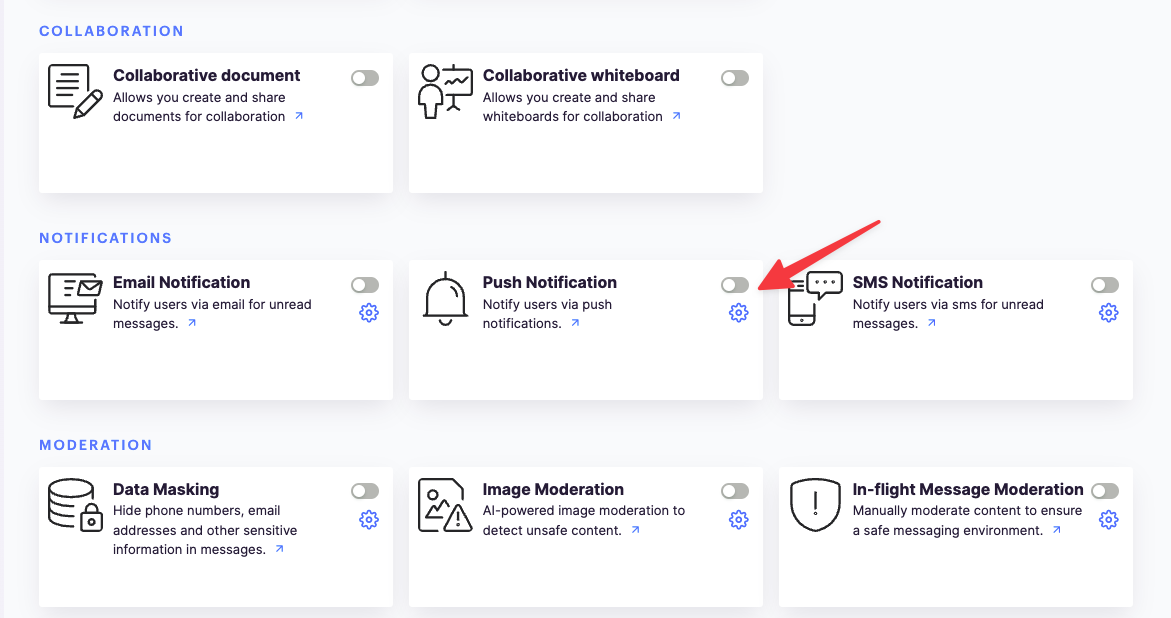
Click on the cog below the toggle to pull up the settings; then scroll down to find the text area for the FCM Server key and paste the key you saved earlier:
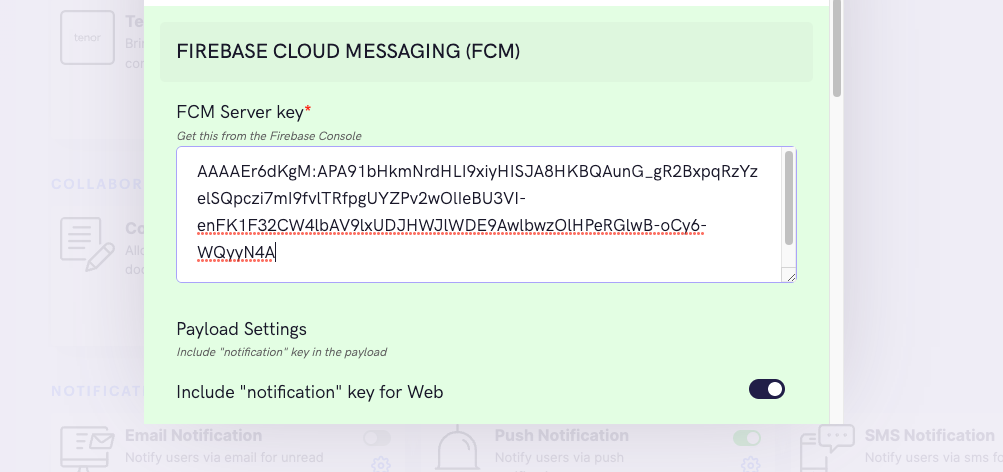
You can leave the rest of the settings for now, but feel free to explore them later. Scroll to the bottom of the modal and save your changes.
Now that you're done with the configuration, you can focus on writing code. You need all the details from this app during the next section, so make sure to keep this page open.
Integrate Your Application
In this section, you'll add push notifications to a plain HTML site, meaning you can focus on implementing push notifications without distractions. You could adapt this for any framework or library you're using with minimal changes.
In the <head> of your index.html, you need to import the relevant Firebase libraries and initialize your application. This will allow your website to interact with Firebase and pick up any messages that might be waiting for your user:
The CometChat.js file will import CometChat's UI kit:
This will allow your application to listen to events and be able to display notifications as they happen.
To display notifications when your user is not on the site, you need to add a service worker.
In the code above, you're checking if you can register a service worker and doing so when the window finishes loading. You'll notice this references another file that you'll create in a few moments named firebase-messaging-sw.js.
The final addition to the <head> of your HTML is the JavaScript for registering the client and the service worker. It's good practice to encapsulate this code in a separate file:
Create the Service Worker
Once registered, the service worker is going to listen for updates while your users are not on the site. This small file will run when the browser is open and will be responsible for triggering a notification when one is received.
Create a new file for your service worker named firebase-messaging-sw.js (the same name you registered previously).
This code will run separately from the main JavaScript thread as well as the DOM itself. You need to import your Firebase libraries as part of this script and reinitialize the application:
Once the service worker has initialized the application, you need to have Firebase listen for messages:
With that, your service worker is complete. This code will run in the background while the browser is open and display any notifications that are received.
Create the Client Code
The last file to create is the JavaScript file for the client application. Here, it's referred to as PushNotification.js.
There are three pieces of configuration you need from the CometChat dashboard. You can find them in the CometChat dashboard and add them to the top of our client code as shown here:
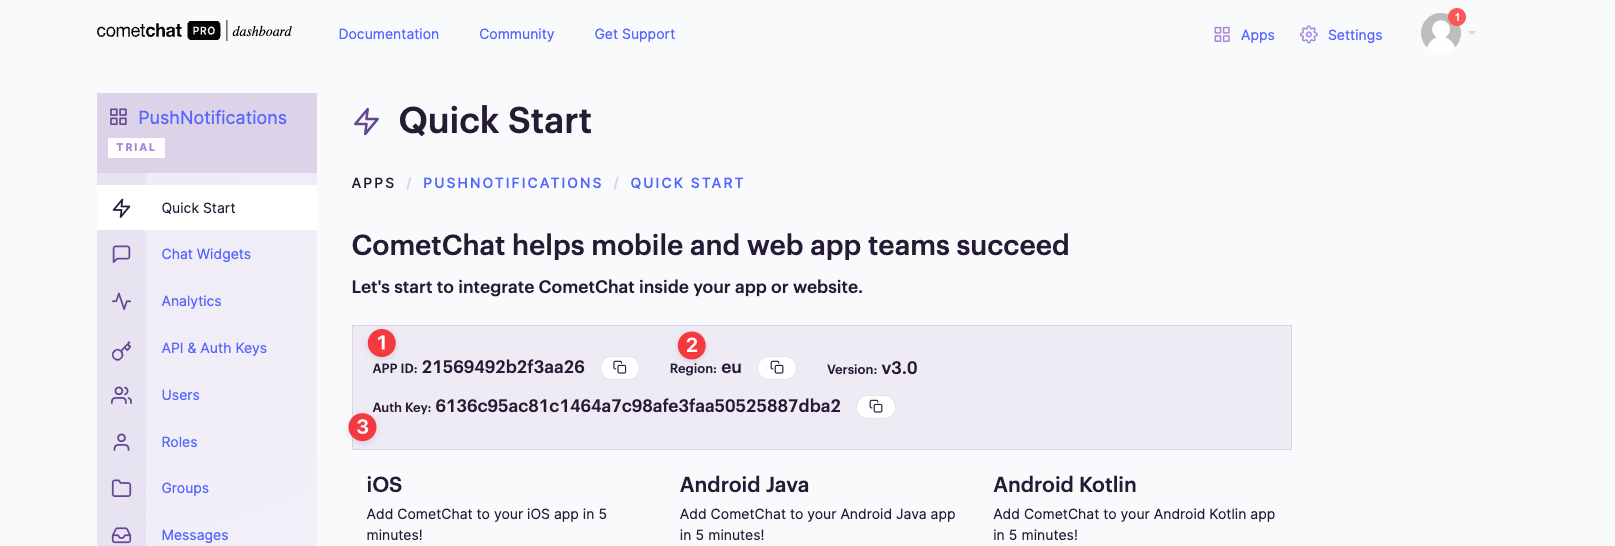
Add the global variables that you'll use throughout this code. Creating them on this level allows them to be updated and accessed by all the functions in this file:
In this tutorial, you're tying the logic of logging in and out to some HTML elements:
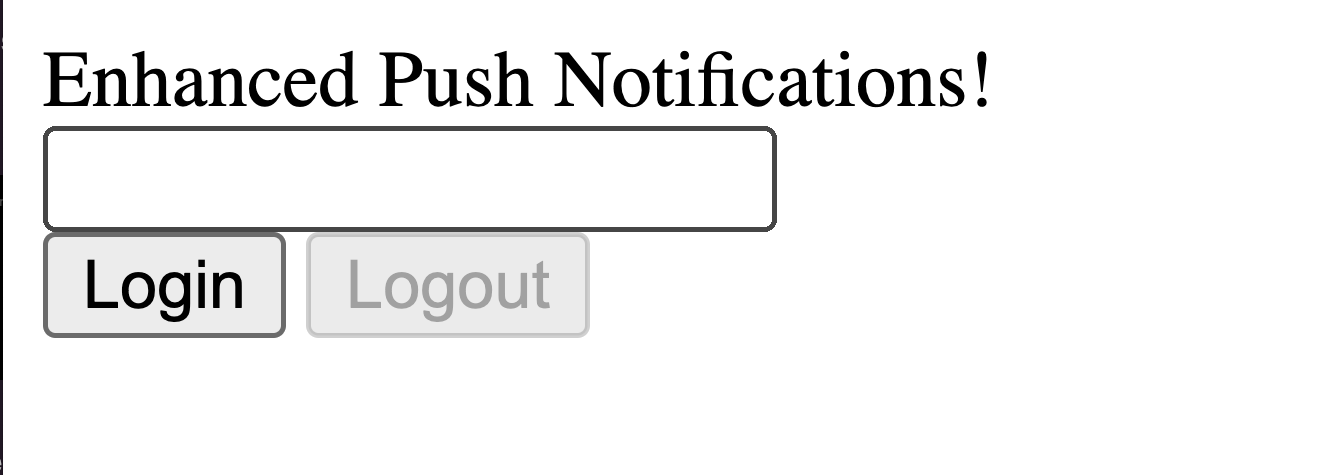
If you are using React or Vue, you may want to abstract this into a hook or a composable. You can also create and store a unique identifier rather than have a user provide a name. In either scenario, the flow of the code will be similar, with the try…catch being almost identical:
In the code above, you're connecting CometChat to the user through Firebase. The UID from the DOM and the AUTH_KEY from the constants are used for logging in the user to CometChat. At this point, Firebase messaging is activated and requests the token needed to talk to this user. Finally, the token is shared with CometChat, so it can target this particular user through Firebase.
If the user wants to stop receiving messages, you can provide logout capabilities as well, as seen here:
Test Your Notifications
When you create a CometChat application, some test users are provided for you:
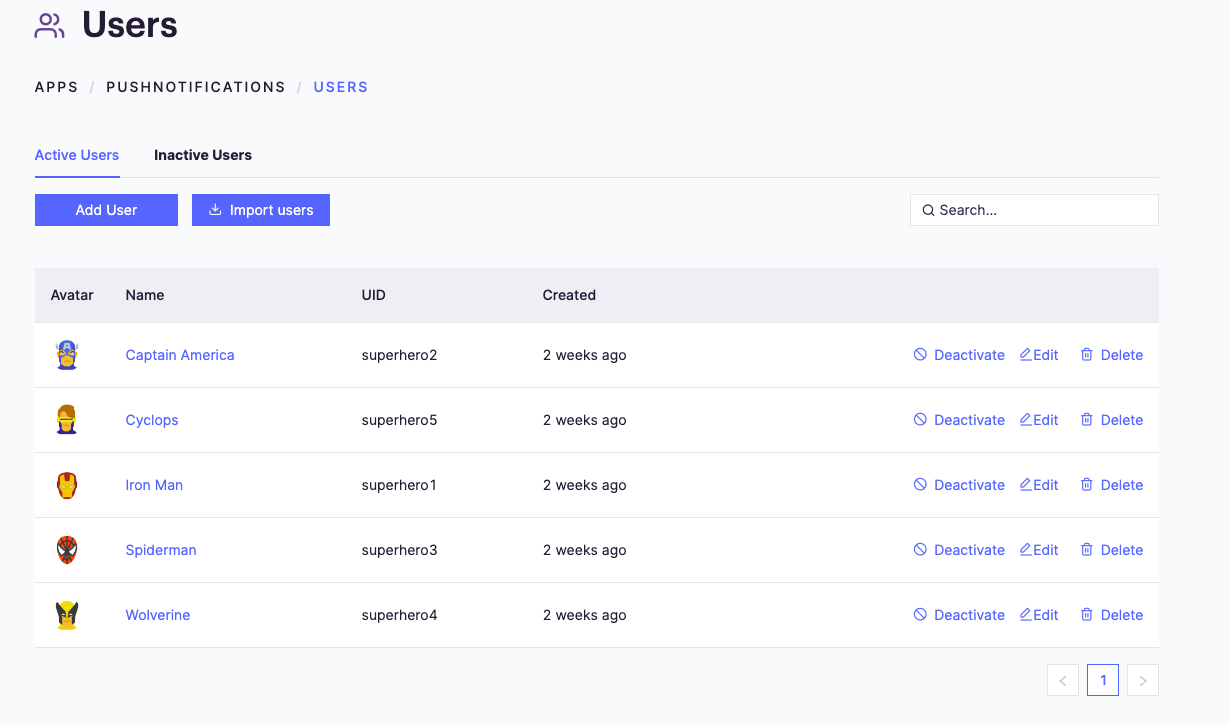
In this example, the username "superhero1" has been used for logging in, but any other account could be used:
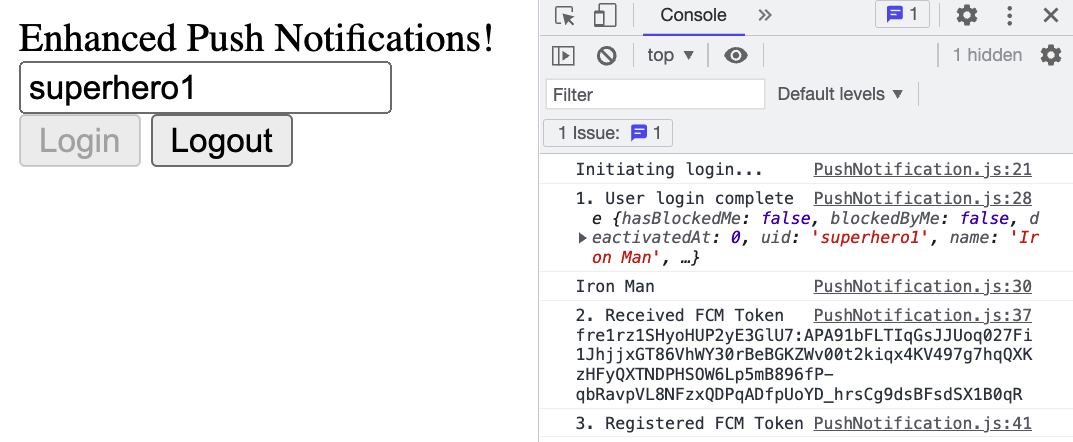
Your application is now ready to receive push notifications. You can test this by navigating away from this tab (but make sure it's still in the background) and sending a POST request to CometChat to tell it to create a new message. There are lots of tools available for this, like Postman, Insomnia, or curl on the command line.
You need to construct the URL, add the headers, and then create the body of your message.
The URL
The URL follows the following pattern: https://appId.api-region.cometchat.io/v3/messages. In this instance, using the details from the CometChat dashboard, this becomes https://21569492b2f3aa26.api-eu.cometchat.io/v3/users.
The Headers
There are three headers that you need to add to your request. The first two are universal, Content-Type and Accept, and both need to be set to application/json. The third header is the apiKey, which you need to get from the CometChat dashboard.
Select API & Auth Keys on the left-hand navigation, click on Rest API Keys, and copy the REST API key:
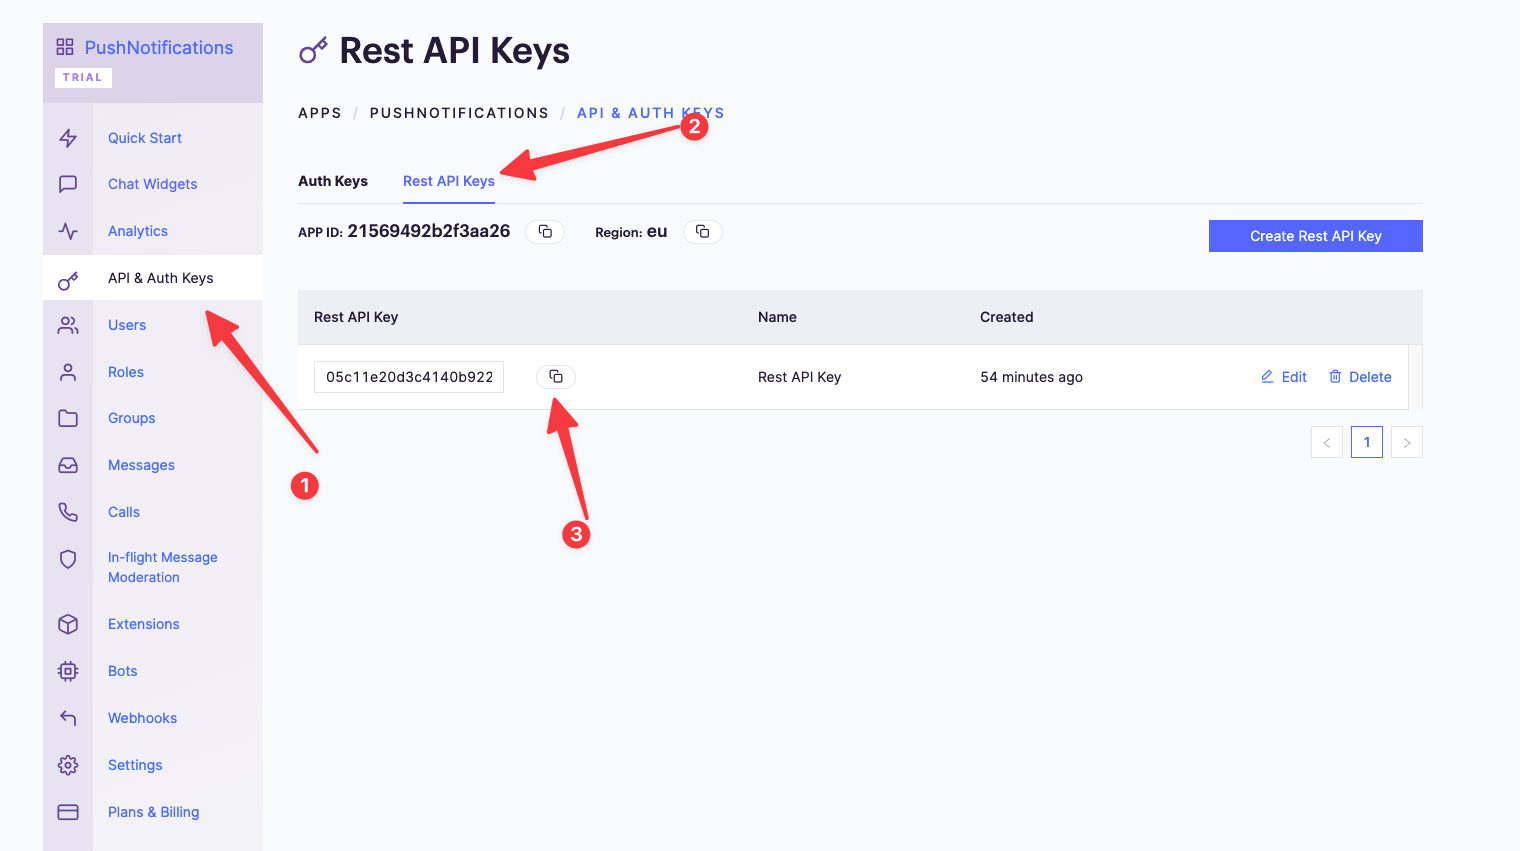
Your completed headers should look like this:

The last thing you need is the payload, this is the actual message you will send.
The JSON Body
In the JSON body, you can set the category and type of your message, as well as who to send it to. Most importantly, you have the actual message content. Browsers vary on character limit here, so stick with a short message:
Send the request with your API tool, and you should see the notification pop up.
Conclusion
In this tutorial, you learned how to easily send push notifications using CometChat and Google Firebase. You created and registered a service worker and sent messages from your API client.
Adding push notifications to your website or app is easier than ever with CometChat -- we already did most of the work for you! Try CometChat today and see how quickly you can get a fully featured in-app messaging experience up and running.

Kevin Cunningham
CometChat