This tutorial is outdated. We're currently working on an updated version. In the meantime, for instructions on building a chat app using CometChat, please visit our documentation.
Rocket.Chat is an open source team communication platform. In this tutorial, we'll show you the steps required to install a Rocket.Chat instance on Ubuntu and secure it with a free TLS/SSL certificate supplied by Let’s Encrypt. Then, we'll show you how to log into your Rocket.Chat server’s web interface and register your instance with Cloud.Rocket.Chat to enable all of its functionality.
Note: CometChat is an alternative you might consider to Rocket.Chat. According to a Q2 comparison between CometChat and Rocket.Chat, "reviewers found CometChat easier to use, set up and administer." See the full product comparison on the G2 site.

Prerequisites
Before you begin the steps shown below, you should have the following:
A basic familiarity with using the Linux command line. You should be able to move around the file system and manage services with systemd.
An Ubuntu 20.04 server with a non-root, sudo enabled user.
A domain name that resolves to the public IP address of your server that you will use for your Rocket.Chat server.
Log into your server as the sudo enabled non-root user to begin the steps below.
Installing Rocket.Chat
The recommended method to install a Rocket.Chat server is as an Ubuntu Snap package. This method ensures that all of the Rocket.Chat server package dependencies are installed along with their configuration making for a very straightforward installation process.
First, ensure your local snap package server is up-to-date:
sudo snap install core
sudo snap refresh core
Next, install the Rocket.Chat server snap from the official snap repository:
sudo snap install rocketchat-server
Your Rocket.Chat is now installed and running! Snap packages make it that simple.
While it is possible to log in and manage your Rocket.Chat server now doing so is not advised because there is no SSL/TLS certificate protecting you. You will install this in the next step.
Registering an SSL/TLS certificate
SSL/TLS certificates are what allows websites and other digital communication applications to encrypt and authenticate that data that they transmit across the internet. Any website you visit that uses HTTPS employs SSL/TLS certificates to protect your data.
We will do the same for your Rocket.Chat server protecting you and your users' chat messages.
The Rocket.Chat developers have included the tools to register and install an SSL/TLS certificate when you installed the Rocket.Chat server.
The following commands will register, install and enable the SSL/TLS certificate:
sudo snap set rocketchat-server caddy-url=https://<YOUR_DOMAIN>
sudo snap set rocketchat-server caddy=enable
sudo snap set rocketchat-server https=enable
sudo snap run rocketchat-server.initcaddy
All you need to do now is to restart the Rocket.Chat and process the Caddy webserver to load the certificate and the new configuration:
sudo systemctl restart snap.rocketchat-server.rocketchat-server.service
sudo systemctl restart snap.rocketchat-server.rocketchat-caddy.service
Your Rocket.Chat server is now installed and available at https://<YOUR_DOMAIN>.
Open this address in your browser to start the web installer.
Configuring the web installer
The first time you browser to your Rocket.Chat domain, you will begin the web installer process. You will need to complete the following pages before you can log into and start using your Rocket.Chat server.
Step 1 - Admin Info

This page is where you configure the first user who will also be an administrator. The fields shown above have been populated with an invented person as an example.
Step 2 - Organization Info
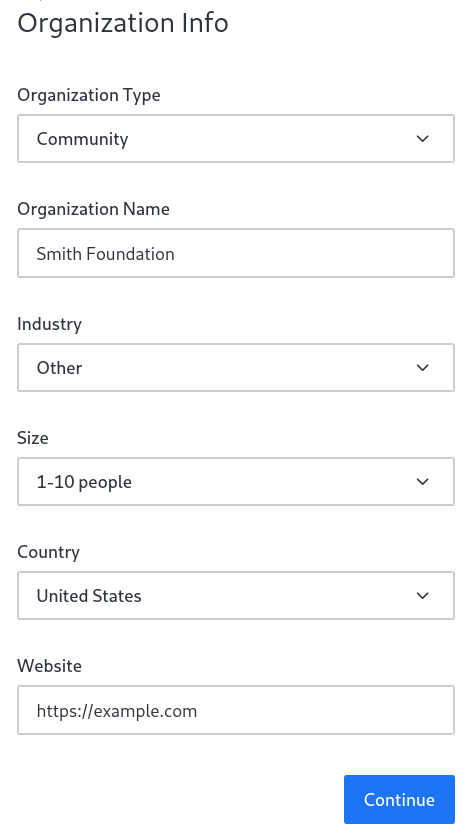
In this step you need to supply your organization’s details for Rocket.Chat.
Step 3 - Server Info
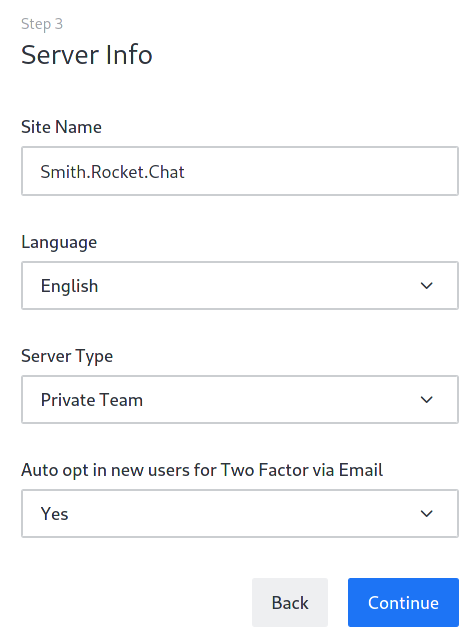
Here you define some of your Rocket.Chat server settings:
Site name - This is not the domain name for your server but a descriptive name that your users will recognize when they log in.
Server Type - Select either Private Team or Public Community to match your use profile.
Auto opt in new users for Two Factor via Email - If you enable this then new users will not be able to use your Rocket.Chat server until they confirm their email address. Enabling this is recommended.
Step 4 - Register Server
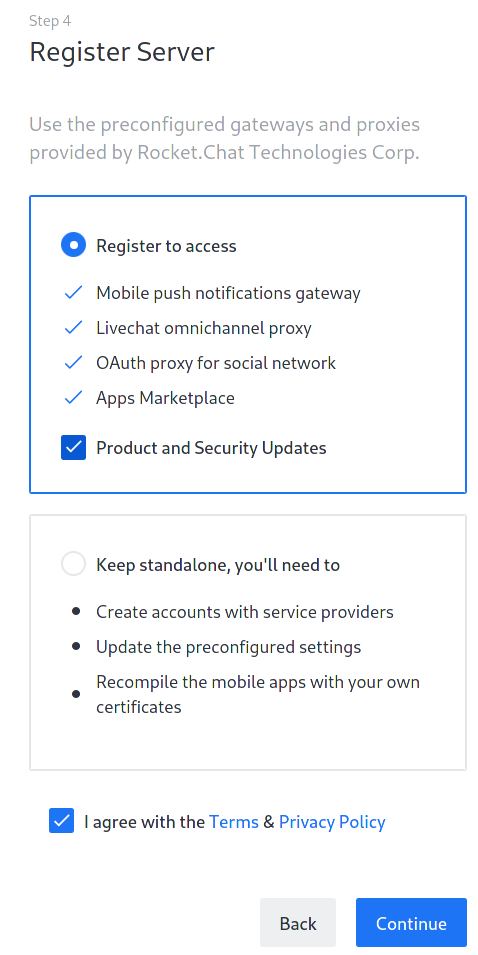
Here you choose to register your server with the Rocket.Chat company. This brings the many benefits that are shown in the screen capture and is the recommended setting.
You must check I agree with the Terms & Privacy Policy to proceed.
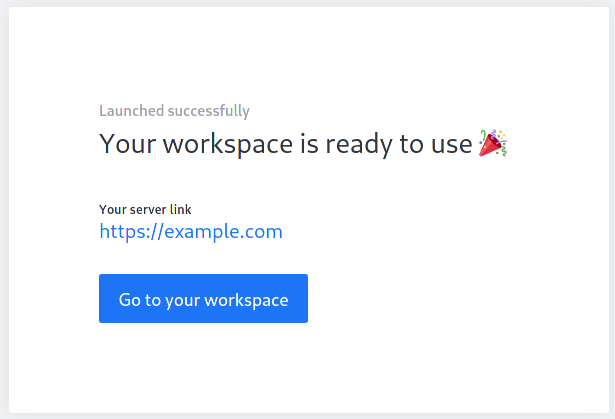
Your Rocket.Chat server is now ready to log into and start using. Click Go to your workspace and navigate to the login page and sign in.
Register your Rocket.Chat server
If you selected to register your server in Step 4 of the web installer, you must create an account with Rocket.Chat and link it to your server to register it.
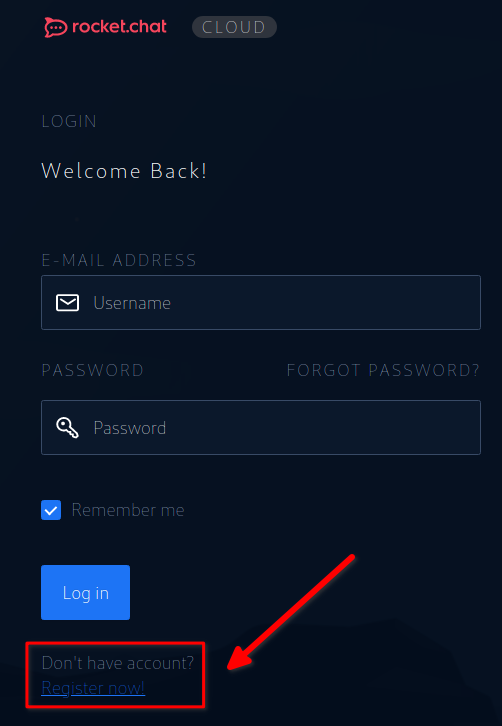
Create your Rocket.Chat account by browsing to https://cloud.rocket.chat/ and clicking on the Register Now! link shown here:
Fill in the usual account information on the page that follows, then click Register to create an account. Before you can log in, you will be asked to confirm your email address to verify your Cloud.Rocket.Chat account:
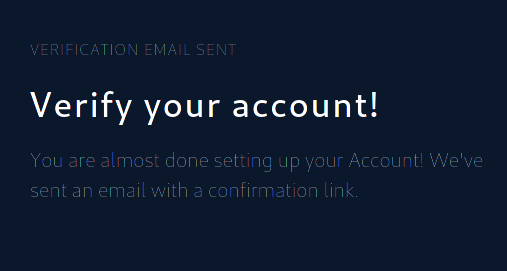
You will receive an email with a confirmation link:
Click on the link to verify your email address and log into your new cloud.rocket.chat account console.

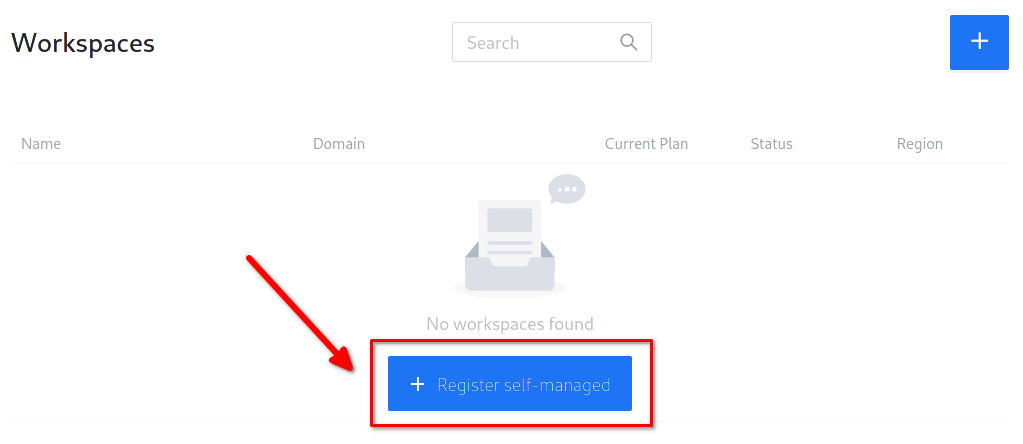
After you log in, click the Register self-managed button in the middle of the control panel home page:
When you click this button a window will pop up that requires you to select if your Rocket.Chat server is connected to the internet or not:
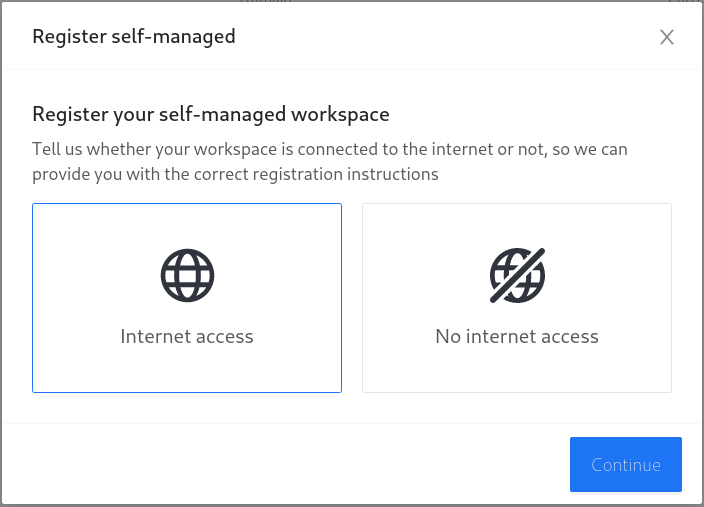
Choose the appropriate option and click Continue.
You will now be given a registration code that looks like the following:

Copy this code by clicking on it and then return to your Rocket.Chat web interface.
You need to enter this code in the Administration control panel. Open the administration control panel by doing the following:

Click on the three dots.
Click on Administration
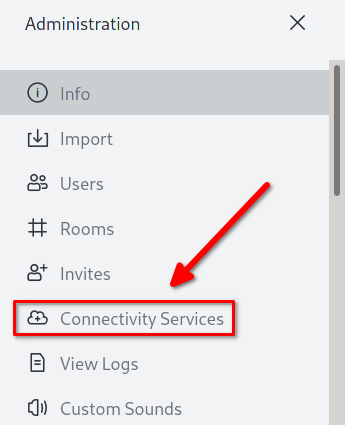
Next, click on Connectivity Services in the left hand navigation menu of the Administration control panel:
Enter the registration code you copied from https://cloud.rocket.chat into the Token field on the page that follows:
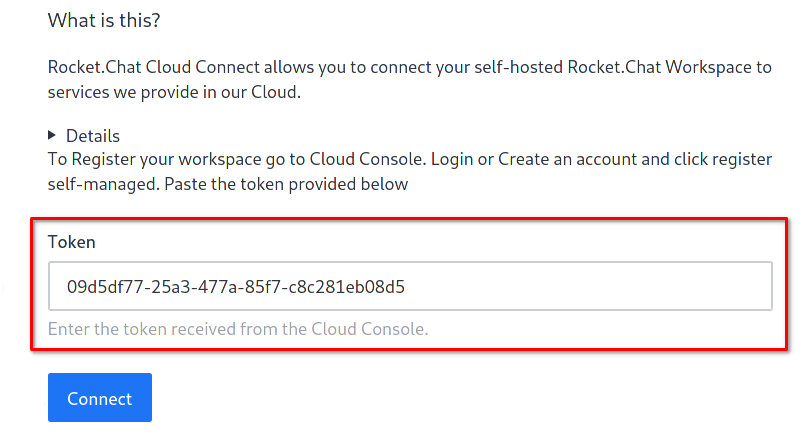
Finally, click Connect to complete the registration.
You will see a green Sync Complete banner in the top right of the page when you successfully register your Rocket.Chat server:

Your Rocket.Chat server is now registered and ready to start adding users.
Adding a user
New users are added to your Rocket.Chat server from the Administration control panel. First, click on Users in the left hand navigation panel:
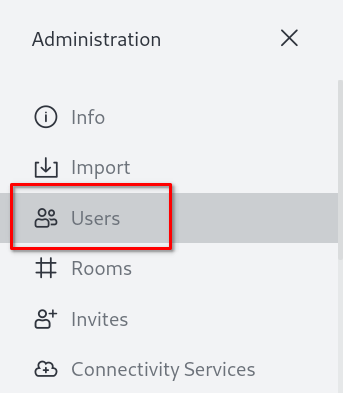
This will take you to a page that lists all the users of your Rocket.Chat server. Add a new user by clicking on the + New at the top right of the page:

This will bring up the new user registration panel. Fill in the details to match your new user, then click Save to complete the registration.
Conclusion
We've just walked you through the steps to install, configure and register a Rocket.Chat instance on your own server. We also suggest you check out CometChat, which is widely considered to be an easier to use alternative that can be up in running in 30 minutes or less. Get a free 30-day CometChat trial, and see for yourself the most developer-friendly in-app messaging solution.
About Author
Elliot Cooper has worked as a Linux systems administrator and open source technical content creator for over 20 years. He passionately advocates for open source software and an open source attitude to knowledge sharing.

Elliot Cooper
CometChat