This tutorial is outdated. We're currently working on an updated version. In the meantime, for instructions on building a chat app using CometChat, please visit our documentation.
If you’re using the BuddyPress plugin to create a social website, then you may want to enable the chat room feature for your users. Unfortunately, BuddyPress doesn’t have a feature where users can create chat rooms for real time messaging.
In this tutorial, you will learn how to create chat rooms for your BuddyPress powered website. In order to follow along with this tutorial, you need to have CometChat Go installed on your website. You can follow my previous tutorial on installing CometChat Go for WordPress if you haven’t already done so.
Make CometChat exclusive to registered users
First, let’s make sure CometChat will only be available for registered users. Head over to CometChat’s admin panel and go to Settings → Authentication. In this page, you need to change the option “Would you like guests to login as well?” to “No”.
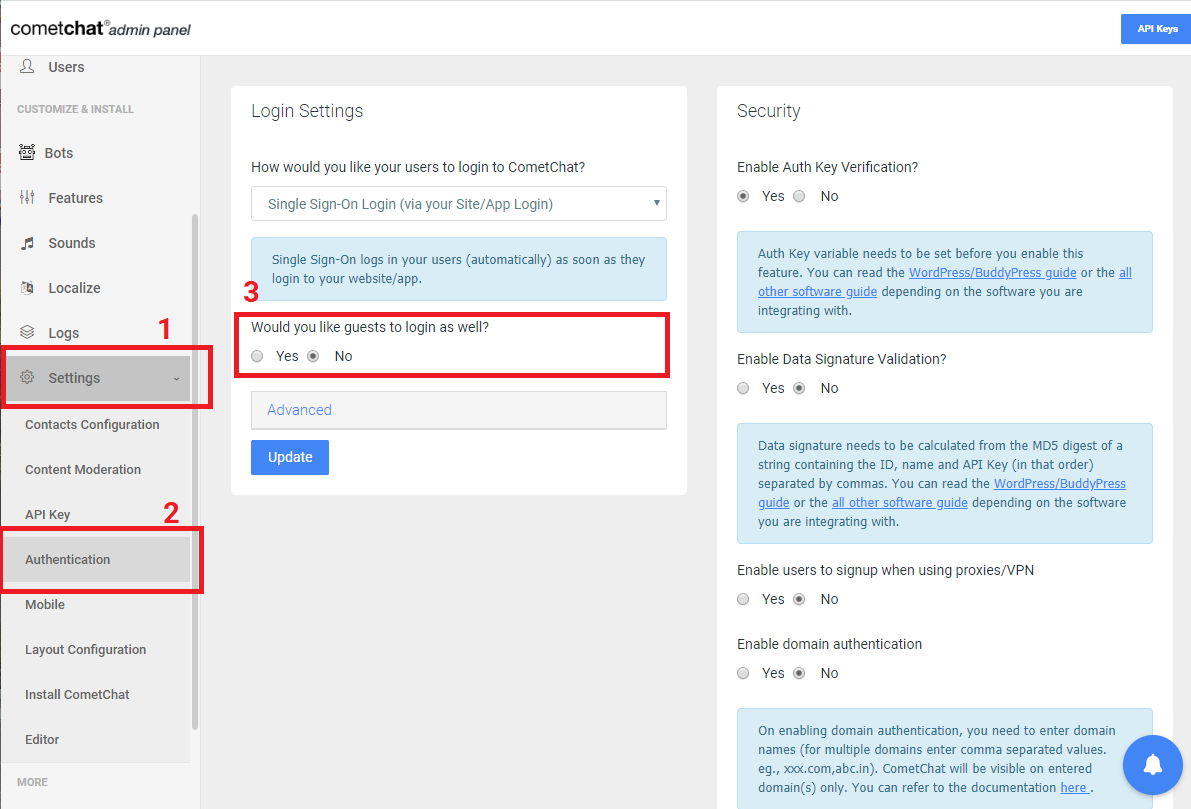
Click the “Update” button to save your changes. Now, head back to your WordPress website and make sure you’re not logged in. You’ll find that CometChat is unavailable in both widget and docked mode:
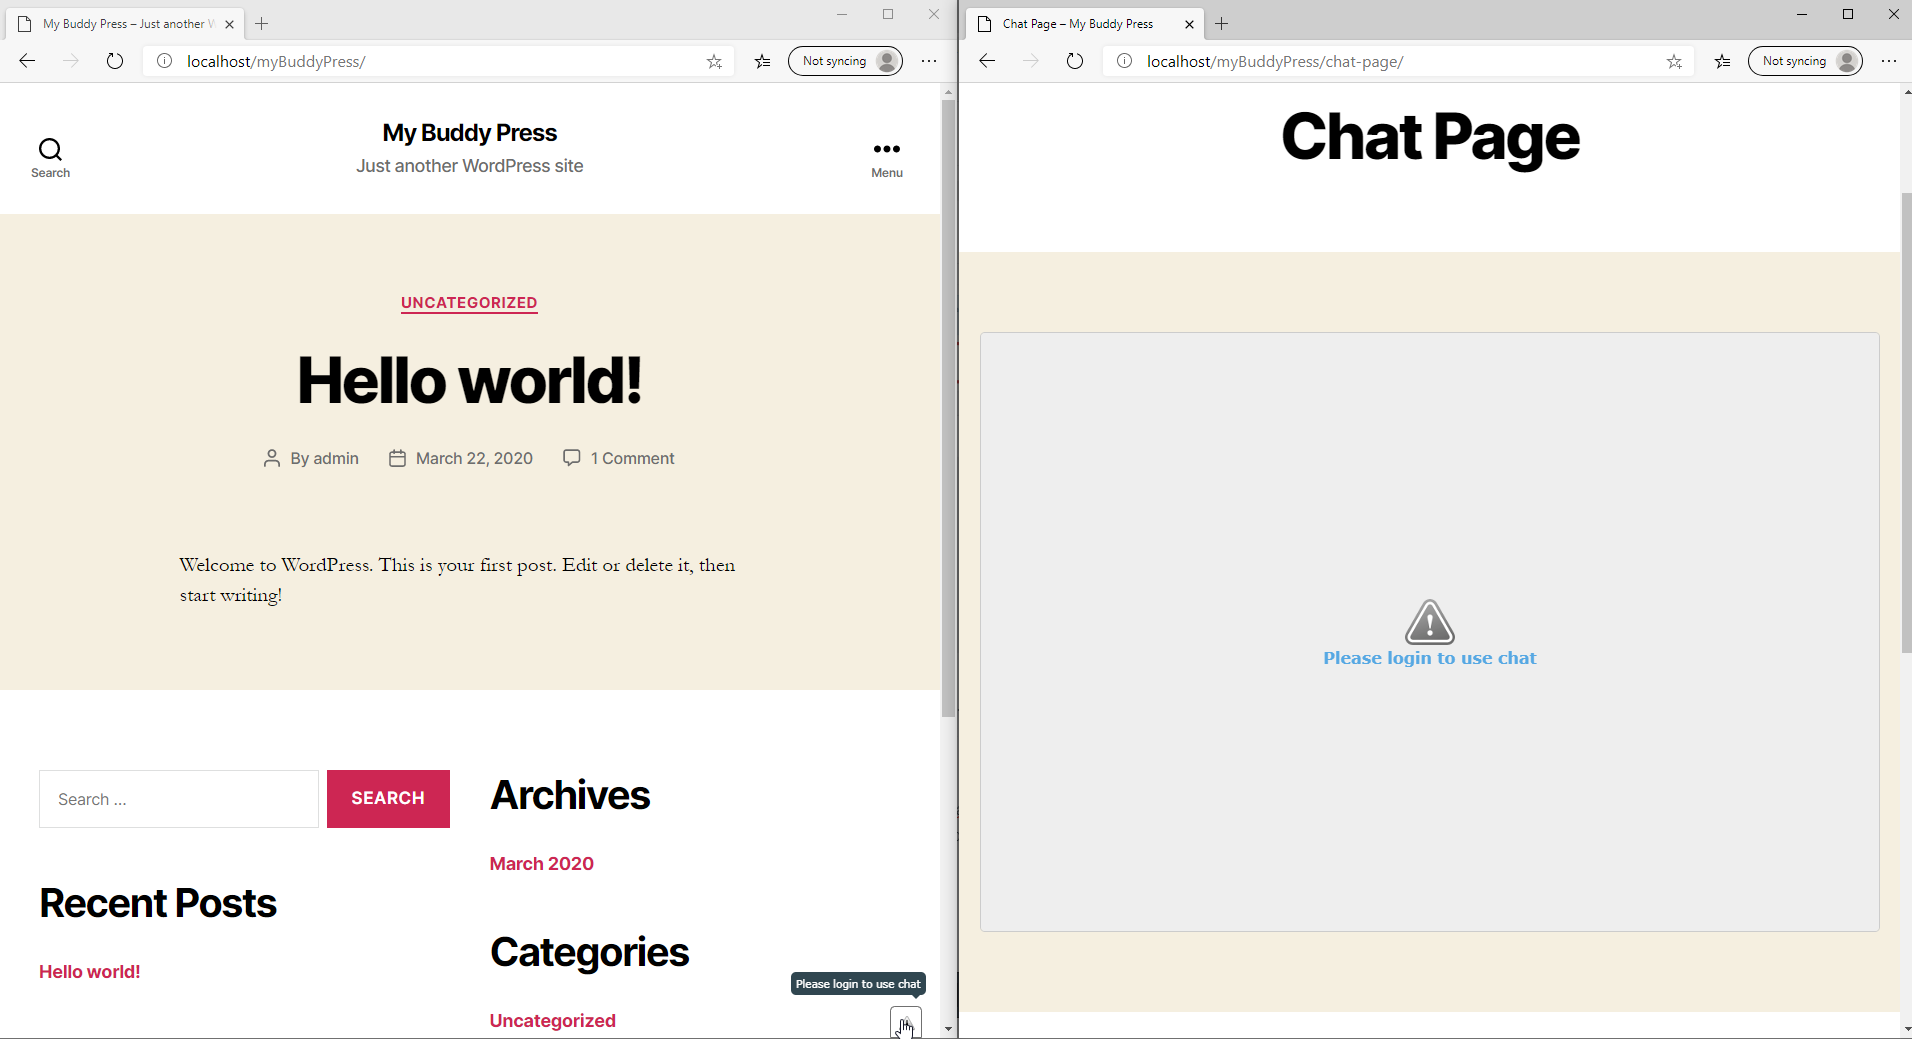
Try to login again, and you’ll see that CometChat is available for you to use. CometChat will detect users from your website automatically as soon as they login. This means you only need to allow visitors to register and login from your website, and they will be able to use CometChat.
Let’s continue configuring the BuddyPress plugin.
Setting up a BuddyPress plugin and enable registrations
I assume you already have BuddyPress installed on your website, but in case you haven’t, you can install it by visiting the BuddyPress website. BuddyPress is a social networking plugin for WordPress sites that you can use to add friends, groups and many more social features to your website.
Once BuddyPress is installed, you can enable member registration by enabling WordPress membership settings. Go to Settings → General and tick the Membership checkbox:
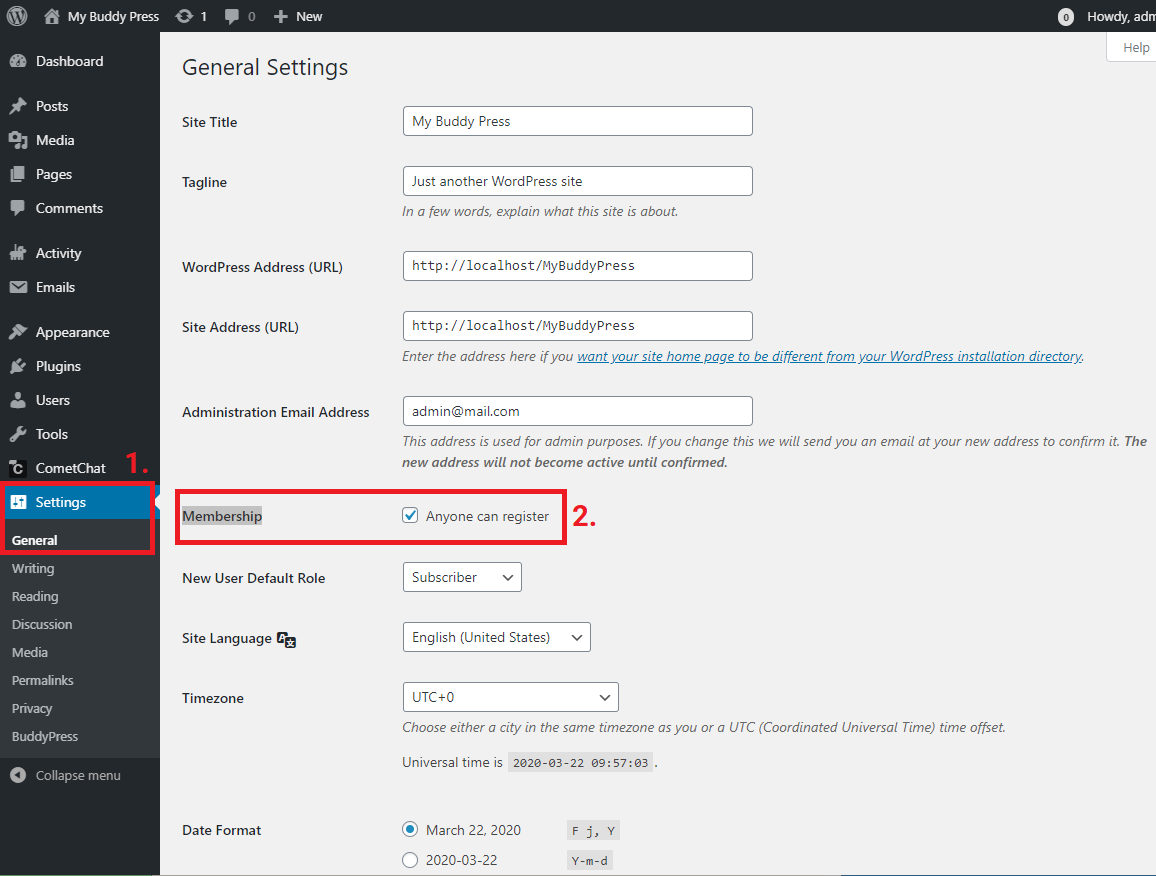
That’s all you need to do to enable user registrations. BuddyPress will automatically detect this setting and generate the user registration page.
By default, BuddyPress also has the email verification method activated, so visitors who register with your site must validate their email by clicking a link that’s emailed to them.
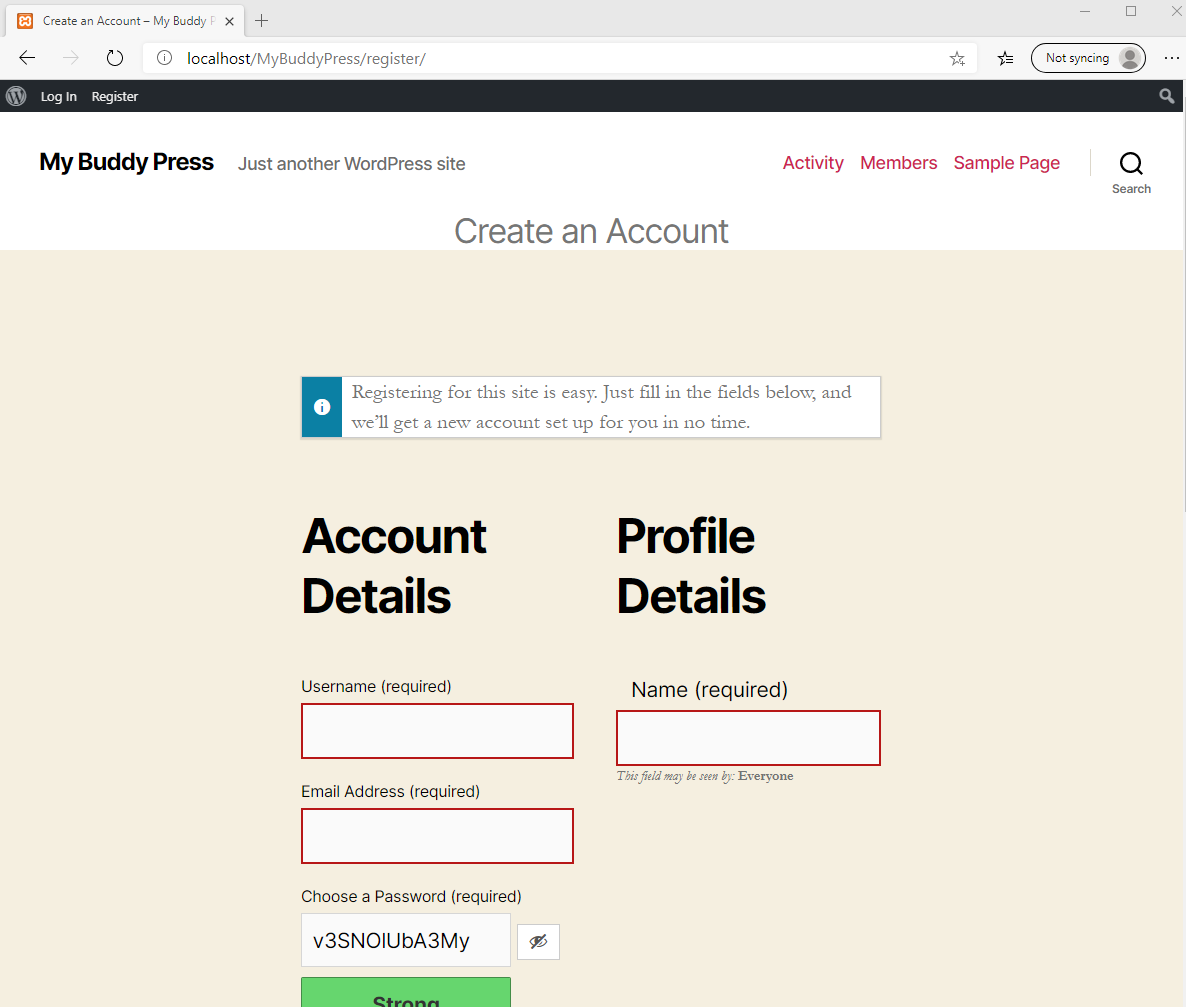
Now your website can accept new member registrations, and they will be able to use CometChat immediately after logging into your site.
CometChat extension for BuddyPress
CometChat allows you to offer an improved user experience by requiring visitors to be friends before they can chat with each other. To enable this feature, go to your WordPress dashboard, then select CometChat in the side menu. Click on the BuddyPress Settings:
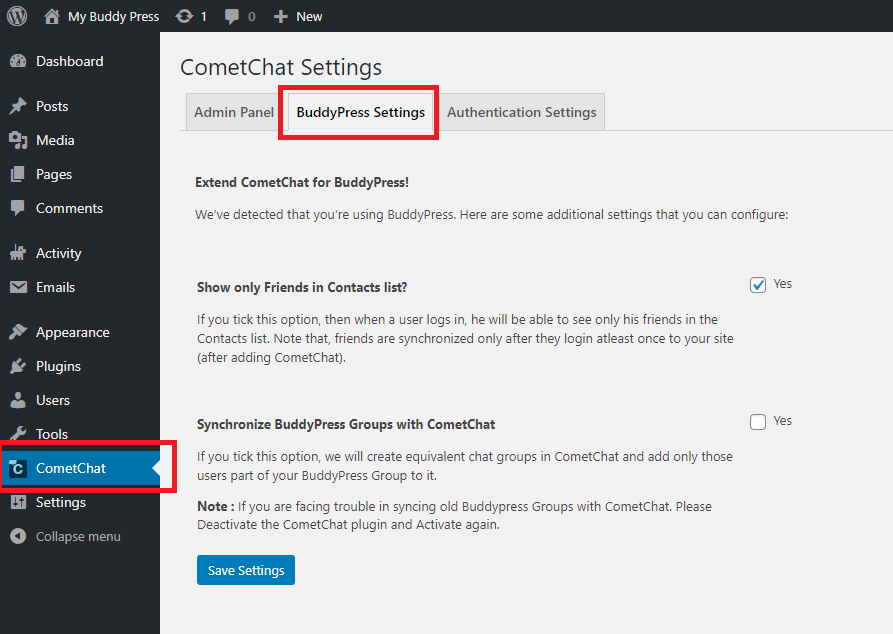
The option “Show only Friends in Contacts list?” will make the contacts list show only people that you have befriended in BuddyPress, instead of everyone. The second option, “Synchronize BuddyPress Groups with CometChat”, will automatically generate CometChat group chats based on any BuddyPress groups you’ve created.
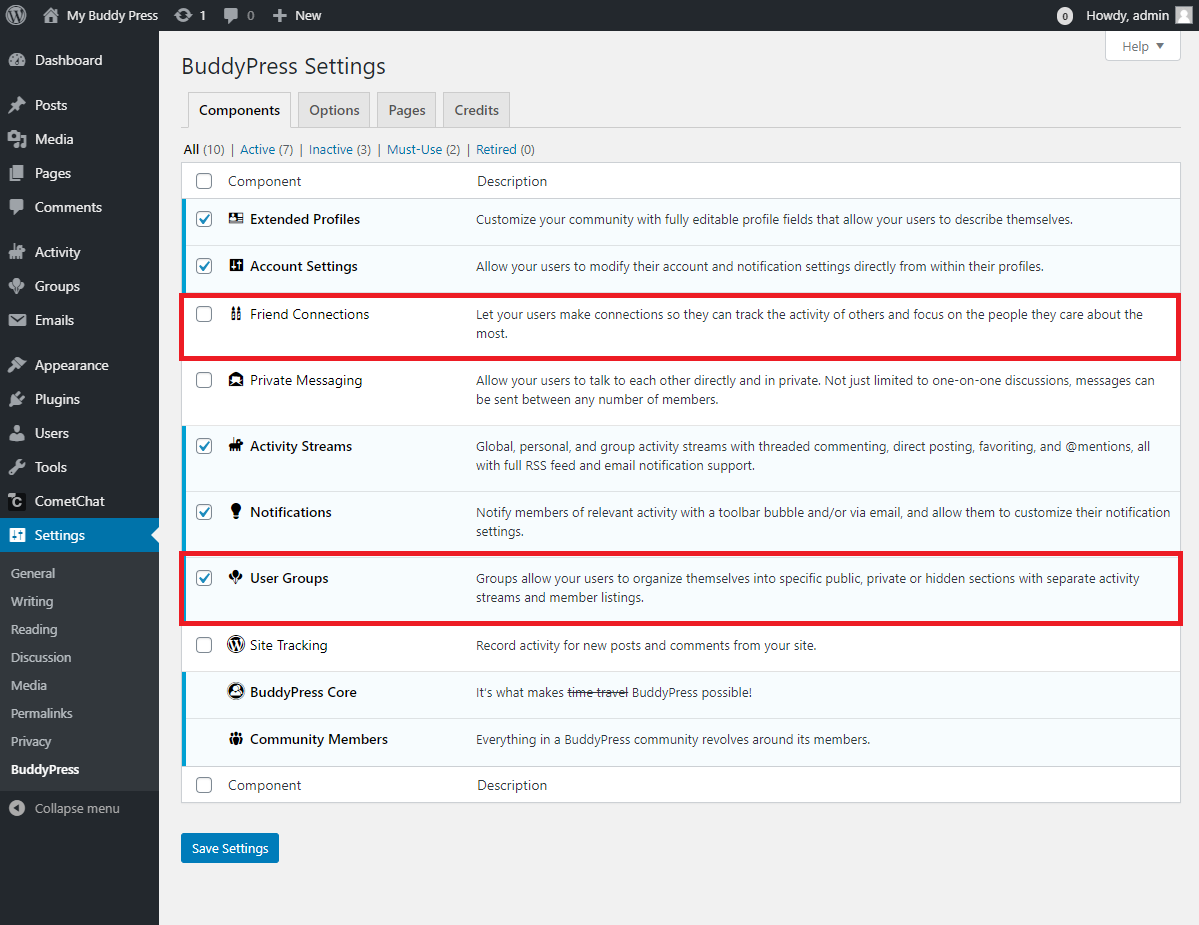
If you wish to enable either any of these settings, then don’t forget to also turn on Friend Connections and User Groups components that are available in BuddyPress Settings. To do that, click on the Settings tab from the side menu, then click on BuddyPress. You’ll now see the Components options, just like in the following screenshot:
Creating Chat rooms with CometChat
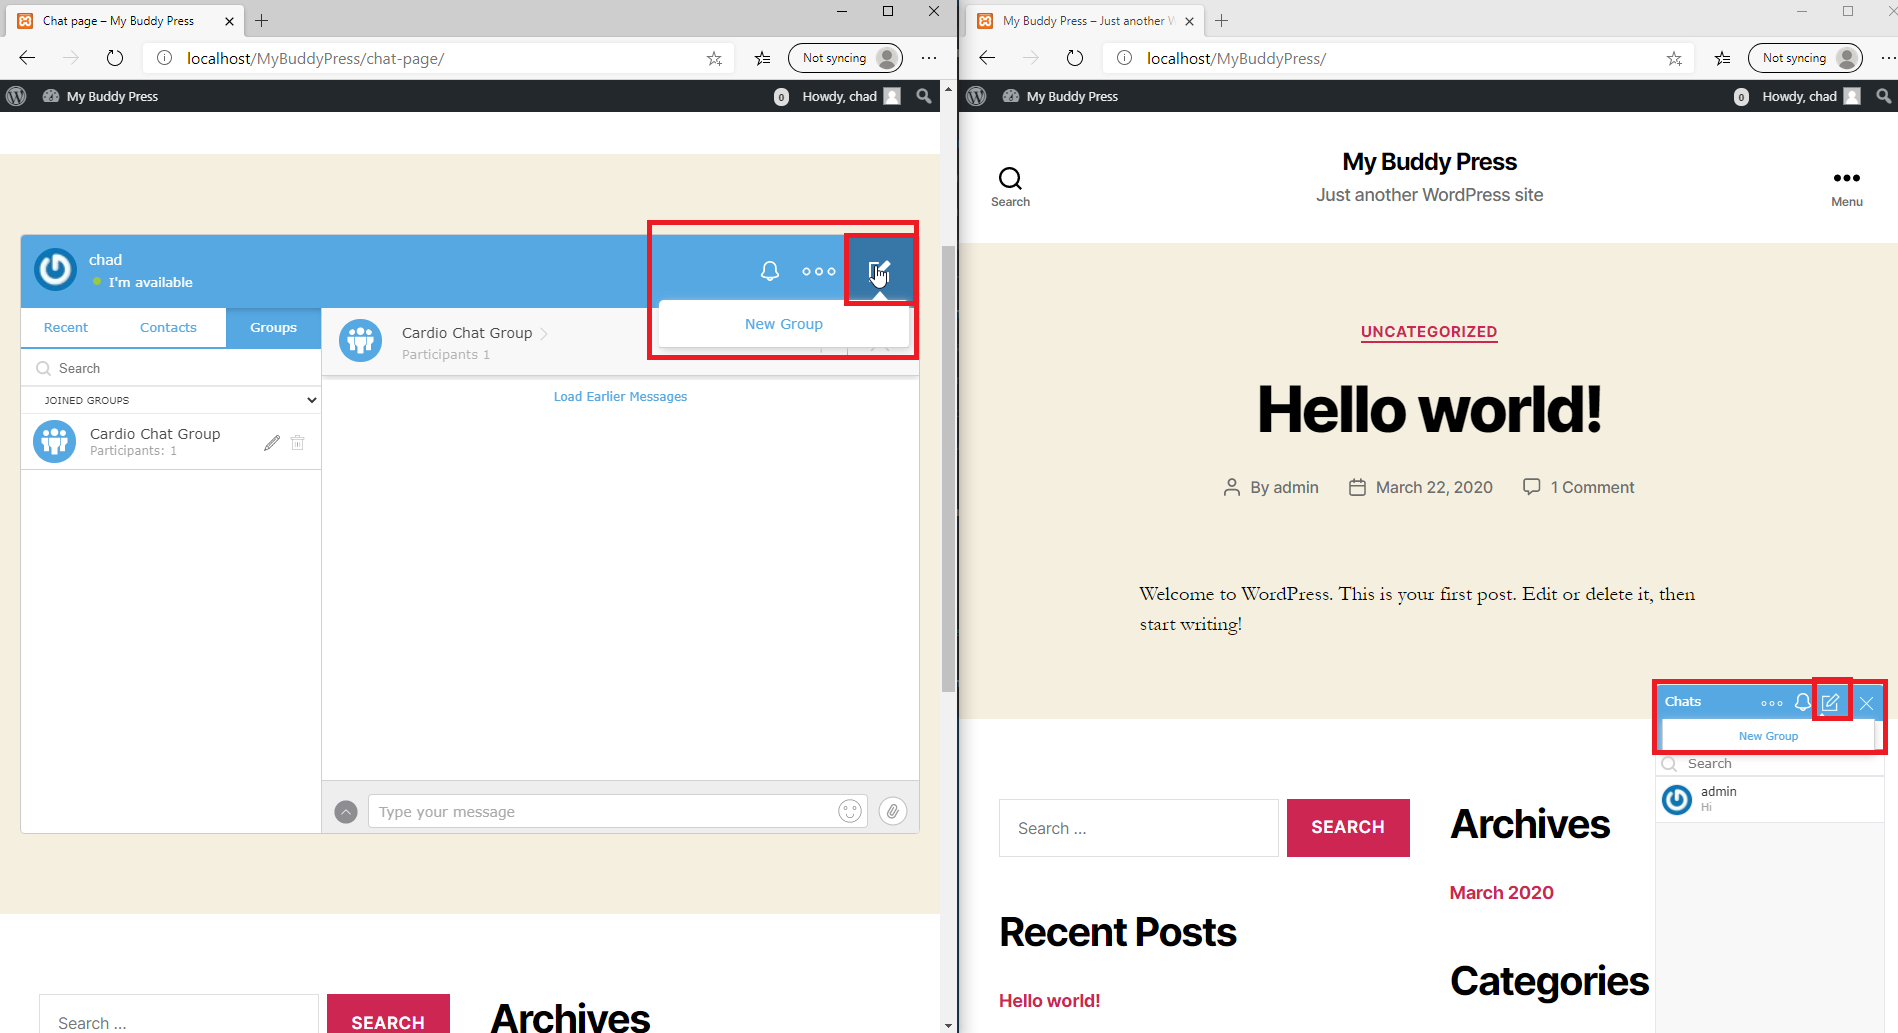
Now that CometChat Go is integrated with BuddyPress, you can manually create chat groups where other users can join and have a chat room together. To create a group, click the “Edit” button on the top right side of your CometChat Go widget or dock. Click on the text that says “New Group”:
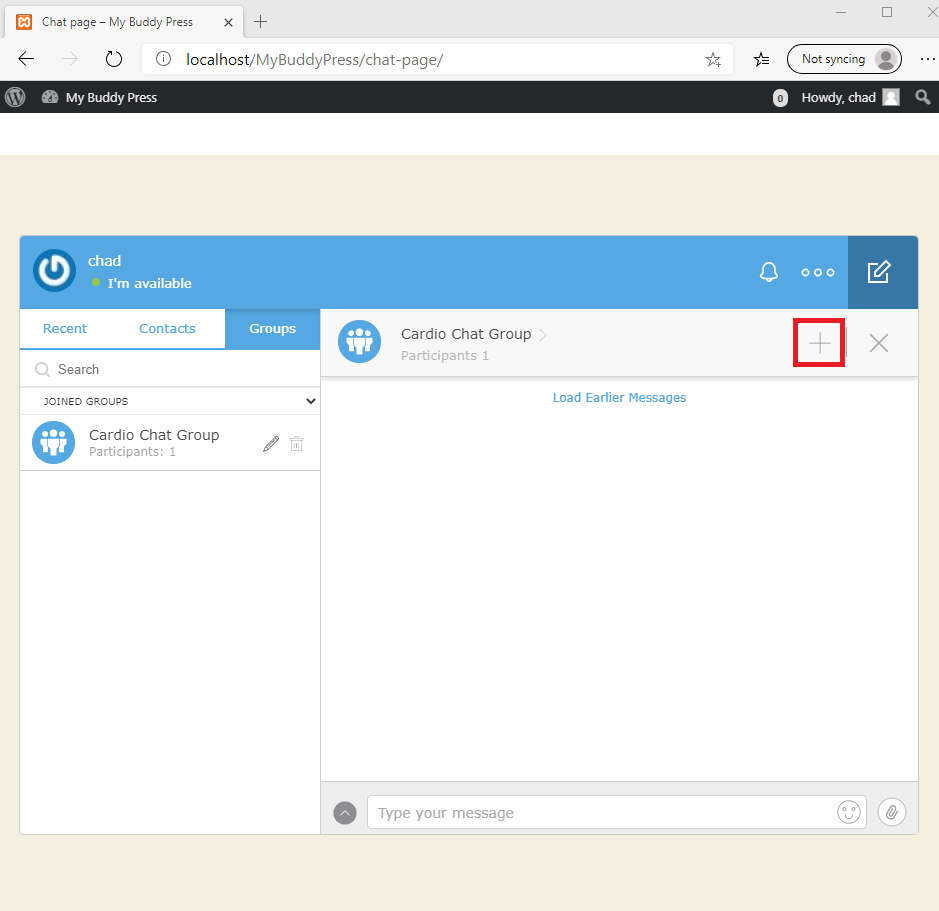
Next, you need to configure your group’s name and its privacy policy. You can set the group to be public, password protected or private. Once created, you can start inviting other users to join your group by clicking the group tab → plus(+) icon:
And that’s how you create chat rooms in BuddyPress using CometChat.
Conclusion
You have now learned how to integrate BuddyPress with CometChat Go in your WordPress site. You have also learned how to create chat rooms for your users without having to write a single line of code.
Aside from BuddyPress, CometChat Go can also integrate with other plugins to deliver a user-to-user messaging experience. If you don’t need the extra features of BuddyPress like friends or groups, then you can use other membership plugins like Simple WP Membership plugin, to enable CometChat Go for registered users.

Nathan Sebhastian
CometChat