
Call

Overview

CometChat's Calls feature is an advanced functionality that allows you to seamlessly integrate one-on-one as well as group audio and video calling capabilities into your application. This document provides a technical overview of these features, as implemented in the Flutter UI Kit.

Integration

First, make sure that you've correctly integrated the UI Kit library into your project. If you haven't done this yet or are facing difficulties, refer to our Getting Started guide. This guide will walk you through a step-by-step process of integrating our UI Kit into your Flutter project.

Once you've successfully integrated the UI Kit, the next step is to add the CometChat Calls SDK to your project. This is necessary to enable the calling features in the UI Kit. Here's how you do it:

Step 1

Add Dependency

Add the following dependency to your pubspec.yaml file:

dependencies:
cometchat_calls_uikit: ^4.3.4

Step 2

Update build.gradle

If your Flutter project's minimum Android SDK version (minSdkVersion) is below API level 24, you should update it to at least 24. To achieve this, navigate to the android/app/build.gradle file and modify the minSdkVersion property within the defaultConfig section.

defaultConfig {
minSdkVersion 24
targetSdkVersion flutter.targetSdkVersion
versionCode flutterVersionCode.toInteger()
versionName flutterVersionName
}
info

If you want to use the Flutter UI Kit or enable calling support within it, you'll need to:

  1. Set the minSdkVersion to 24 in your android/app/build.gradle file.

Step 3

Update iOS Podfile

In your Podfile located at ios/Podfile, update the minimum iOS version that your project supports to 12.

platform :ios, '12.0'

Step 4

Modify UIKitSettings

To activate the calling features, you'll need to modify the UIKitSettings using callingExtension and pass the key in the widget.

Example

UIKitSettings uiKitSettings = (UIKitSettingsBuilder()
..subscriptionType = CometChatSubscriptionType.allUsers
..autoEstablishSocketConnection = true
..region = "REGION"//Replace with your App Region
..appId = "APP_ID" //Replace with your App ID
..authKey = "AUTH_KEY" //Replace with your app Auth Key
..extensions = CometChatUIKitChatExtensions.getDefaultExtensions() //Replace this with empty array you want to disable all extensions
..callingExtension = CometChatCallingExtension() //Added this to Enable calling feature in the UI Kit
).build();

CometChatUIKit.init(uiKitSettings: uiKitSettings,onSuccess: (successMessage) {
// TODO("Not yet implemented")
}, onError: (e) {
// TODO("Not yet implemented")
});

To allow launching of Incoming Call screen from any widget whenever a call is received provide set key: CallNavigationContext.navigatorKey in the top most widget of your project (the widget that appears first of your app launch).

CometChatUIKit.login(uid, onSuccess: (s) {
Navigator.push(context, MaterialPageRoute(builder: (context) => CometChatUsersWithMessages(key: CallNavigationContext.navigatorKey)));
}, onError: (e) {
// TODO("Not yet implemented")
});

After adding this dependency, the Flutter UI Kit will automatically detect it and activate the calling features. Now, your application supports both audio and video calling. You will see CallButtons widget rendered in MessageHeader Widget.

Image

Listeners

For every top-level widget you wish to receive the call events in, you need to register the CallListener listener using the addCallListener() method.

import 'package:cometchat/cometchat_sdk.dart';

class _YourClassNameState extends State<YourClassName> with CallListener {

void initState() {
super.initState();
CometChat.addCallListener(listenerId, this); //Add listener
}


void dispose() {
super.dispose();
CometChat.removeCallListener(listenerId); //Remove listener
}


void onIncomingCallCancelled(Call call) {
super.onIncomingCallCancelled(call);
debugPrint("onIncomingCallCancelled");
}


void onIncomingCallReceived(Call call) {
super.onIncomingCallReceived(call);
debugPrint("onIncomingCallReceived");
}


void onOutgoingCallAccepted(Call call) {
super.onOutgoingCallAccepted(call);
debugPrint("onOutgoingCallAccepted");
}


void onOutgoingCallRejected(Call call) {
super.onOutgoingCallRejected(call);
debugPrint("onOutgoingCallRejected");
}


void onCallEndedMessageReceived(Call call) {
super.onCallEndedMessageReceived(call);
debugPrint("onCallEndedMessageReceived");
}


Widget build(BuildContext context) {
// TODO: implement build
throw UnimplementedError();
}
}

Features

Incoming Call

The Incoming Call widget of the CometChat UI Kit provides the functionality that lets users receive real-time audio and video calls in the app.

When a call is made to a user, the Incoming Call widget triggers and displays a call screen. This call screen typically displays the caller information and provides the user with options to either accept or reject the incoming call.
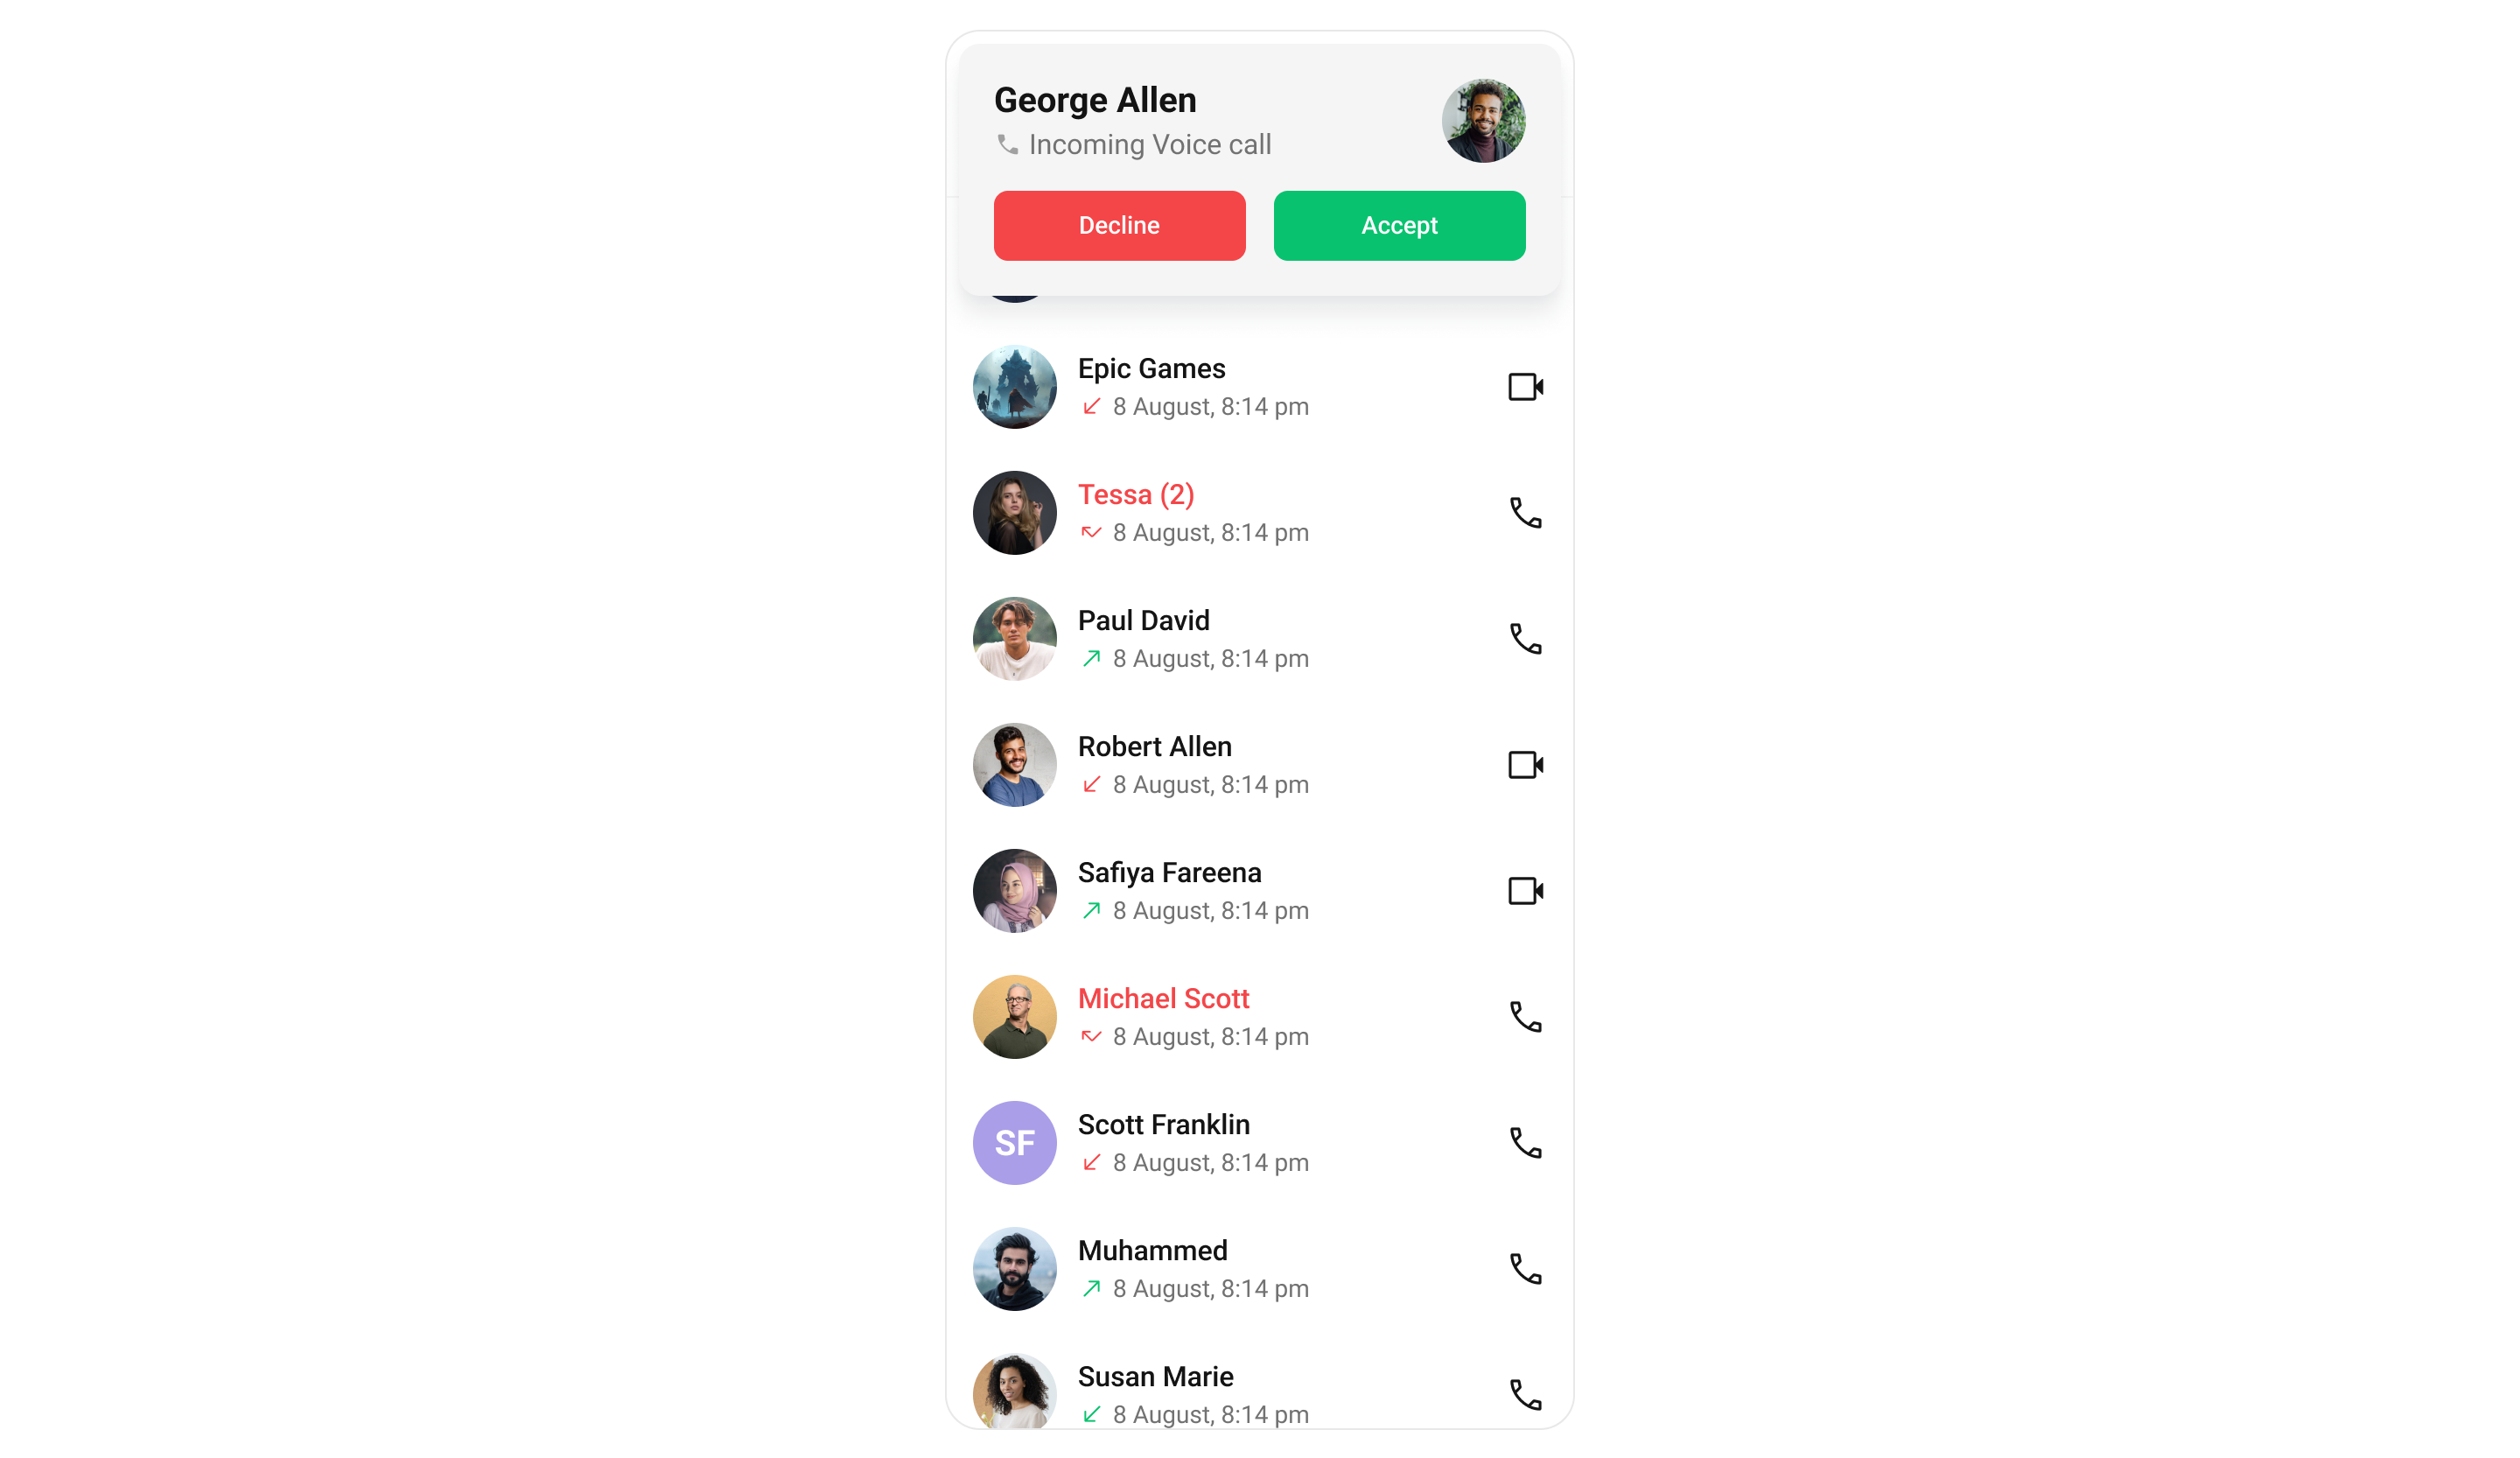
Image

Outgoing Call

The Outgoing Call widget of the CometChat UI Kit is designed to manage the outgoing call process within your application. When a user initiates an audio or video call to another user or group, this widget displays an outgoing call screen, showcasing information about the recipient and the call status.

Importantly, the Outgoing Call widget is smartly designed to transition automatically into the ongoing call screen once the receiver accepts the call. This ensures a smooth flow from initiating the call to engaging in a conversation, without any additional steps required from the user.
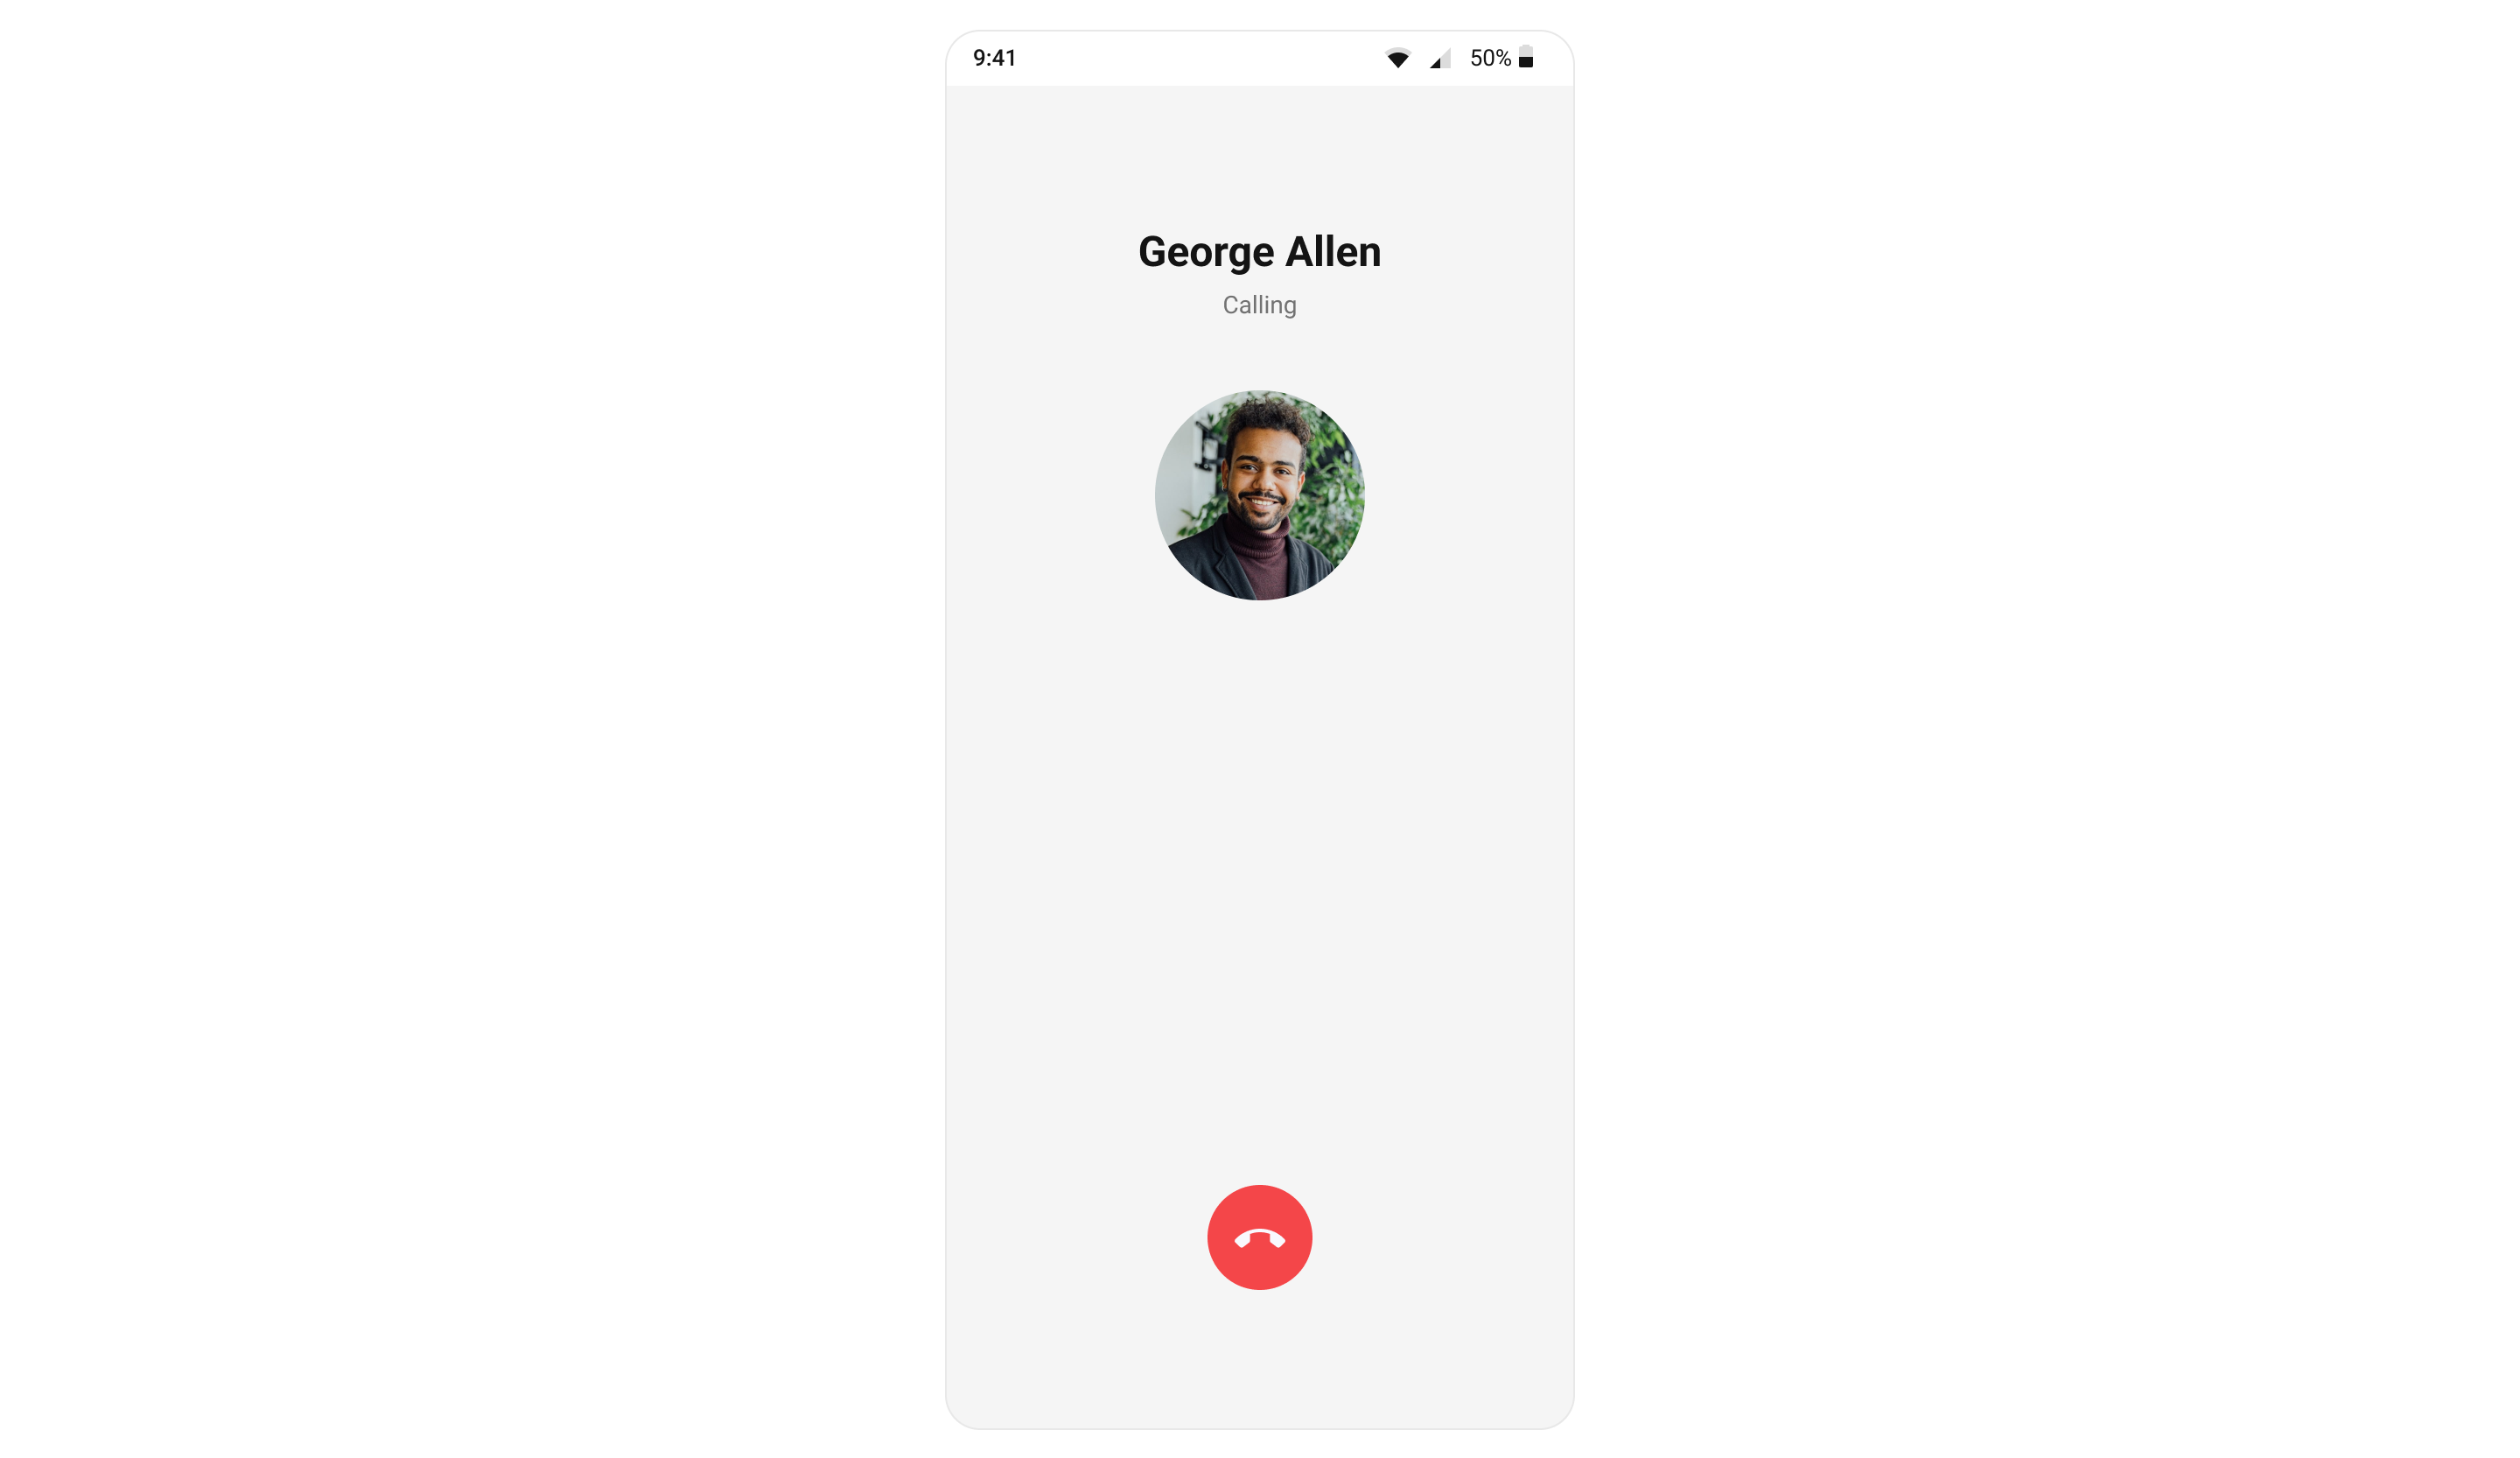
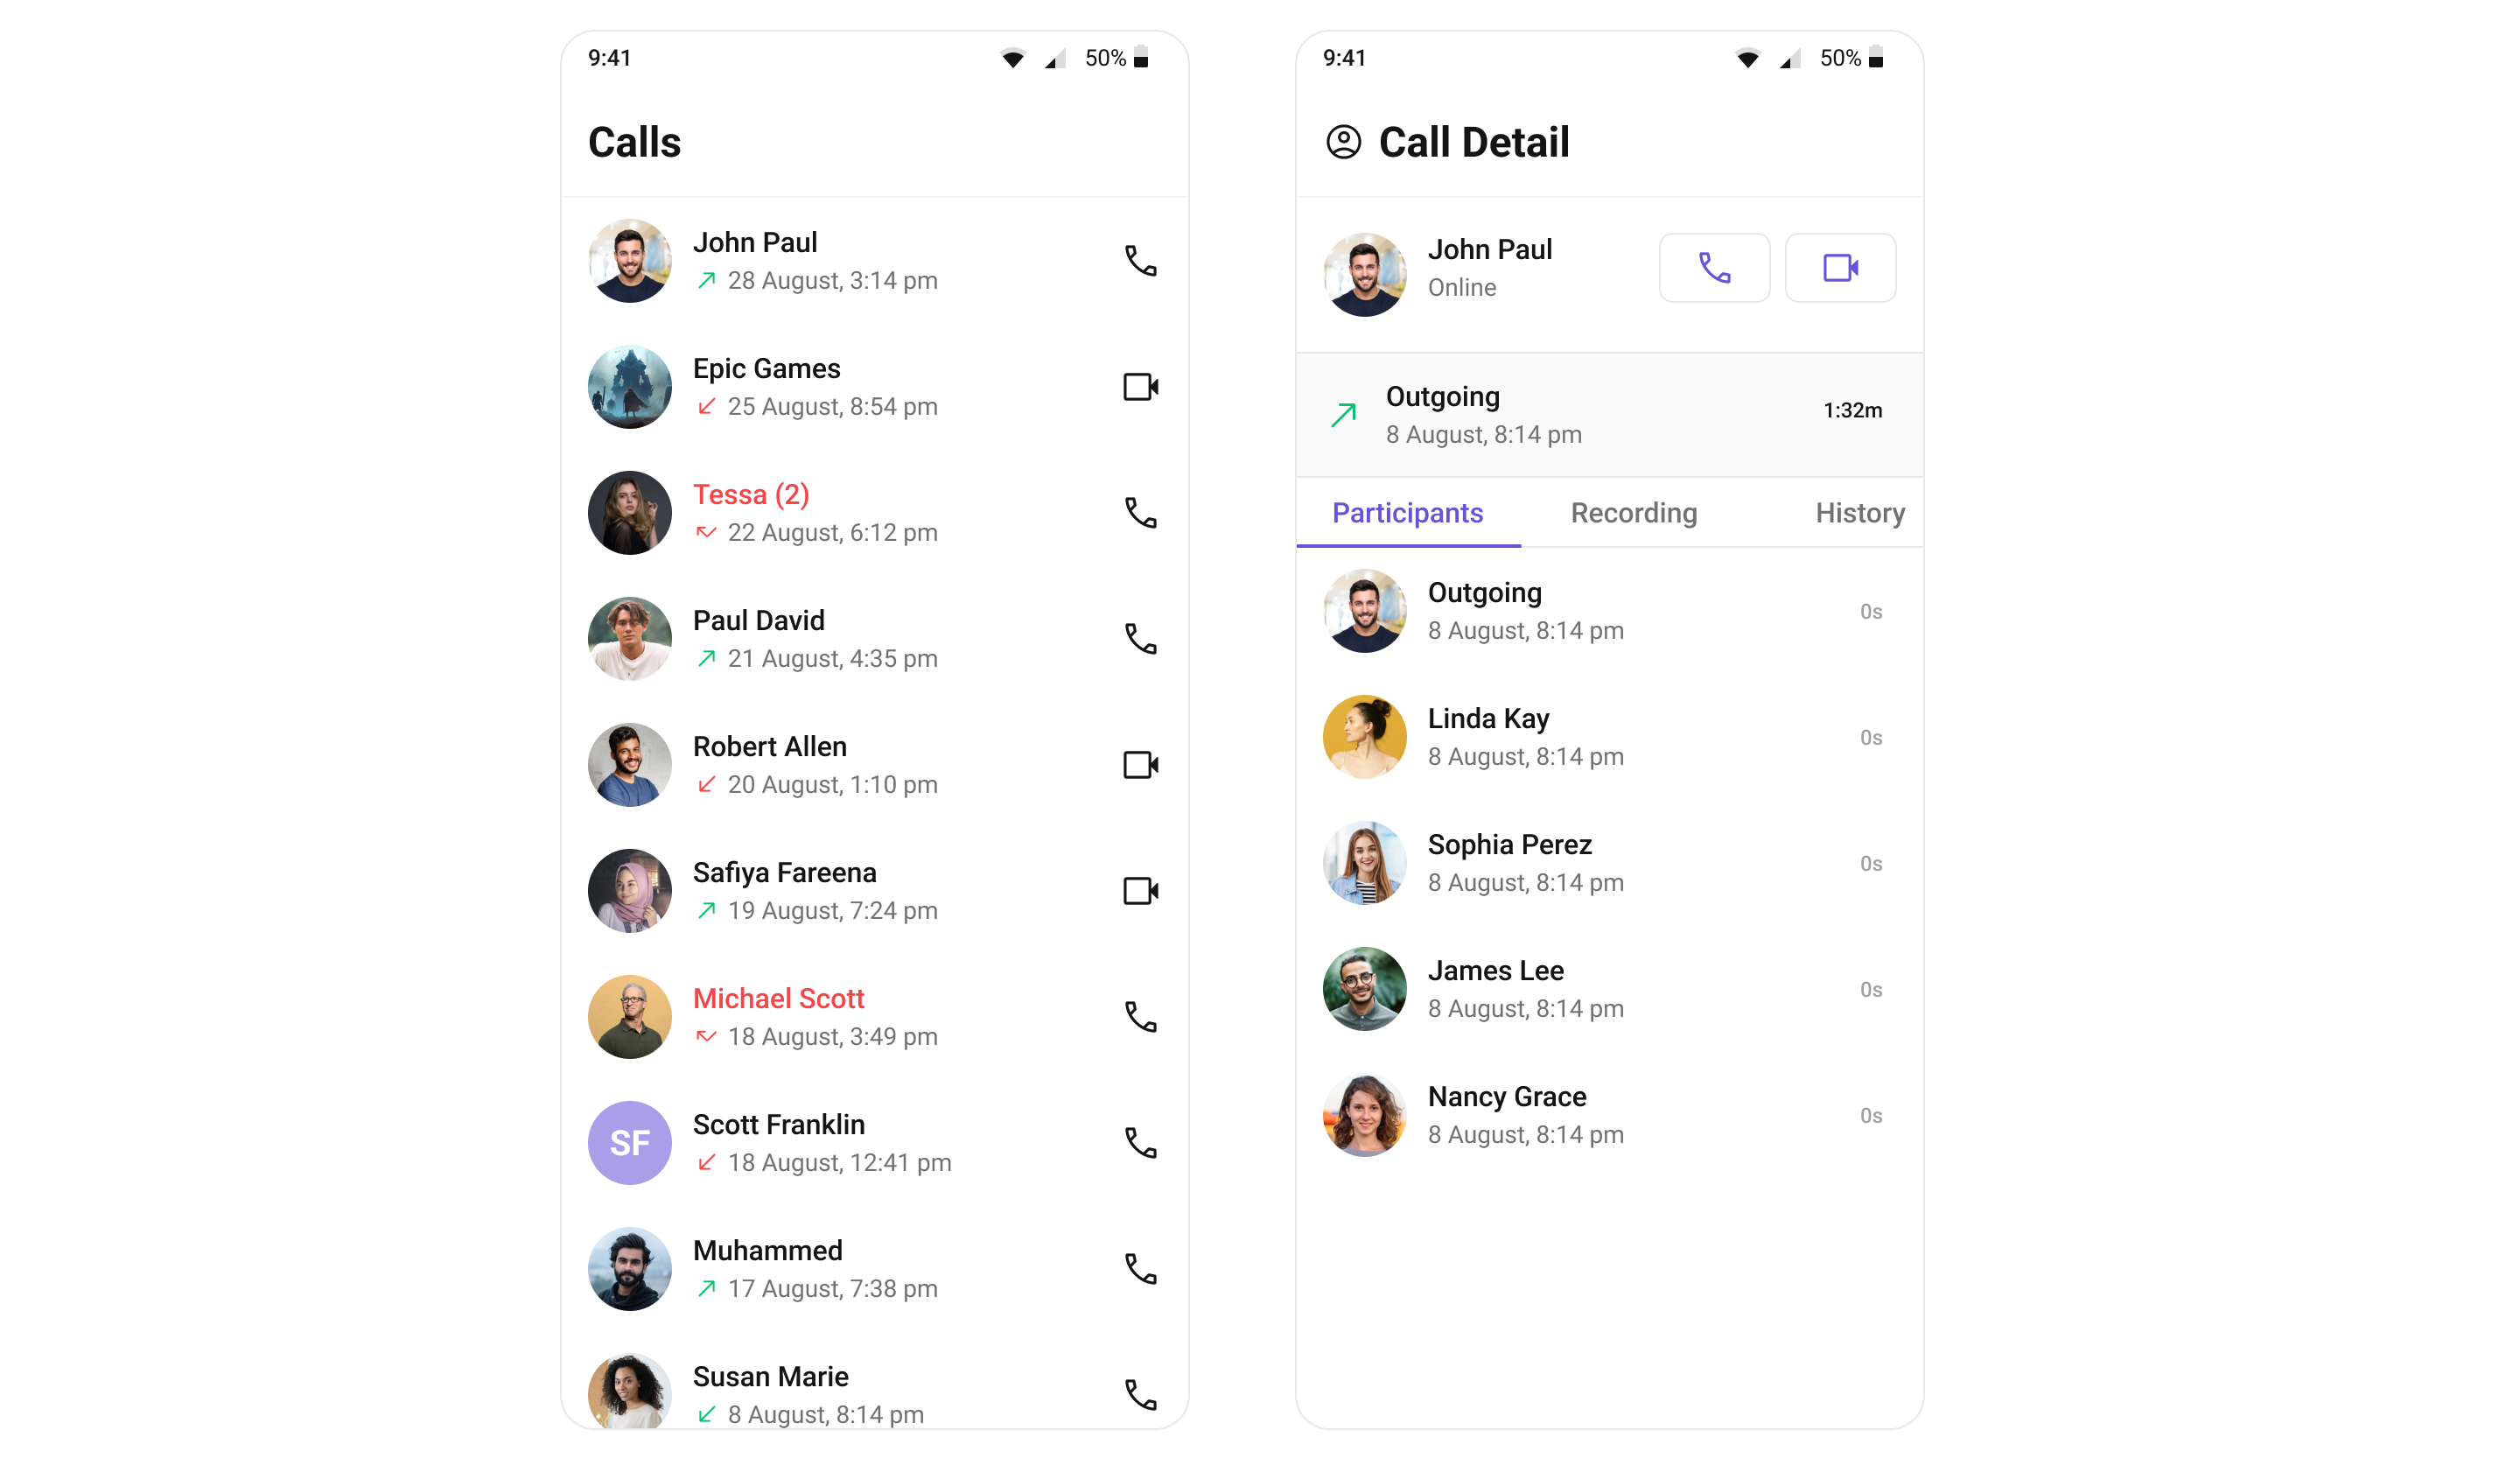
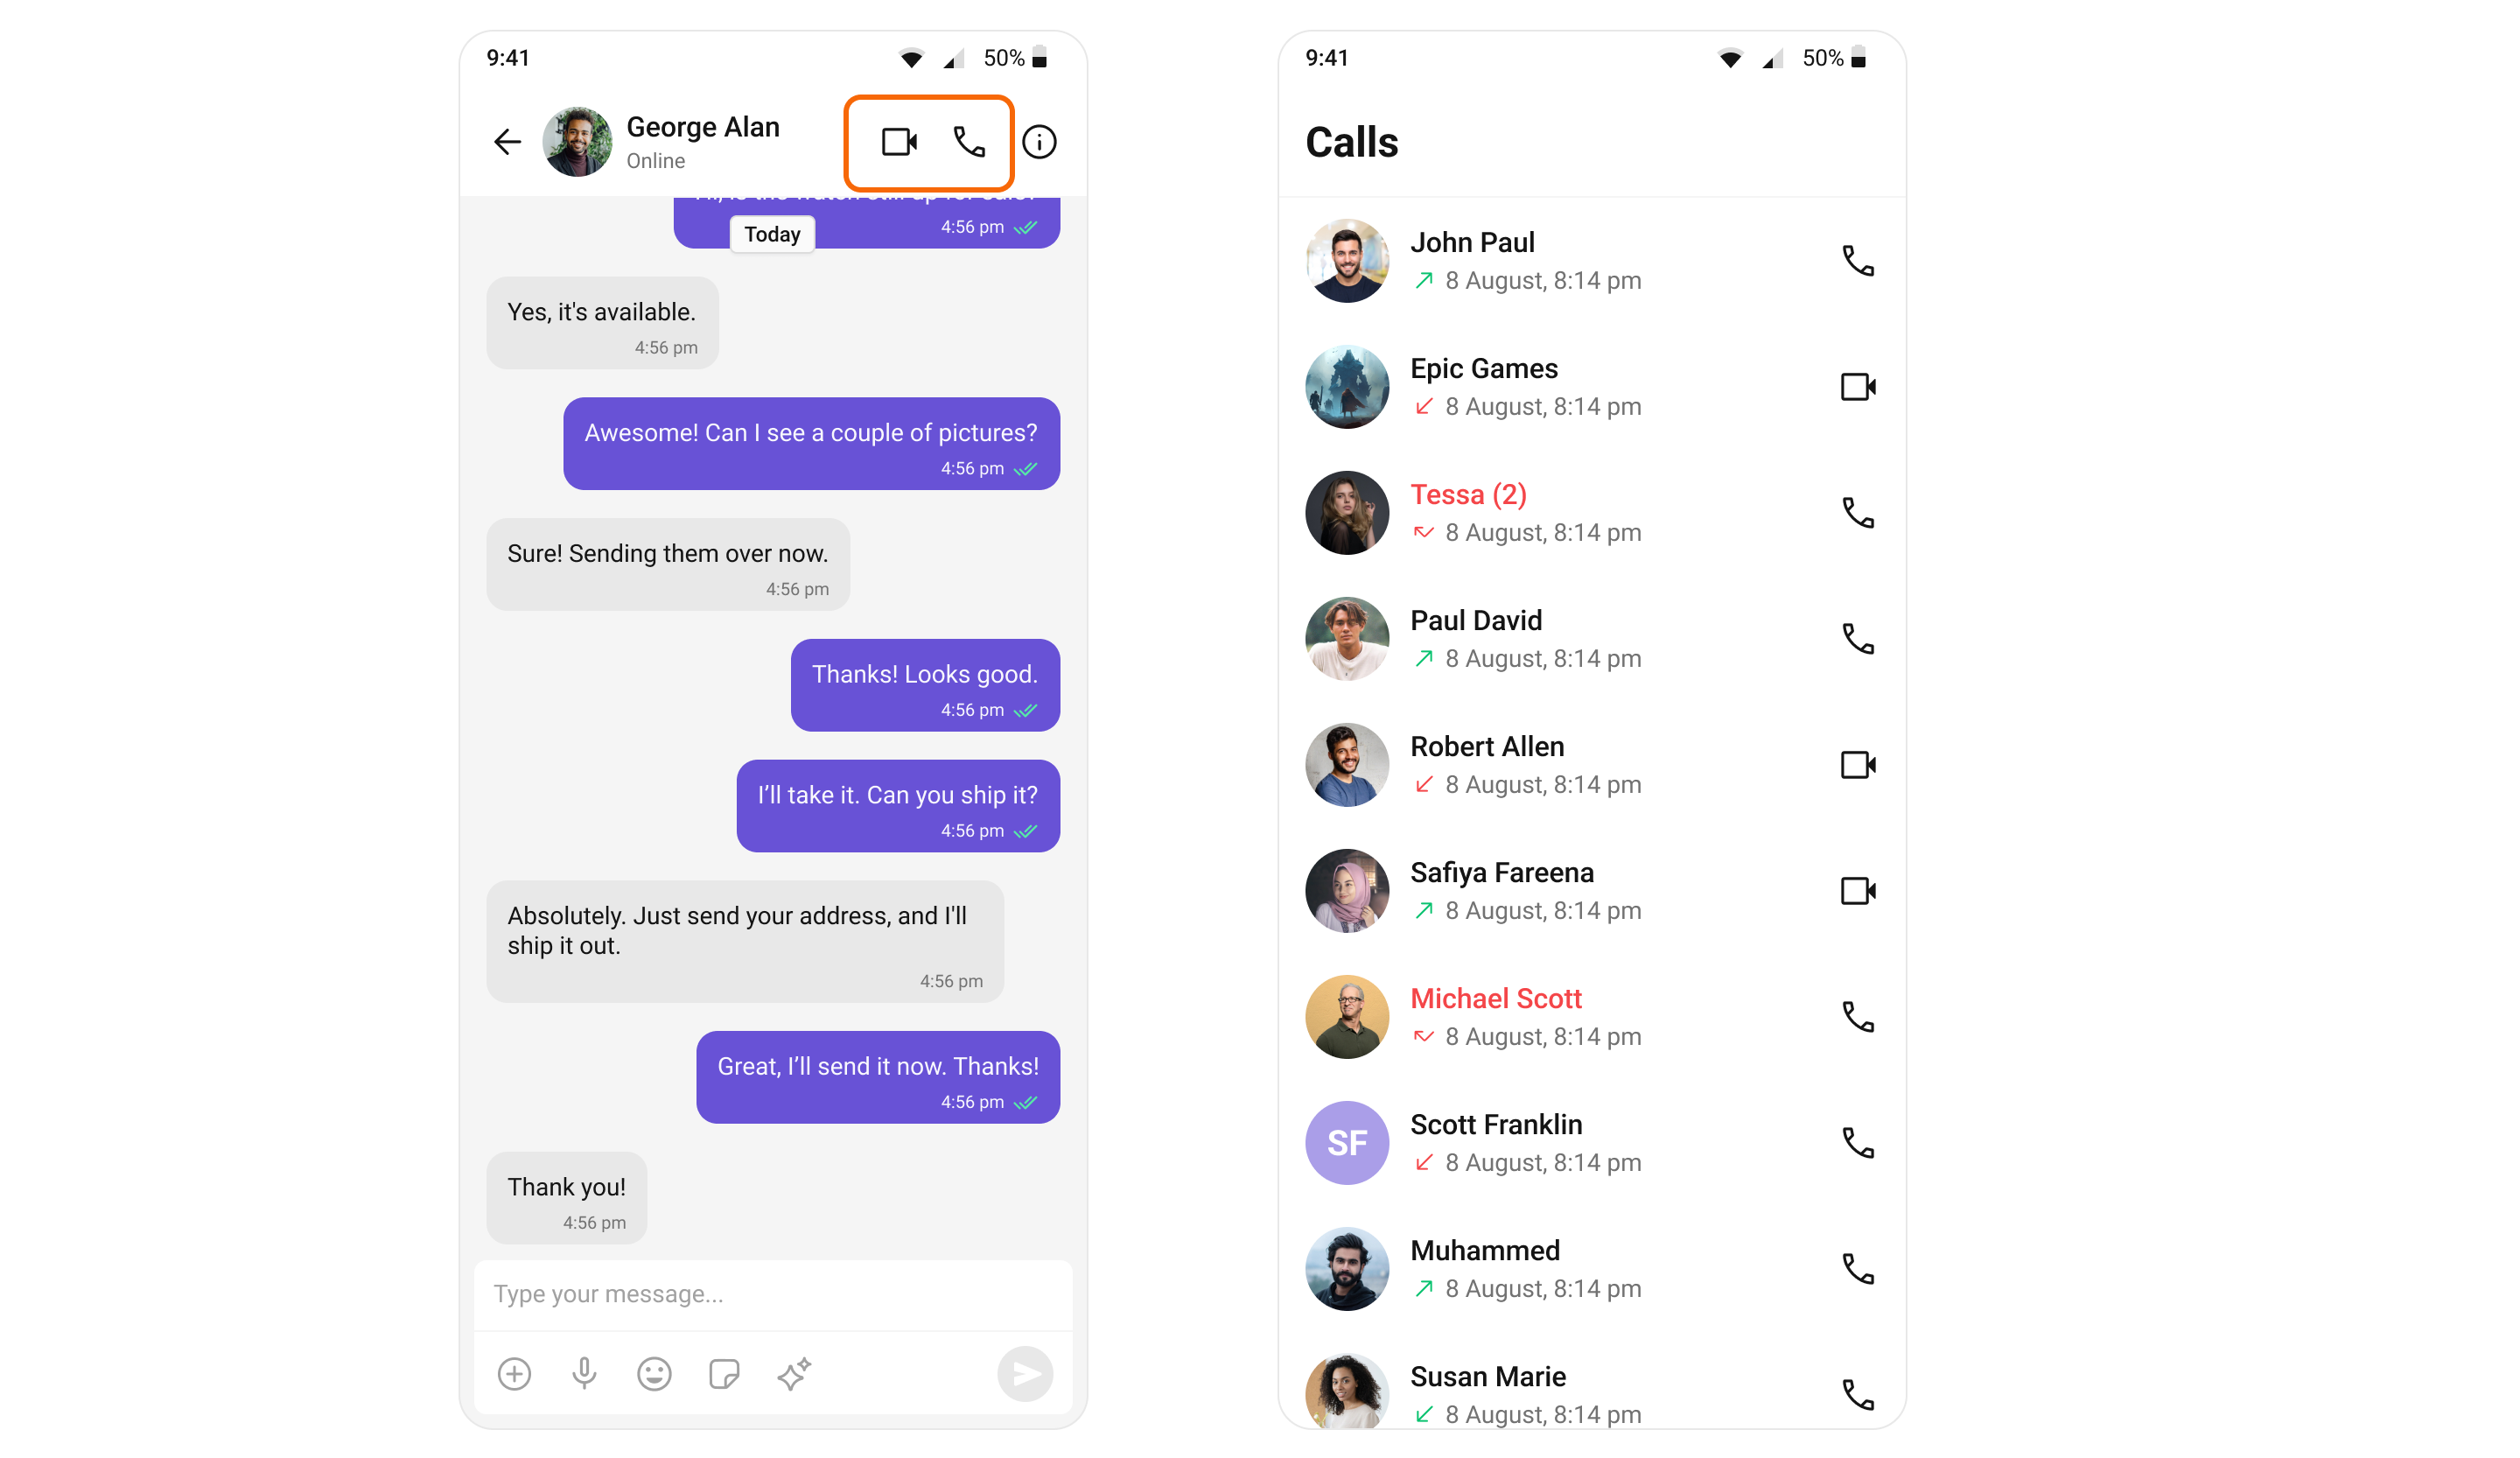
Image

Ongoing Call

The OngoingCall widget is the user interface that displays during an ongoing call. For an audio call, this screen displays the participant's name, call duration, and buttons to mute the audio, enable or disable video, switch the camera, and end the call.

For a video call, the Call Screen might additionally display the video footage from both the user's camera and the recipient's camera.

Image

Call Logs

Call Logs widget provides you with the records call events such as who called who, the time of the call, and the duration of the call. This information can be fetched from the CometChat server and displayed in a structured format for users to view their past call activities.

Image