This tutorial is outdated. We're currently working on an updated version. In the meantime, for instructions on building a chat app using CometChat, please visit our documentation.
App and web development have come a long way over the last few years. We use a lot of chat applications every day, including Facebook, Twitter, WhatsApp, Linkedin, and Messenger. One of the most widely used features is live chat, voice and video calling. Using the CometChat communications SDK and Firebase backend services, and React Native gifted chat library, you will learn how to build one of the best chat app on the internet with minimal effort.
Follow along the steps to build a React Native gifted chat app that will allow users:
Users
1. A way for end-users to signup, login, and sign out (email & password is sufficient)
2. A way for users to create a short profile.
Chat
1. Use the official React Native SDK and Gifted chat to configure the following -
List of Users/Contacts is visible to all users with a search bar
All users can text chat and share images, video.
All users can initiate voice & video call each other and groups
Users can create groups and add/remove other users
Group chat via text, voice, and video must be enabled for all users
2. Login the logged-in user to CometChat
3. Customize UI to a user friendly and attractive state
4. Add API call when a user registers so that the user is created in CometChat
Prerequisites
To follow this tutorial, you must have a degree of understanding of the general use of React Native. This will help you to improve your understanding of this tutorial.
Step 1: Installing the App Dependencies
Step 1: you need to have Node.js installed on your machine.
Step 2: create a new project with the name RNGiftedChatApp with version 0.63.3 by running the following statement.
Step 3: Copy the dependencies from here and run the following statement.
Step 4: Run cd to the ios folder then run pod install to install the pods. Once pods are installed run cd .. to go back to the root folder.
*Note: For more information about setting up CometChat React Native SDK, you can refer to this link.
Step 2: Configuring CometChat SDK
1. Head to CometChat and create an account.
Add real-time chat with minimal effort using CometChat
2.From the dashboard, add a new app called "react-native-gifted-chat-app".
3. Select this newly added app from the list.
4. From the Quick Start copy the APP_ID, REGION, and AUTH_KEY, which will be used later.
5. Also, copy the REST_API_KEY from the API & Auth Key tab.
6. Navigate to the Users tab, and delete all the default users and groups leaving it clean (very important).
7. Create a file called **env.js** in the root folder of your project.
8. Import and inject your secret keys in the **env.js** file containing your CometChat and Firebase in this manner.
9. cd to your root folder and hit npm i --force to install the packages.
10. Run cd to the ios folder then run pod install to install the pods. Once pods are installed run cd .. to go back to the root folder.
11. Run the app on iOS using npx react-native run-ios & on Android using npx react-native run-android
12. Make sure to include env.js in your gitIgnore file from being exposed online.
13. If you would like to test your application on IOS and you are using a Macbook - Apple Chip, you need to follow this link to configure your xcode and your ios project.
14. If you would like to test your application on Android and you have to face with an issue related to ANDROIRD_ROOT_SDK. Please refer to this link to get the solution.
Step 3: Setting Up Firebase Project
According to the requirements of the React Native gifted chat application, you need to let users create a new account and login to the application, Firebase will be used to achieve that. Head to Firebase to create a new project and activate the email and password authentication service. This is how you do it:
To begin using Firebase, you’ll need a Gmail account. Head over to Firebase and create a new project.
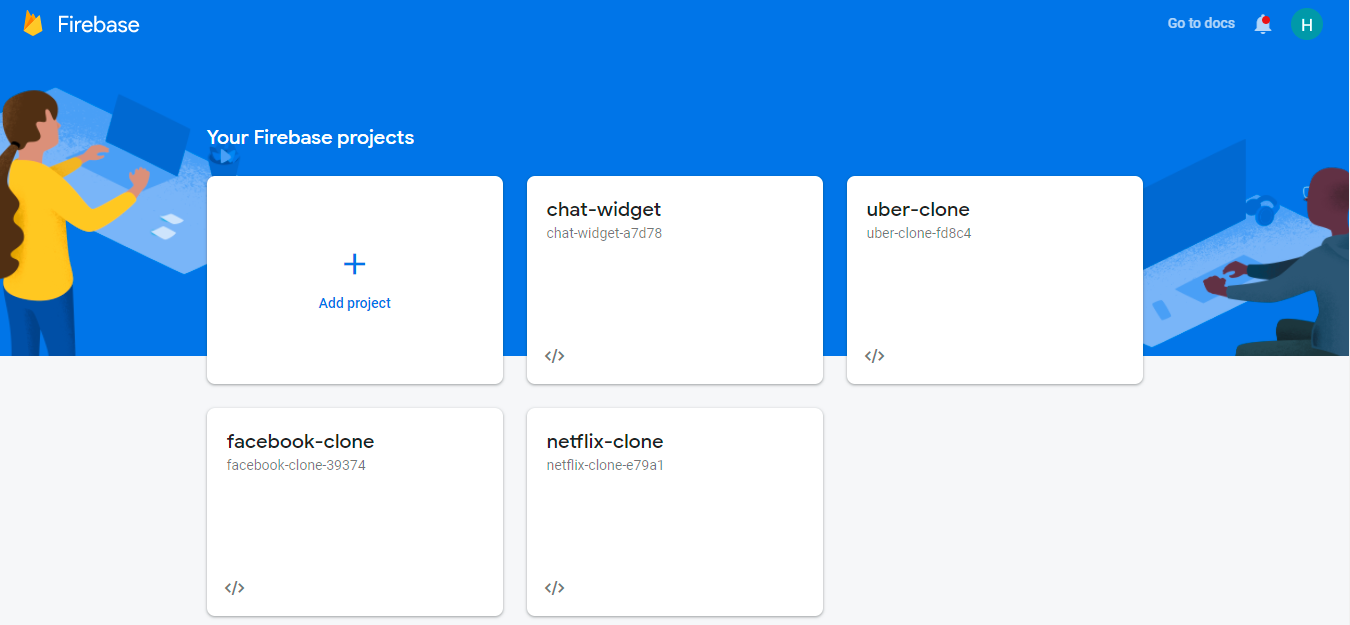
Firebase
Firebase provides support for authentication using different providers. For example, Social Auth, phone numbers, as well as the standard email and password method. Since you will be using the email and password authentication method in this tutorial, you need to enable this method for the project you created in Firebase, as it is by default disabled.
Under the authentication tab for your project, click the sign-in method and you should see a list of providers currently supported by Firebase.
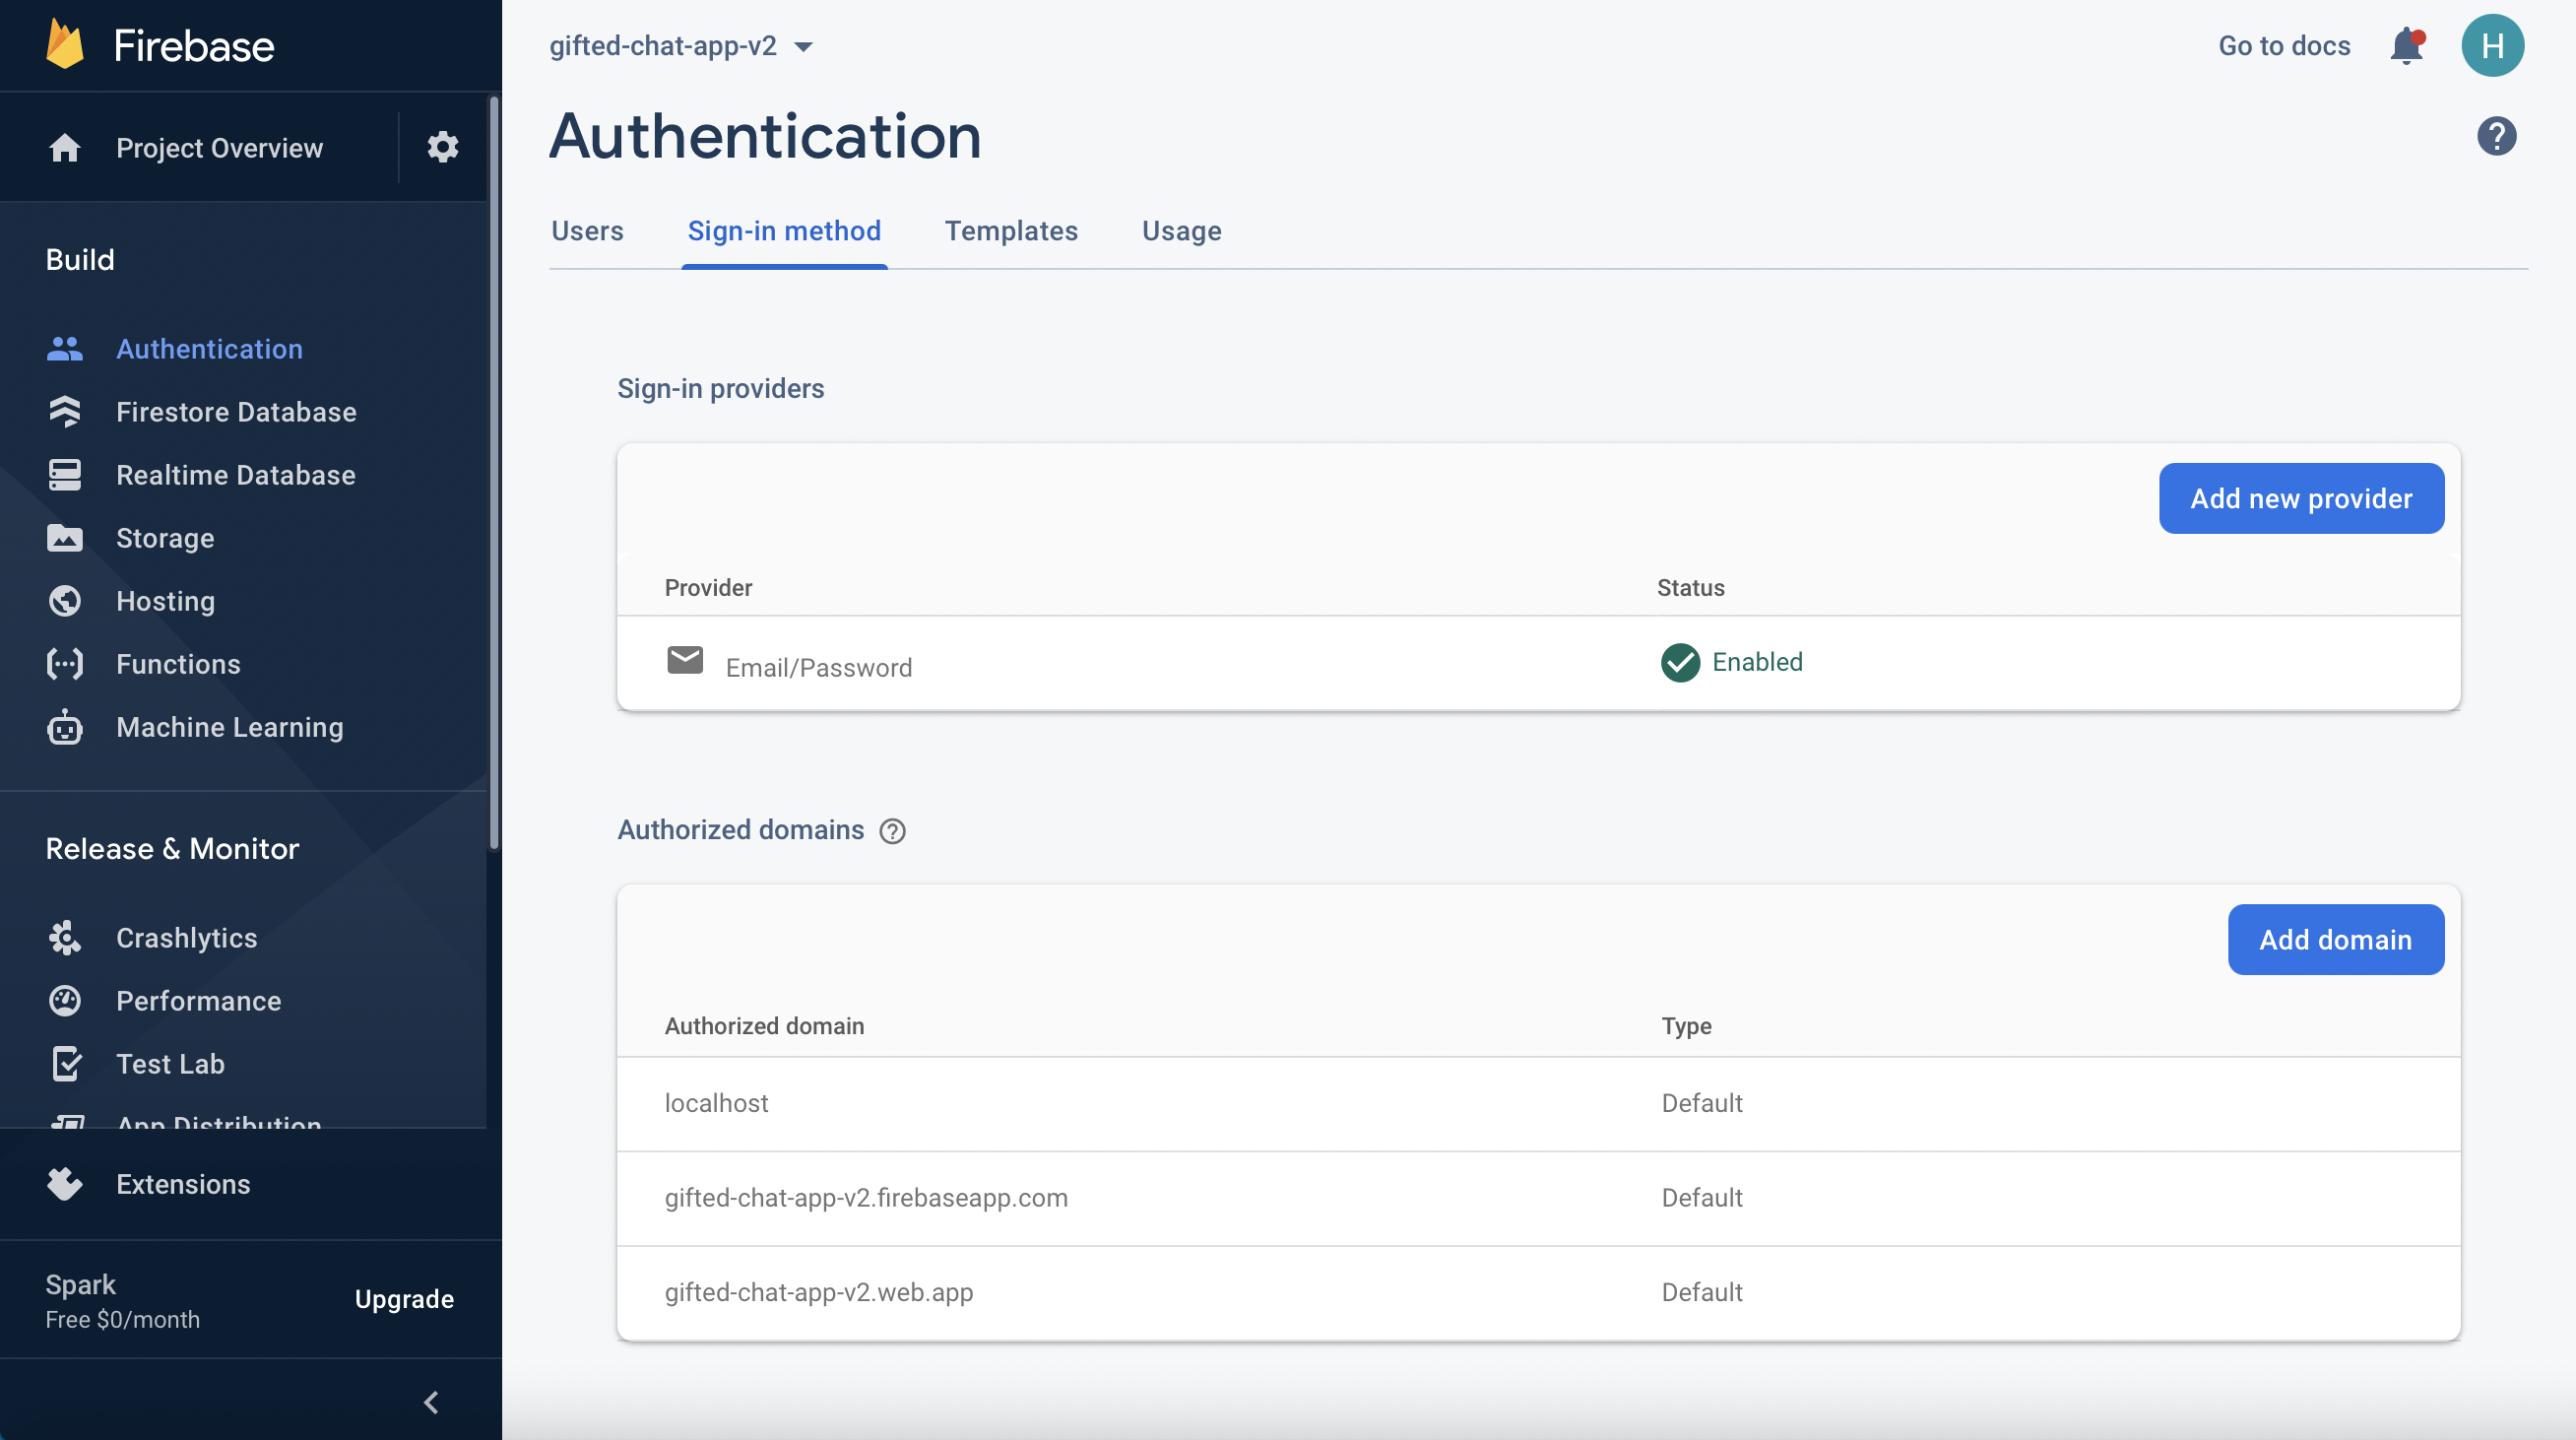
Firebase Authentication
Next, click the edit icon on the email/password provider and enable it.
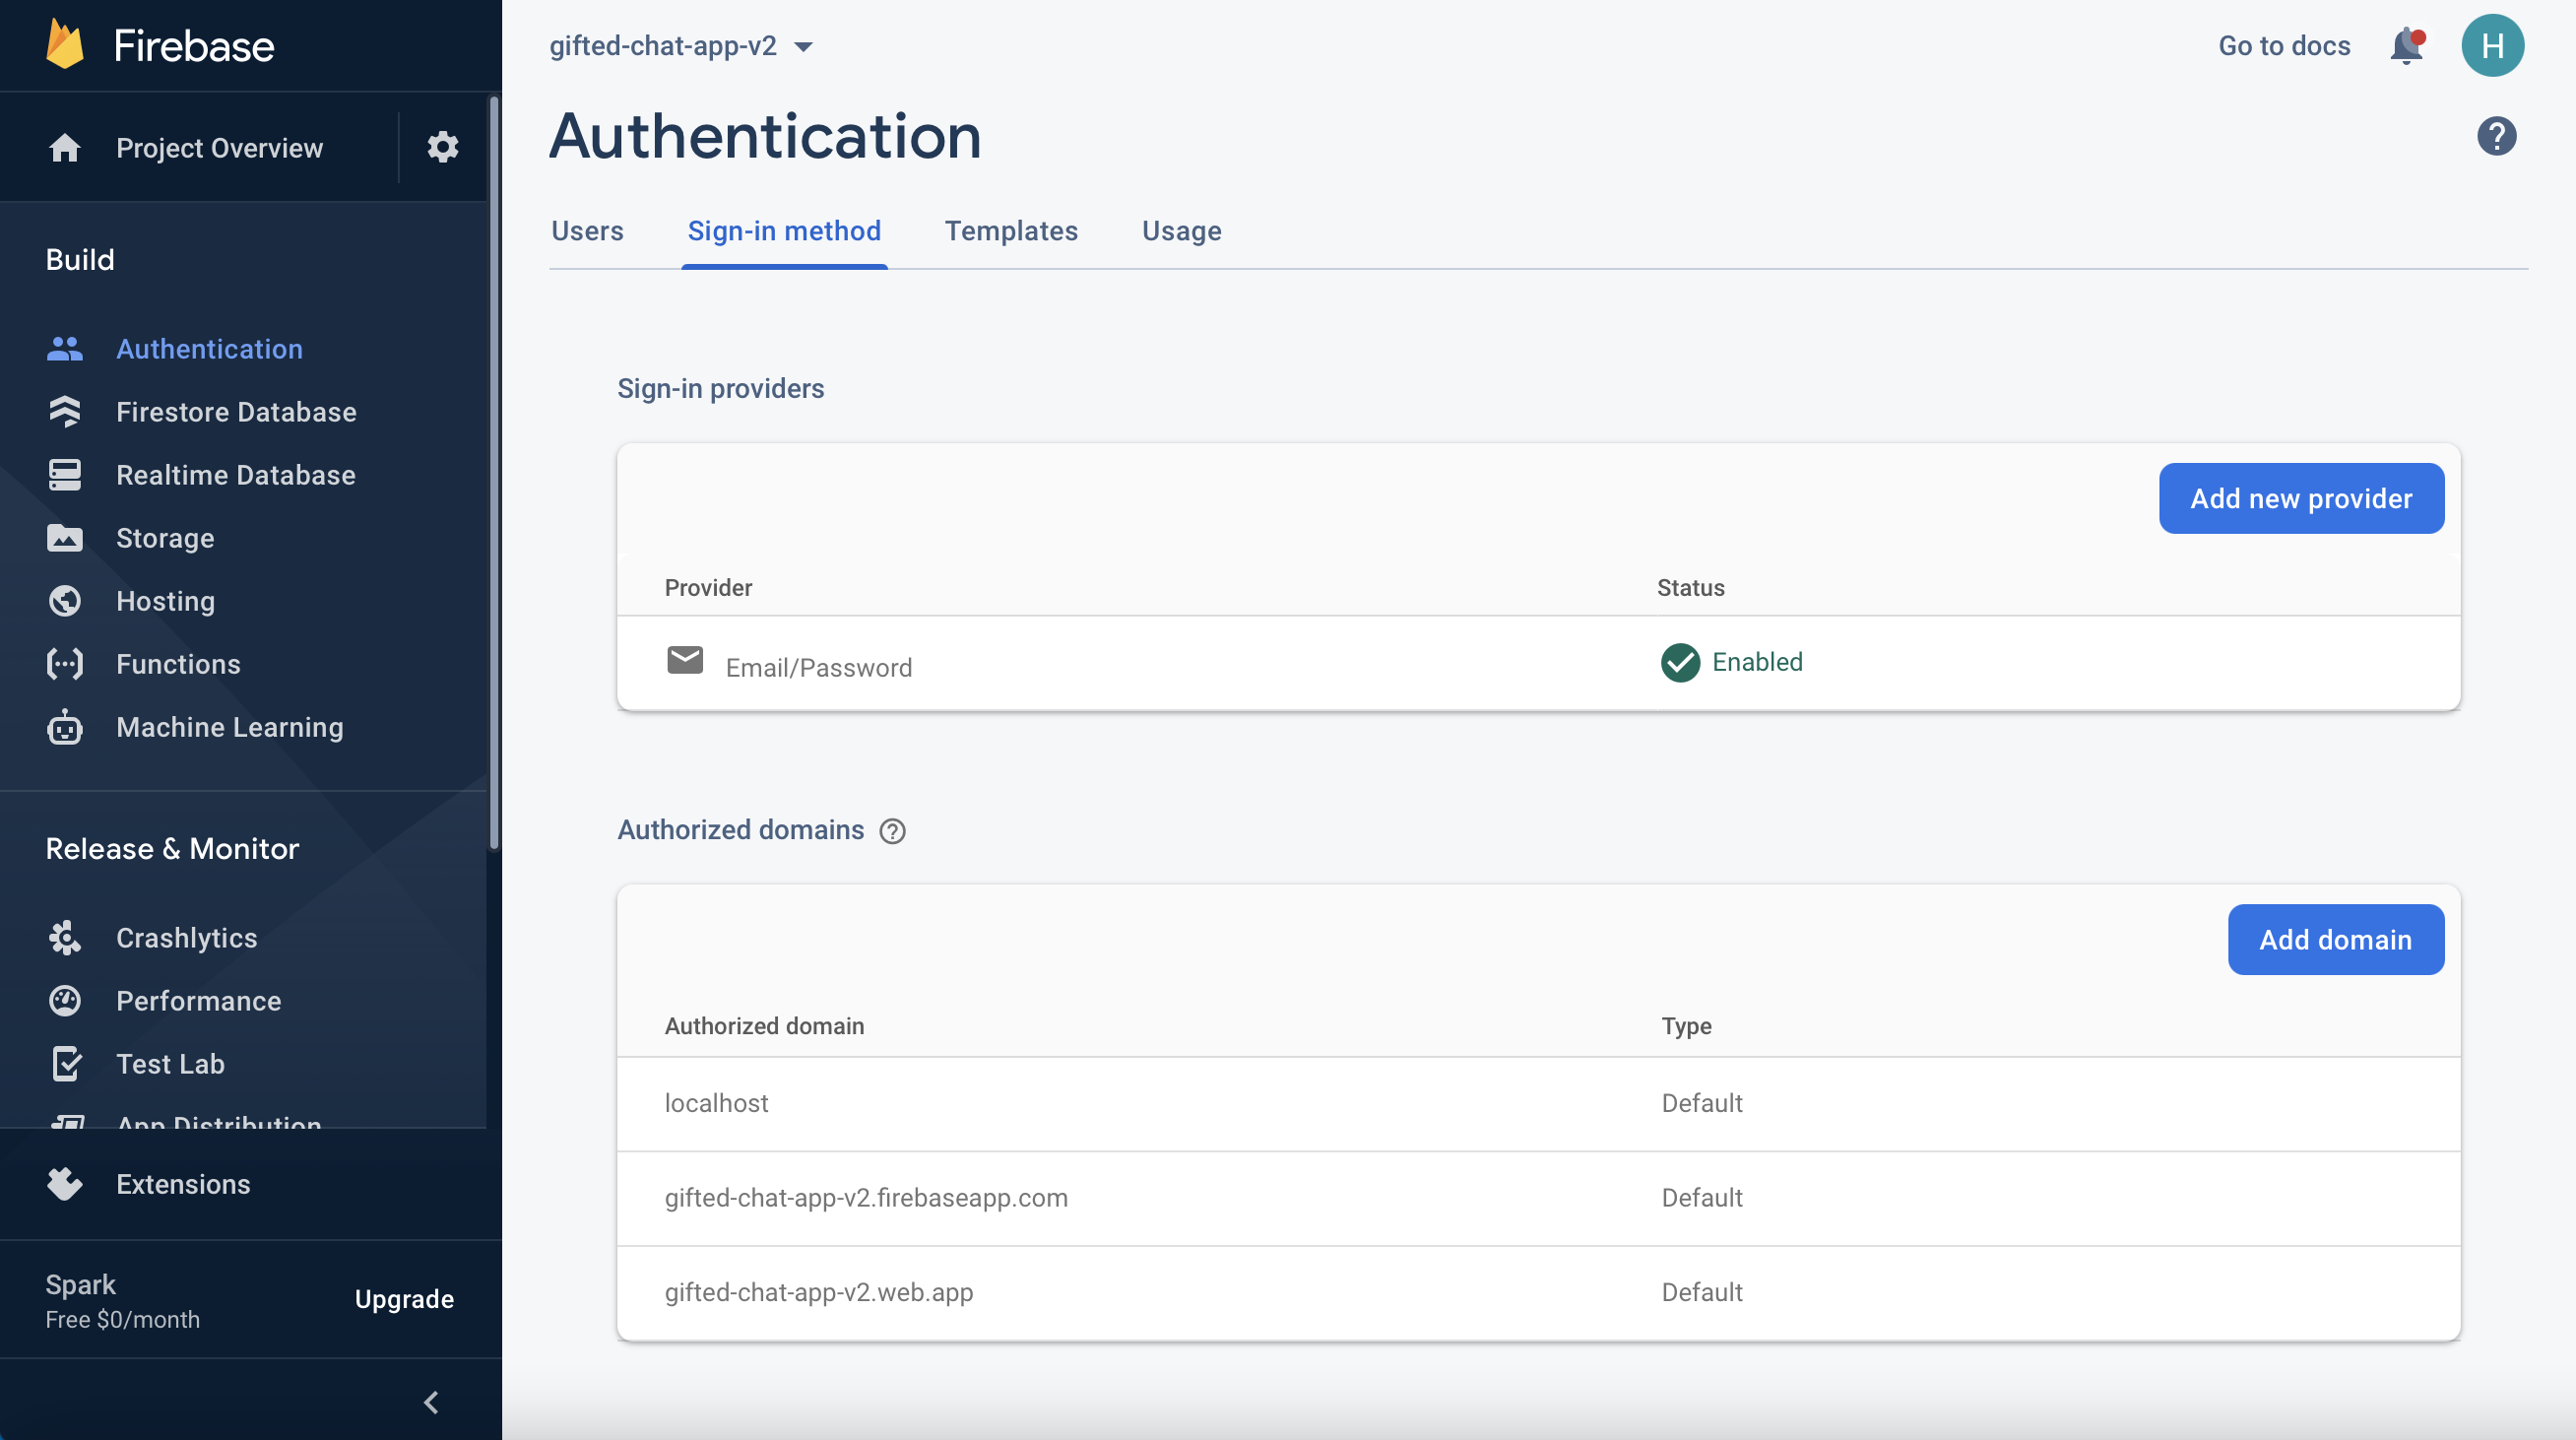
Enable Firebase Authentication with Email and Password
Now, you need to go and register your application under your Firebase project. On the project’s overview page, select the add app option and pick web as the platform.
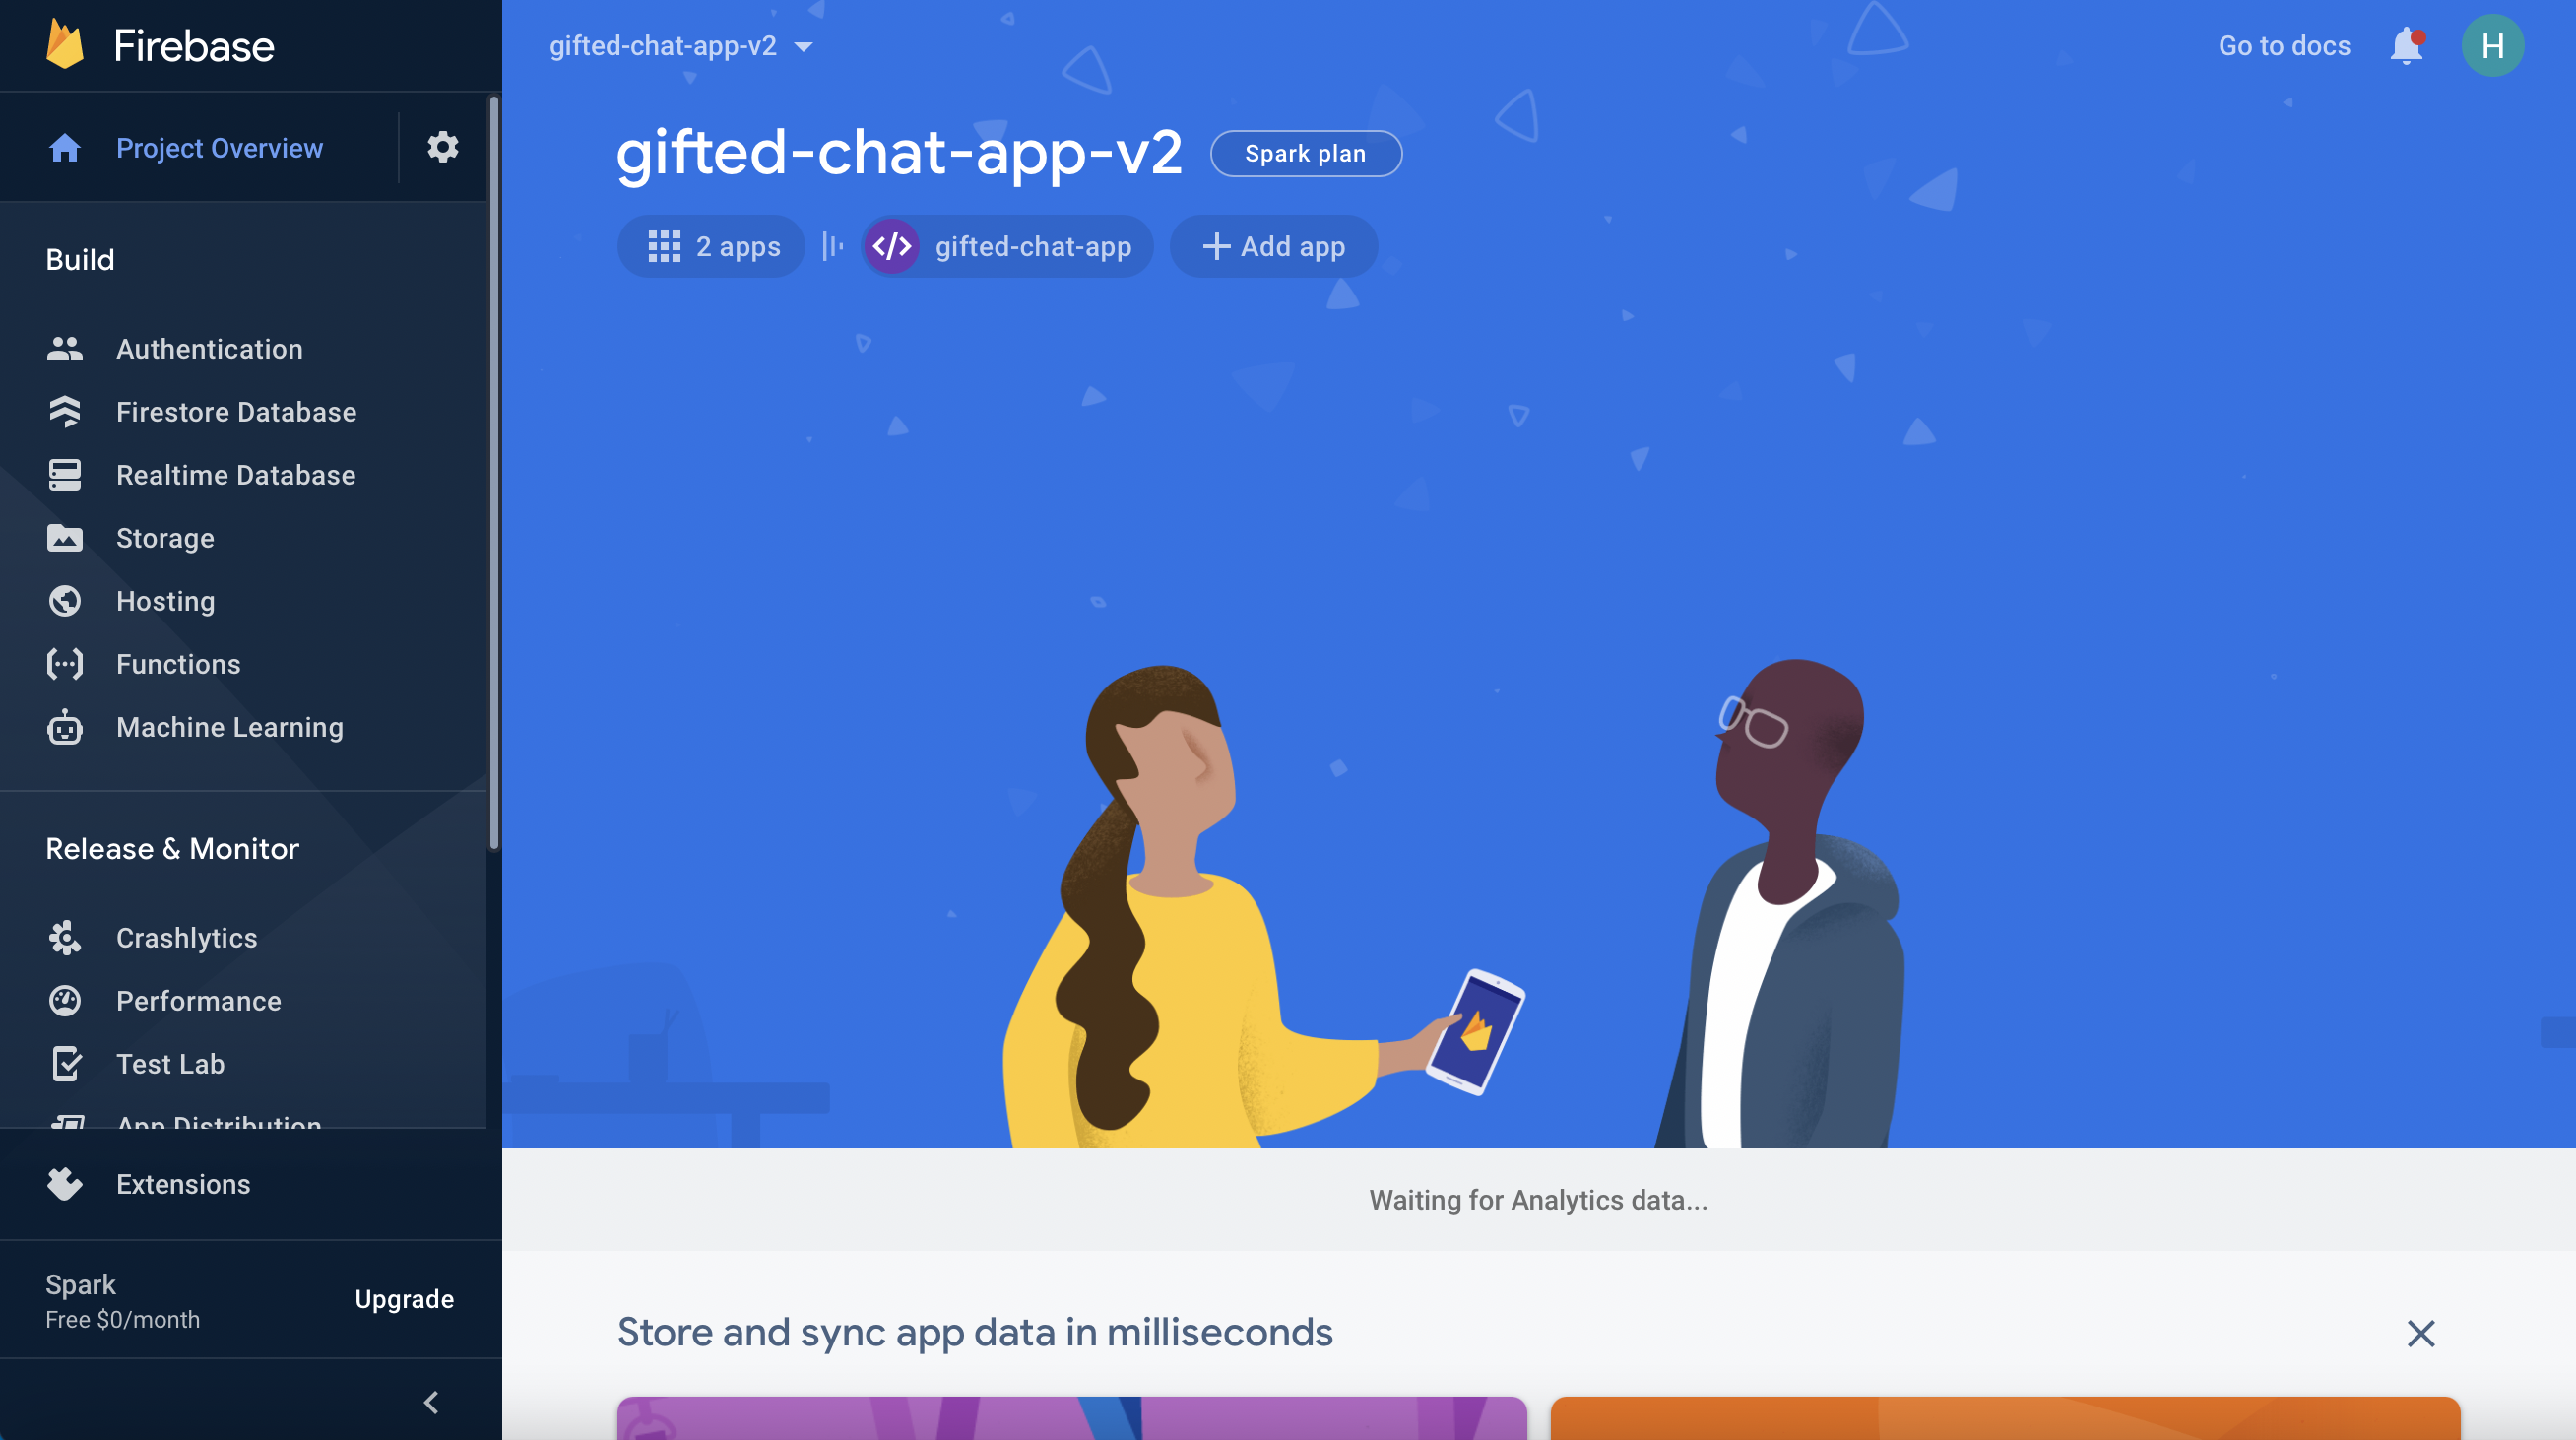
Firebase Dashboard
Once you’re done registering the application, you’ll be presented with a screen containing your application credentials.
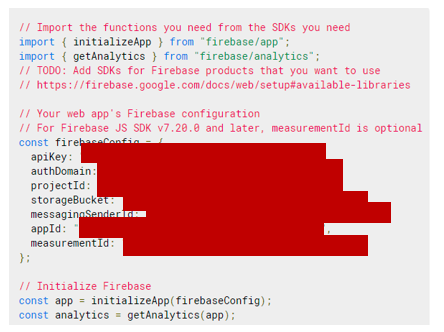
Firebase credentials
Please update your created “env.js” file with the above corresponding information. Congratulations, now that you're done with the installations, let's do some configurations.
Step 4: Initializing CometChat for the Application
The App.js File
The below codes initialize CometChat in your app before it spins up. The App.js file uses your CometChat API Credentials. We will get CometChat API Credentials from the env.js file. Please do not share your secret keys on GitHub.
Actually, App.js does not contain only the above code. It also contains other business logic of the application. The full source code of App.js file can be found here.
Step 5: Create the Permissions for the Application
In this application, we need to provide the calling features. For this reason, the user needs to provide some permissions for the application such as accessing the camera, recording video, writing/reading to external storage, and so on. Because we are wanting the application to run on both Android and IOS. Therefore, this section will help you know how to make the application request permissions from the end-users.
Android
For Android, you need to write the “getPermissions” function and then call it inside the “useEffect” of the App.js file. You can refer to the code snippet below for more information.
IOS
For IOS, you need to add the following content to your Info.plist file.
Step 6: Configuring the Firebase File
This file is responsible for interfacing with Firebase authentication. Also, it makes ready our google authentication service provider enabling us to sign in with google. Secret keys will be retrieved from the env.js file. As mentioned above, please do not share your secret keys on GitHub.
Step 7: Setting Up the Context.js File
In some cases, we need to share the state between components without passing data down at every level. For this reason, we can avoid props drilling. To achieve that, we can use React Context API. Please create a file which is called “context.js” file inside your root folder. You can get the source code of the context.js file here.
Step 8: Project Structure
The image below reveals the project structure. Make sure you see the folder arrangement before proceeding. Now, let's make the rest of the project components as seen in the image above.
In this project’s structure, we’ve created the following files/folders:
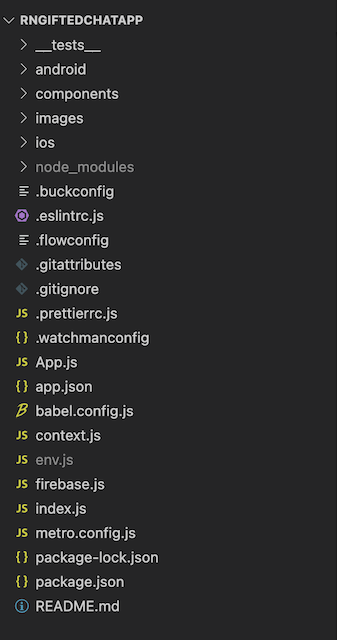
Project Structure
components: this folder stores components that will be used in the application.
images: this folder contains images that will be used in the application such as audio icon, video icon, settings icon and so on.
env.js: this file stores configuration of the application such as Firebase and CometChat configuration.
context.js this file helps us store the state that will be shared across all components without passing down at every level. For this reason, we can avoid props drilling.
Step 9: Configuring Images for the Application
As mentioned above, we need to create a folder which is called “images”. This folder is used to store images in the application. To get images for the application, you can get from here.
The Login Component
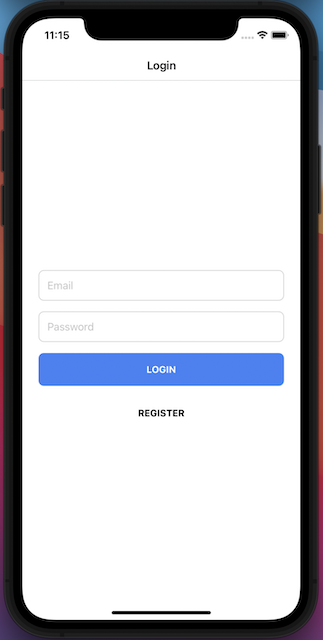
The Login Page
This component is responsible for authenticating our users using the Firebase google authentication service. It accepts the user credentials and either signs him up or in, depending on if he is new to our application. See the code below and observe how our app interacts with Firebase and the CometChat SDK. The full source code can be found here.
Before calling any functions from the CometChat service, please make sure that. CometChat was initialized successfully in your application. After the user has logged in successfully. He/She will be redirected to the home page. In this case, we need to store the authenticated user in the AsyncStorage for further usages. You can refer to the code snippet below to understand how to log in to the CometChat.
The Sign Up Component
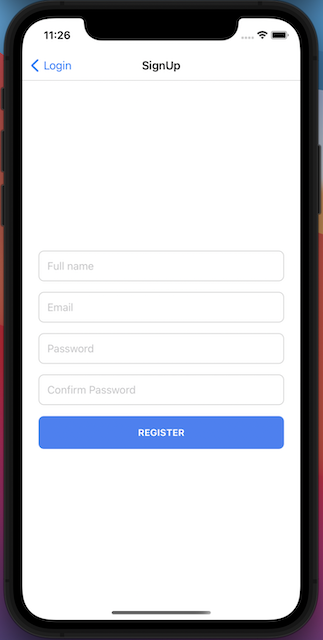
The SignUp Component
The sign-up component will help end-users to register new accounts. This component will do two things. The first thing is to register new accounts on Firebase by using the Firebase authentication service. Aside from that, it also registers new accounts on CometChat by using the CometChat SDK. The full source code can be found here.
To create a new account from CometChat, you need to create a new user object based on the User model from CometChat. Following that, the created user will be registered on CometChat by calling the “registerUser” function from the CometChat service. Please do not forget to pass your CometChat auth key as the second parameter You can refer to the below code snippet for more information.
The Home Page
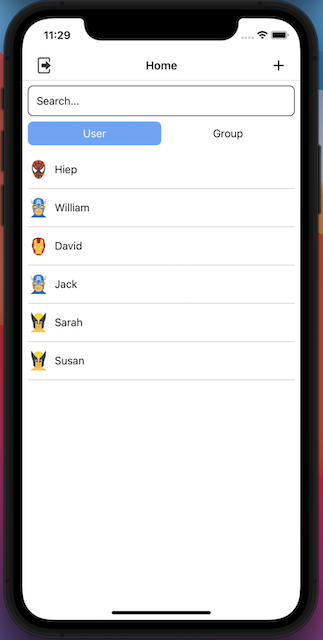
The Home Page - Search Users
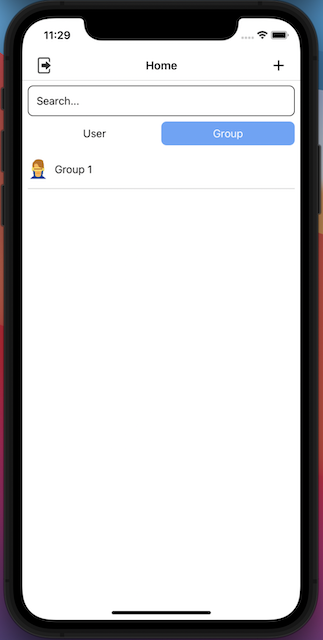
The Home Page - Search Groups
As you can see in figure 9 and figure 10, the home page will show the list of users and groups. We have a search box in which the user can type some keywords that will be used to search the users/groups. On the other hand, the UI is providing two buttons - Users & Groups. It means that, if the user chooses the “Users” option, they want to view the list of users and vice versa. The full source code of the Home component can be found here.
To search the list of users/groups, we need to call the CometChat service. In this case, we define two functions. The first one is the “searchUsers” function and the second one is the “searchGroups”. Both of them build the request payload by using the builder design pattern and call the “fetchNext” function from the CometChat service to fetch the corresponding results, then display the results on the UI by updating the state. You can refer to the below code snippet for more information.
On the right side of the home page header, you can see the plus icon. If the user clicks on that icon, the application redirects the user to the create a group page, and on that page, the user will be able to create a new public group for the application. The public groups will be displayed on the group's section of the home page in which other users can view and join any groups they want. Creating a new group will be discussed in the following section.
Creating a new group will be discussed in the following section.
On the other hand, if the user selects an item from the list, we will update the “selectedConversation” state using React Context API so we can access that state from different places without passing it down manually at every level. If the user selects a group, and he/she has not joined that group before, the “joinGroup” function will be executed to let the user join the selected group. After selecting an item from the list, the application will redirect the user to the chat page. The chat page, and create a new public group page will be discussed in the following section. You can refer to the below code snippet for more information.
The Create Group Page
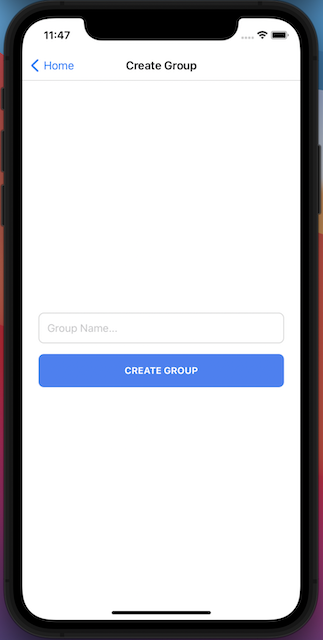
The Create Group Page
To create a new group, the user needs to input the group’s name and then clicks on the “Create Group” button. After that, the application calls the CometChat service to create a new public group. The full source code of creating a new group can be found here.
As mentioned above, we need to call the CometChat service to create a new group. For this reason, the “createGroup” function is created to achieve that. Inside that function, we define some information for the group such as the group’s name, group’s icon, group's type, group’s uid - using the uuid library. You can refer to the below code snippet for more information.
The Chat Page
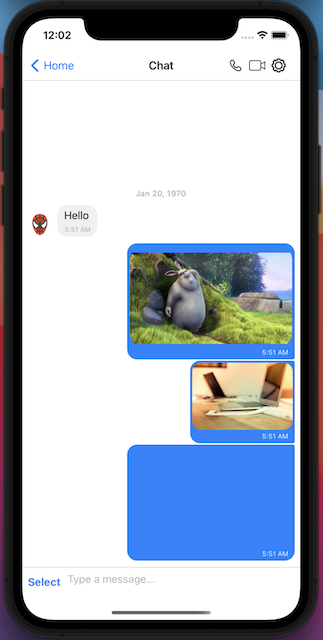
The Chat Page
According to the requirements, the users can chat with each other or chat in groups. We are using React Native to build our mobile application. It means that we are working with components. For this reason, we will create a single component, which is called, “Chat” to reuse for both private chat and group chat. The full source code can be found here.
To build the Chat layout, we will get support from React Native gifted chat library. You need to follow the below steps to install and use that library in the application:
Dependency
Use version 0.2.x for RN >= 0.44.0
Use version 0.1.x for RN >= 0.40.0
Use version 0.0.10 for RN < 0.40.0
Installation
Using npm: npm install react-native-gifted-chat --save
Using Yarn: yarn add react-native-gifted-chat
*Note: Actually, we have done this part in the above section - Installing the App Dependencies.
React native video and expo av
Both dependencies are removed since 0.11.0.
You still be able to provide a video but you need to provide renderMessageVideo prop.
Known Issues
At this time of writing this tutorial, I have to face with the below issue.
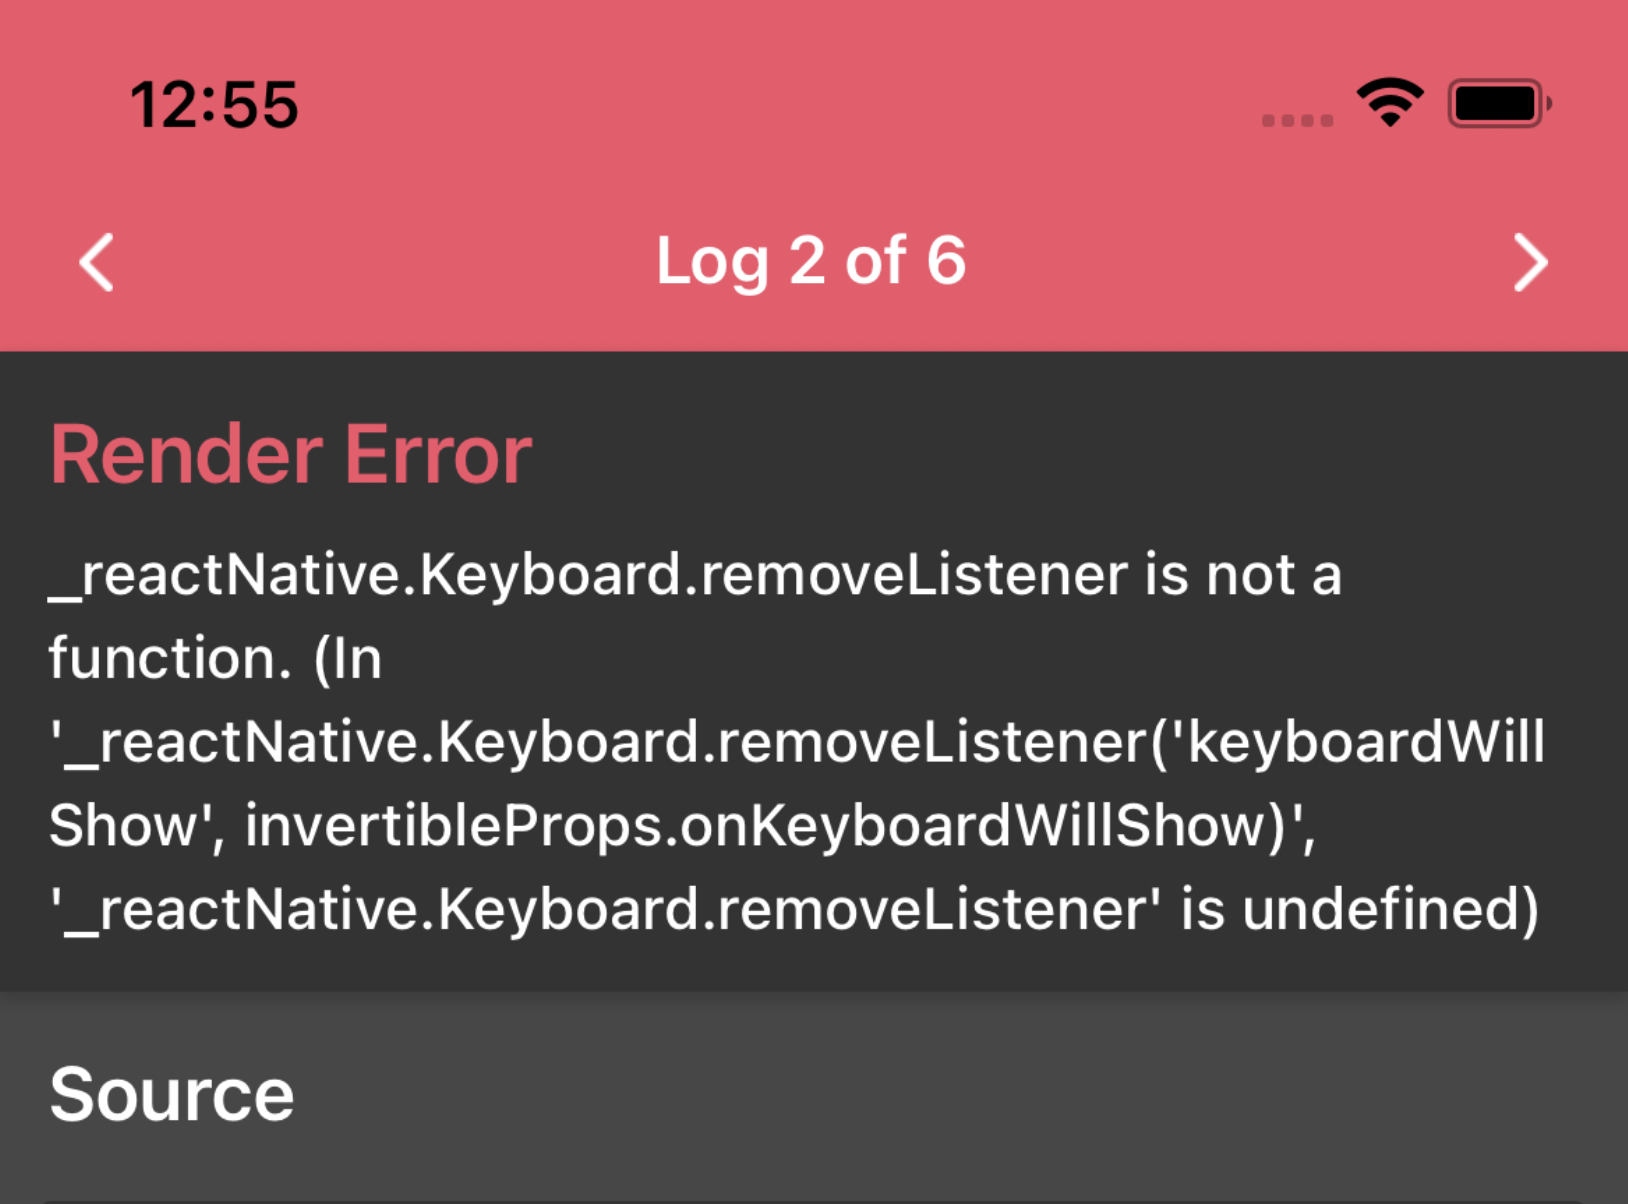
If you are facing the same issue, please follow this link to overcome this issue.
Example of React Native Gifted Chat App
The above code snippet is just a simple example from React Native gifted chat library. However, in our application, we need more than that, for example, we need to render video messages. Moreover, the message composer is also customized to let the end-user chooses files from their phone (images, videos). Those things will be explained in detail in the following parts of this section.
We need to display the list of messages whenever the user chooses a conversation (private chat or group chat) and navigate to the chat page. The below steps need to be implemented:
Step 1: Define a state to store the list of messages.
Step 2: Define a function to load the list of messages from CometChat.
Step 3: Call that function by using useEffect hook.
Step 4: Transform the response before update the state.
Step 5: After updating the state, the component will be re-rendered, and the list of messages will be display on the UI.
That’s why we need to have the step 4 to transform the response from the CometChat service first and then display the transformed messages on the UI. You can refer to the below code snippet for more information.
According to the requirement, the application allows the user to attach files (images, videos). We need to provide a way for rendering video messages on the gifted chat component. The gifted chat component has in-built support for rendering images. To render video messages, the render function will be defined and passed to the “renderMessageVideo” props. Those props will allow us to customize the UI for video messages and render them on the gifted chat UI.
The next part is to figure out how to send a text message. After the user types something on the message composer and hits the send button. The process should look like this.
Step 1: Define a callback function when the user hits the send button on the React Native gifted chat UI.
Step 2: Inside that function, call the CometChat service to store the sent message.
Step 3: If the step 2 is a success, the state will be updated, the sent message will be append to the gifted chat UI.
Besides sending a text message, the application allows the user to attach images, videos. To select a file from the devices, we need to use the react-native-image-picker library. This library helps us to choose different file types from our phones, tablets, and so on. You can refer to its documentation for more information. To upload files in the application, the below steps need to be followed:
Step 1: Make sure that react-native-image-picker has been installed.
Step 2: Customize the message composer by creating a select button. Whenever the user clicks on that button, a popup will be displayed to allow the user to choose a file from his/her device.
Step 3: After the file is selected successfully, the application will call the CometChat service to send a media message.
Step 4: If step 3 is a success, we update the state and display the media on the UI.
One of the most important things about live chat is listening to the incoming messages in real-time. To achieve that in our application, we will need support from the CometChat service. The CometChat service is providing a way to help us listen to messages from other users. You can refer to the below code snippet for more information.
Following that, we have a case. If David have opened a chat screen of Henry and then Henry has logged in to the application. The status on the header of the chat page should be changed from Offline to Online on David’s side. We can use the UserListener to get real-time events of user online/offline. You can refer to the below code snippet for more information.
The Calling Feature
In this section, we will show needs to provide a way to let the user make an audio/video call. It could be a private call between two users or a group call. The full source code can be found here. For more information about the calling features, you can refer to the CometChat documentation. A user can make a call to another user even that user is opening the chatbox, or not. For example, Henry is opening the hatbox and he would like to make a call with Anna. However, Anna is on another screen, she is not opening the chatbox. To increase the UX, we still want Anna can receive the call from Henry. For this reason, we will update the code in our main file, and it is App.js. Please refer to the below section for more information.
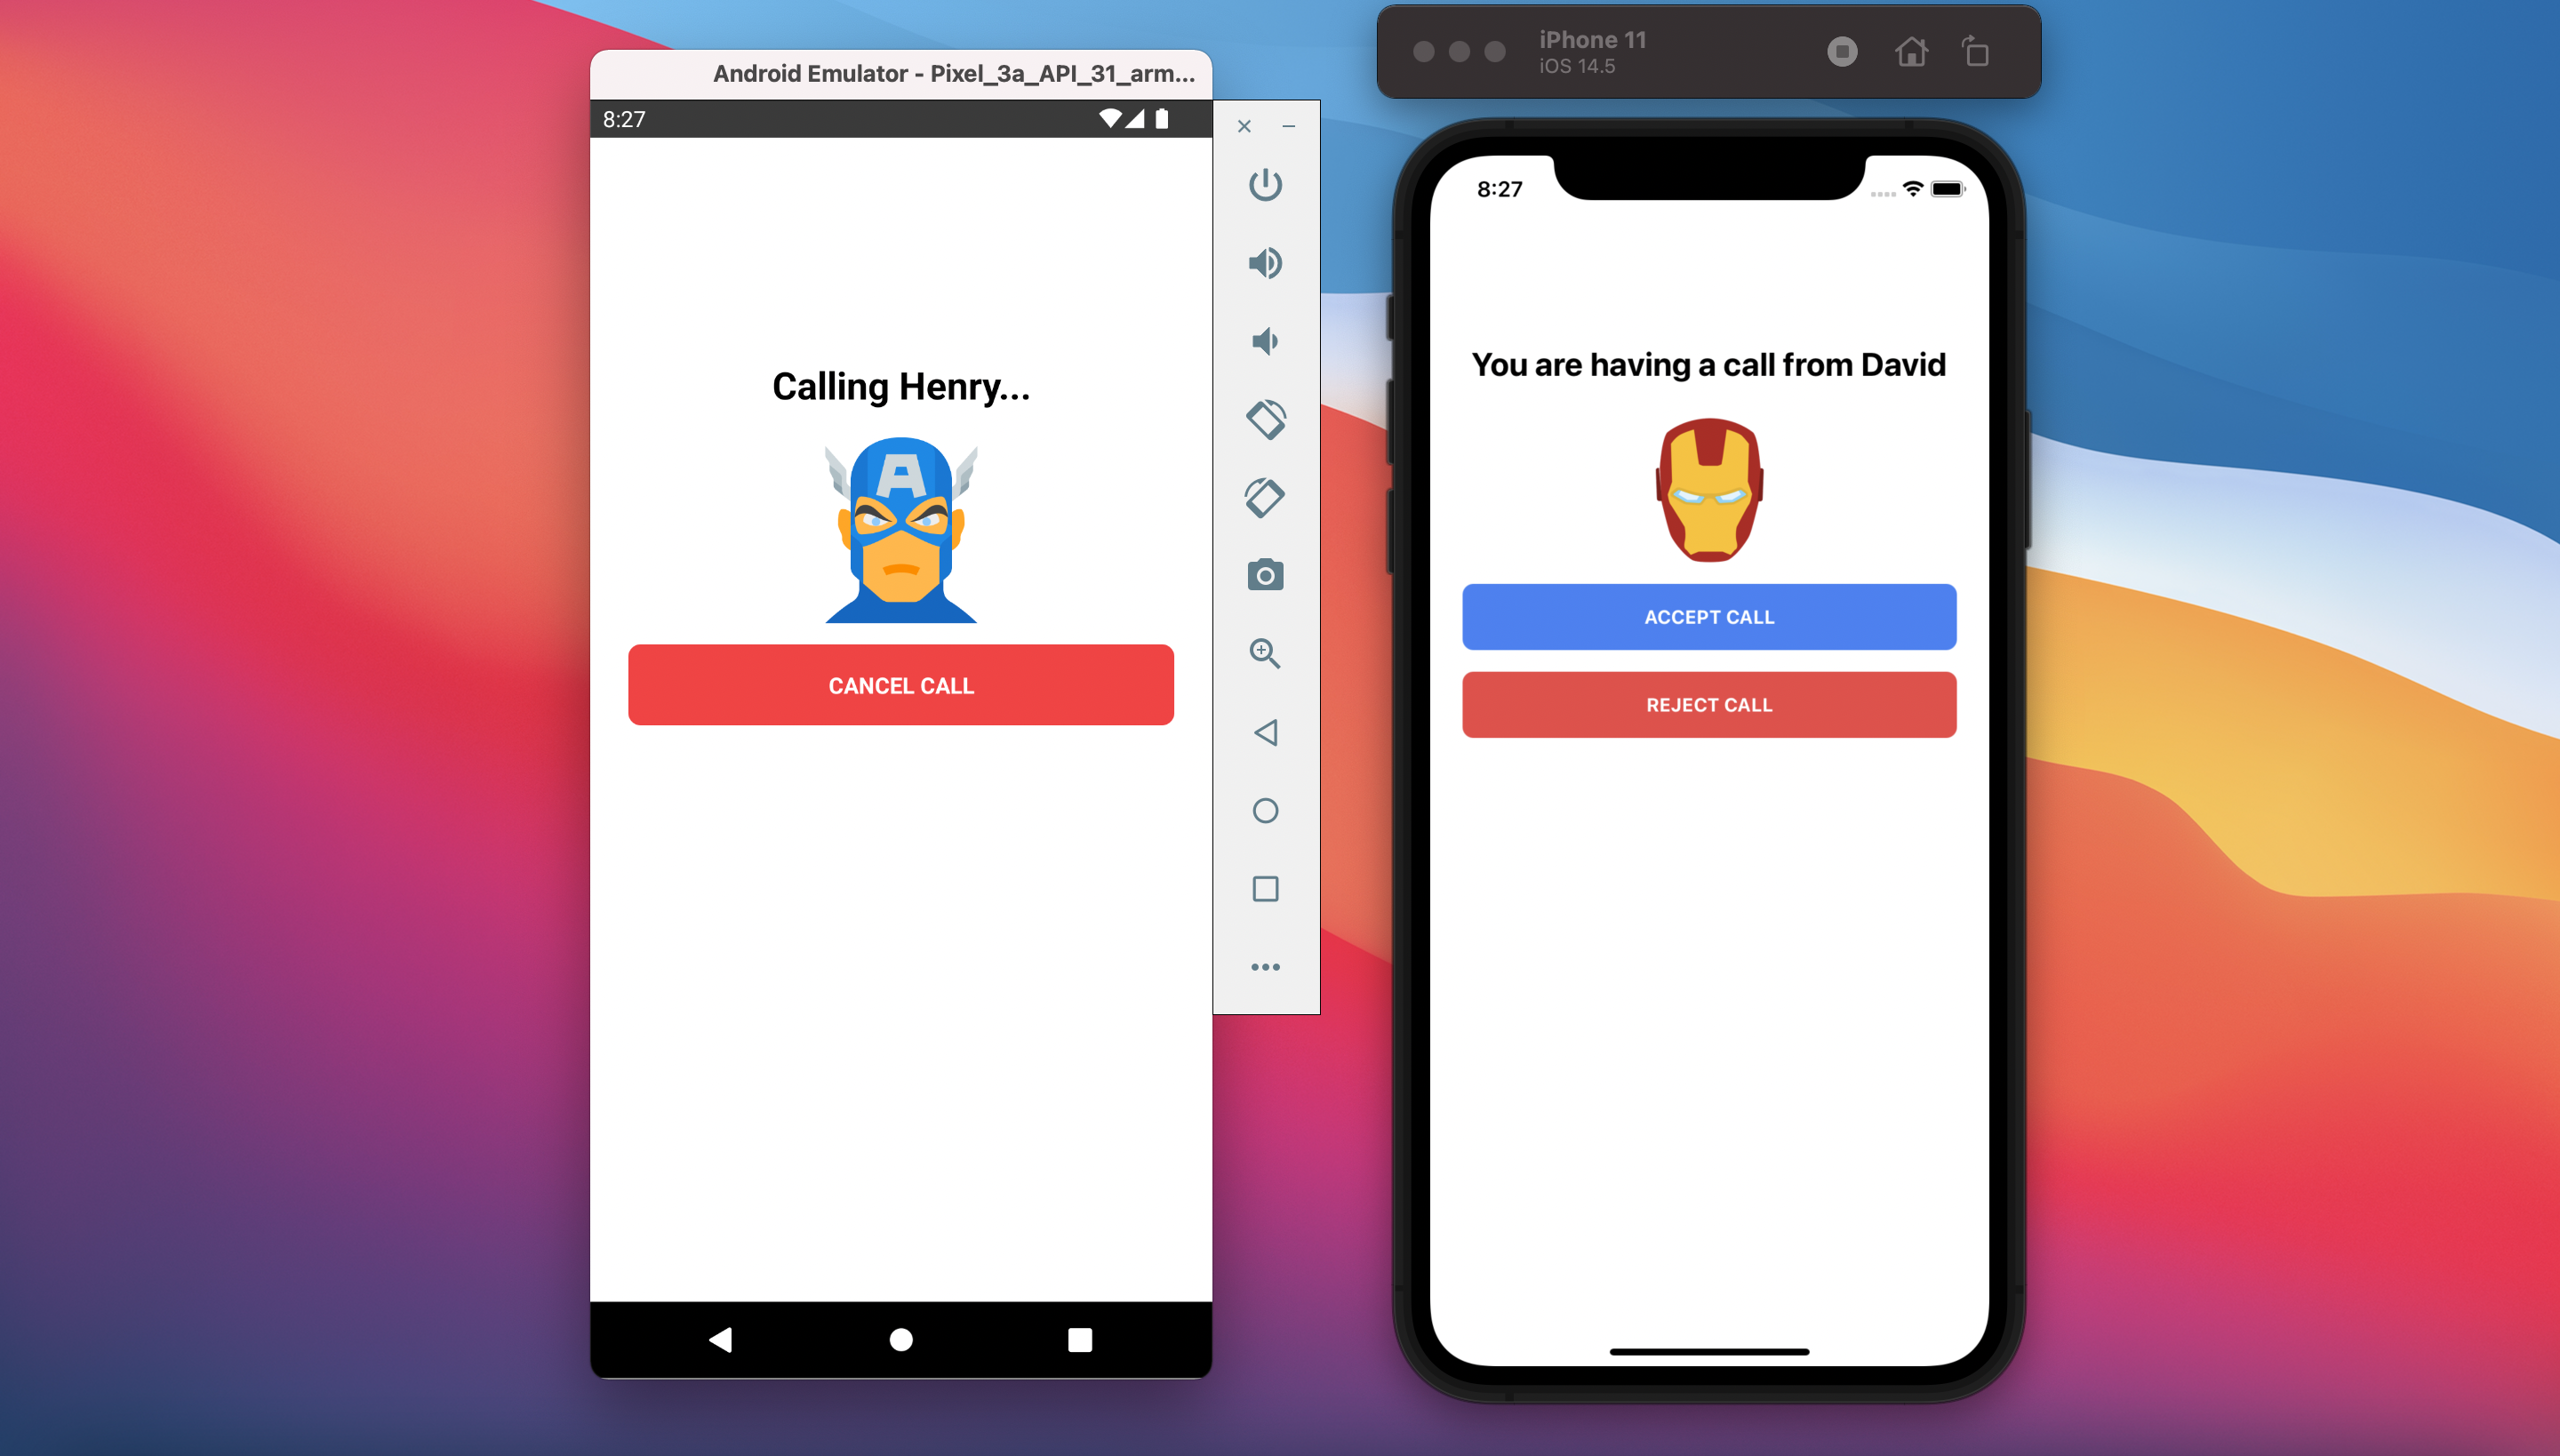
Calling screen between 2 users before the call has actually started
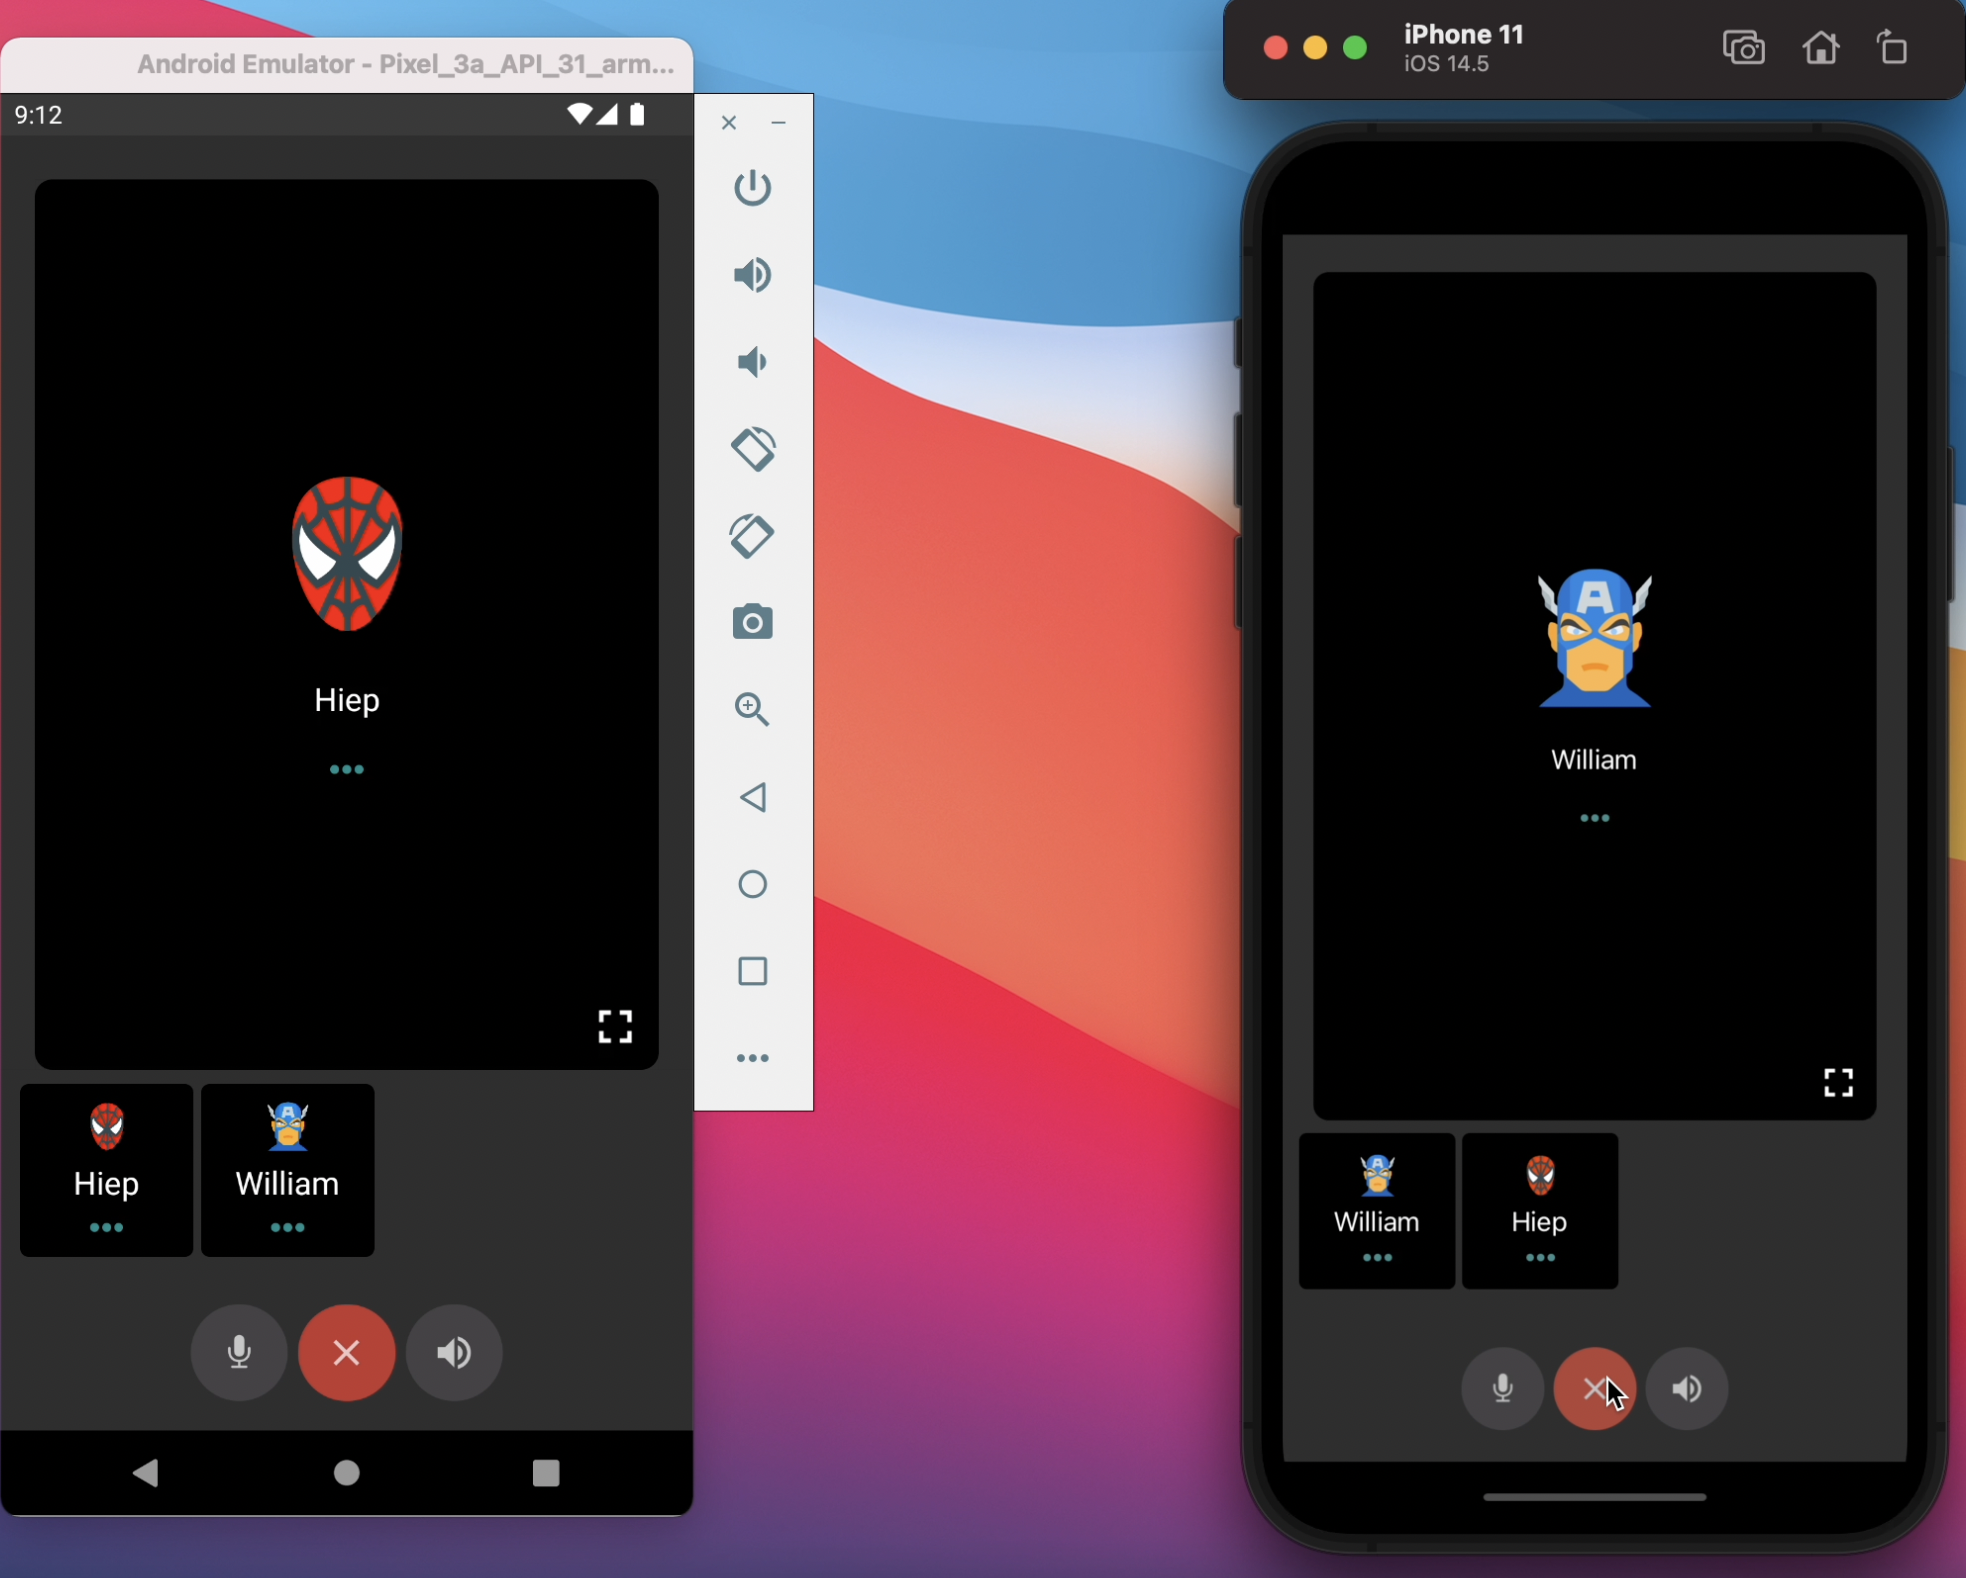
Audio Call
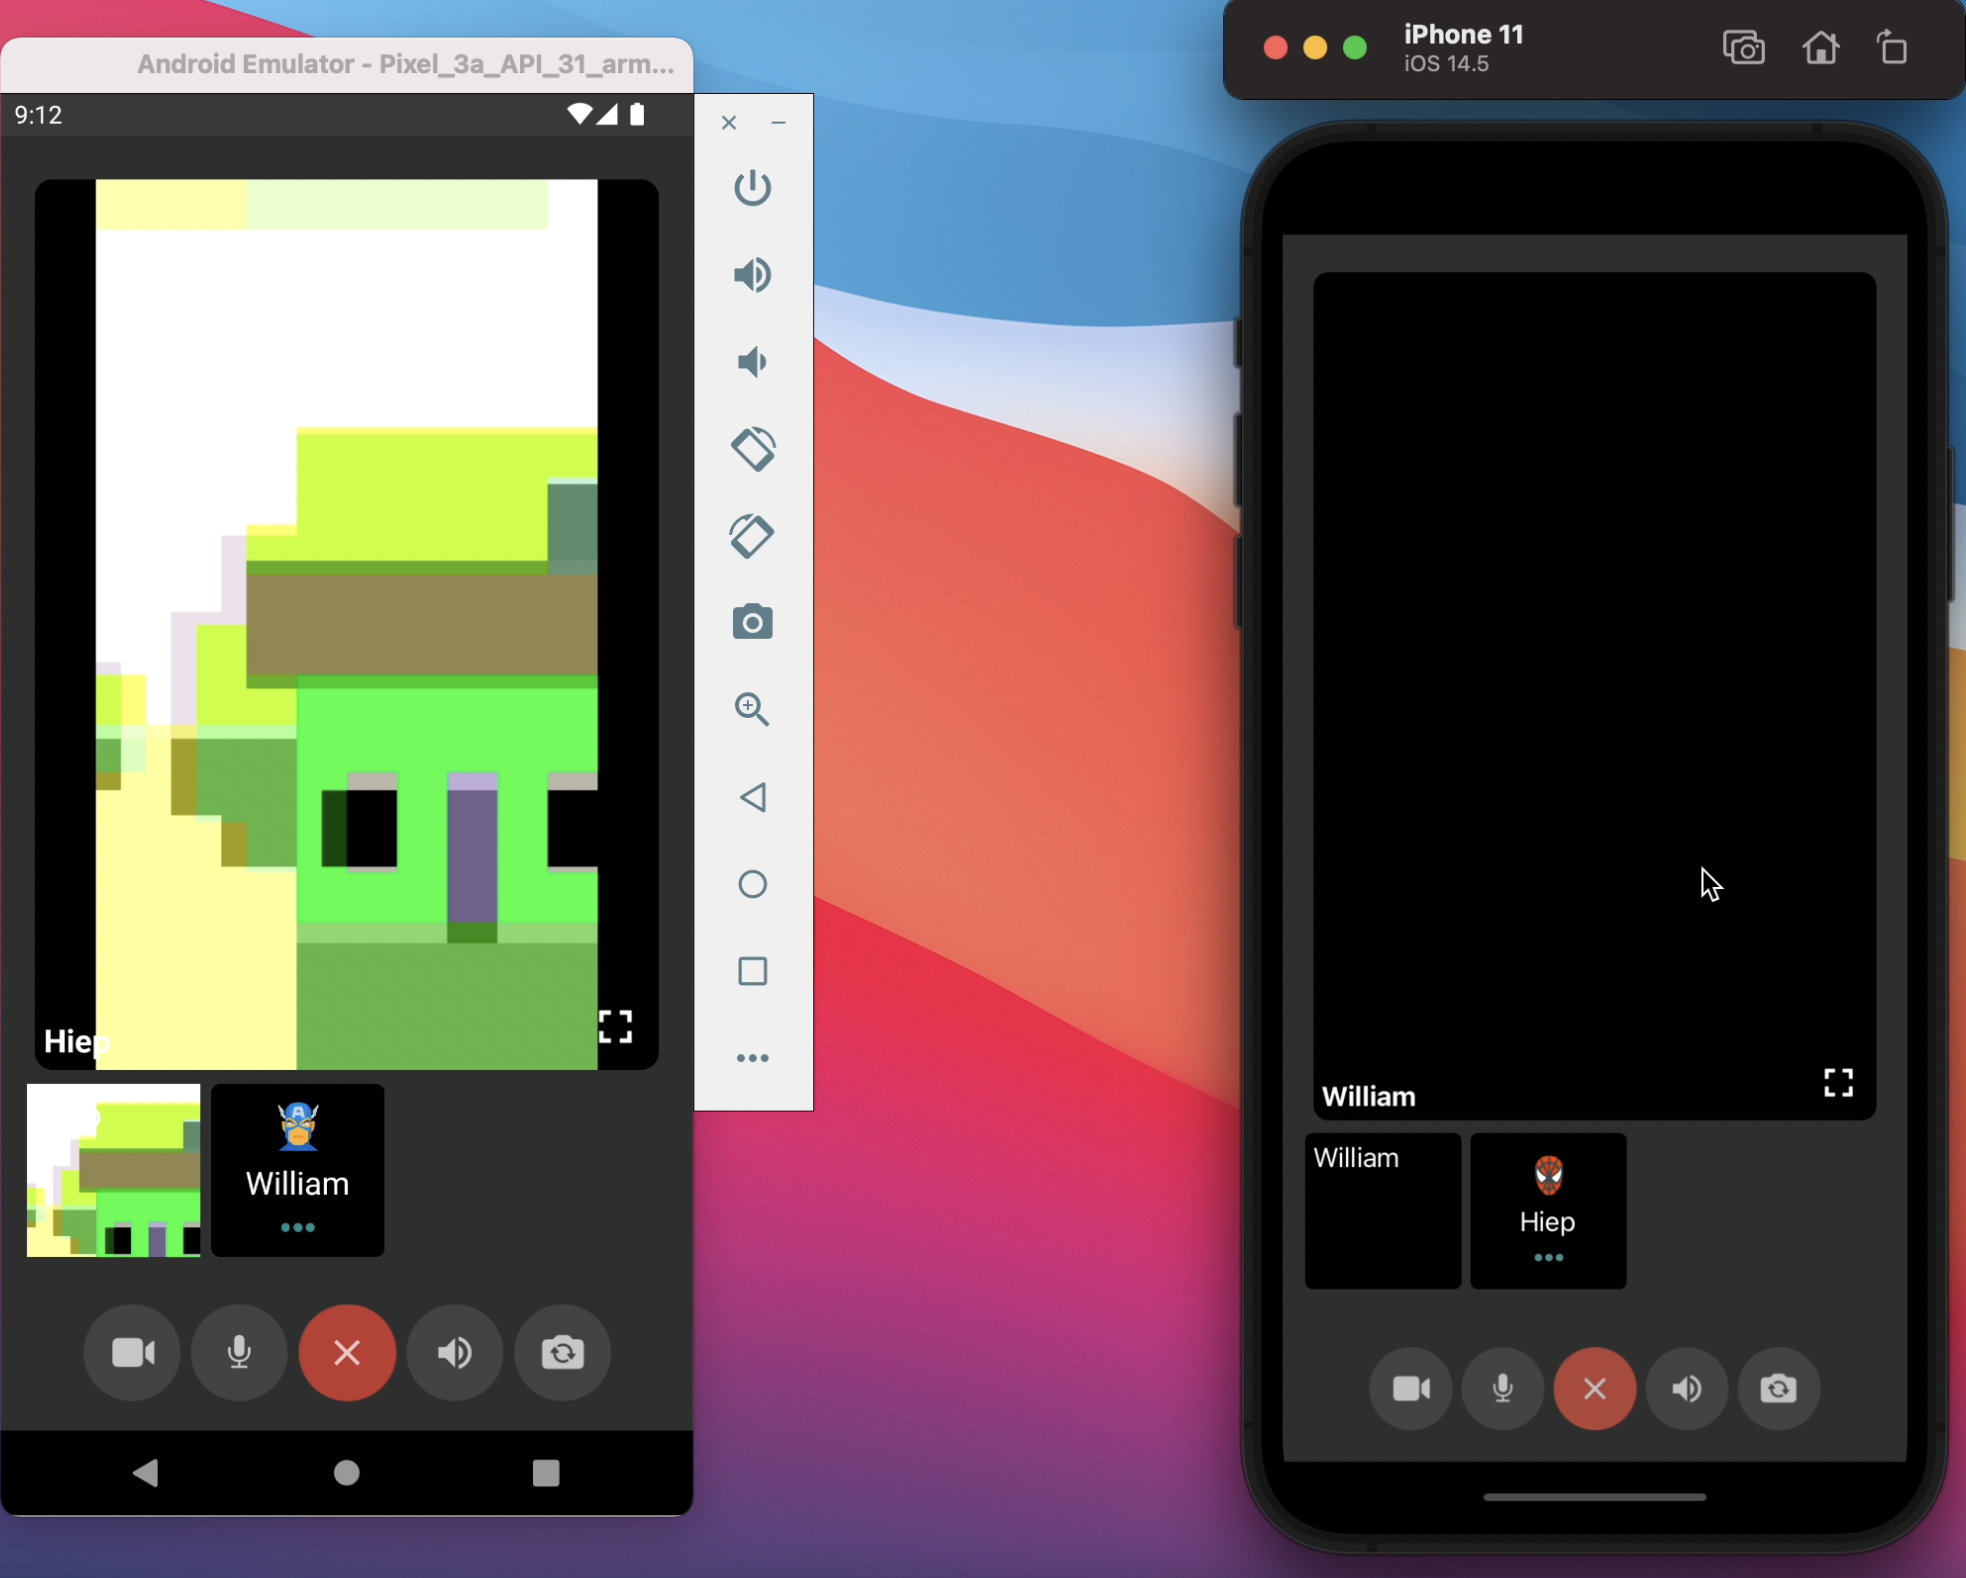
Video Call
To achieve this feature, we need to follow the documentation from CometChat. You can refer to the below code snippet.
The Manage Group Page
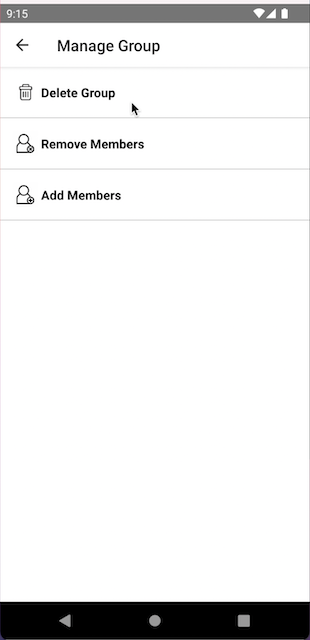
The Manage Group Page
According to the requirements, we need to provide a way to let the user manage a group if the user is the owner of that group. The user can add members to the group or remove members from that group. We can achieve that feature so easily by using the CometChat services. The manage group page is taking responsibility for rendering the group management options. Whenever the user selects an option. He/She will be redirected to the corresponding screen. The full source code can be found here. You can refer to the code snippet below and the documentation from CometChat for more information.
The Add Group Members Page
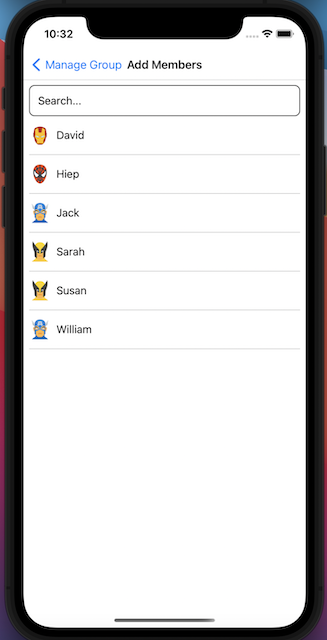
The Add Group Members Page
The add group members page will let the user to add users to a group. The feature can be done with supporting from the CometChat service. The full source code of this page can be found here.
The Remove Group Members Page
The remove group members page allows the user to remove users from a group. Like adding members to a group, the CometChat service is providing a way to help us achieve that feature with minimal effort. The full source code of this page can be found here.
The Logout Feature
On the home page, if the user clicks on the exit icon. A popup will be shown to make sure that the user wants to log out from the application. Following that, we need to do some clean-up actions such as calling logout function from the CometChat service and then removing the authenticated information from the AsyncStorage and navigating the user back to the login page. You can refer to the below code snippet for more information.
Wrapping Up
In conclusion, we have done an amazing job in developing a React Native gifted chat app by leveraging React Native, Firebase, and CometChat. You’ve been introduced to the chemistry behind React Native gifted chat app and how the CometChat SDK makes chat applications buildable.
React Native gifted chat app supports the UI part. For the business logic, we have to modify it and integrate it with the back-end services. The good news is the CometChat team is providing React Native UI Kit. You just need to follow its documentation. After a few steps, you will have an end-to-end including the UI and its business logic that you will need for a chat application.
You have seen how to integrate most of the CometChat functionalities such as texting and real-time messaging, voice/video call, managing users/groups. I hope you enjoyed this tutorial and that you were able to successfully clone React Native gifted chat app. It's time to get busy and build other related applications with the skills you have gotten from this tutorial. You can start building your chat app for free by signing up to the cometchat dashboard here.
About the Author
Hiep Le is a software engineer. He takes a huge interest in building software products and is a full-time software engineer. Most of his work is focused on one thing - to help people learn.

Hiep Le
CometChat
