Get your Application Keys
Signup for CometChat and then:- Create a new app
- Head over to the API Keys section and note the Auth Key, App ID & Region
Add the CometChat Dependency
CocoaPods
We recommend using CocoaPods, as they are the most advanced way of managing iOS project dependencies. Open a terminal window, move to your project directory, and then create aPodfile by running the following command.
- Swift
- Swift
CometChatSDK framework through CocoaPods.
- Swift
CometChatSDK by command
- Swift
Swift Packages
To install Swift Packages you can use Xcode package manager**.**- Open Xcode, go to the project’s General settings tab and select the project under Project in the left column.
- Go to the Swift packages tab and click on the + button.
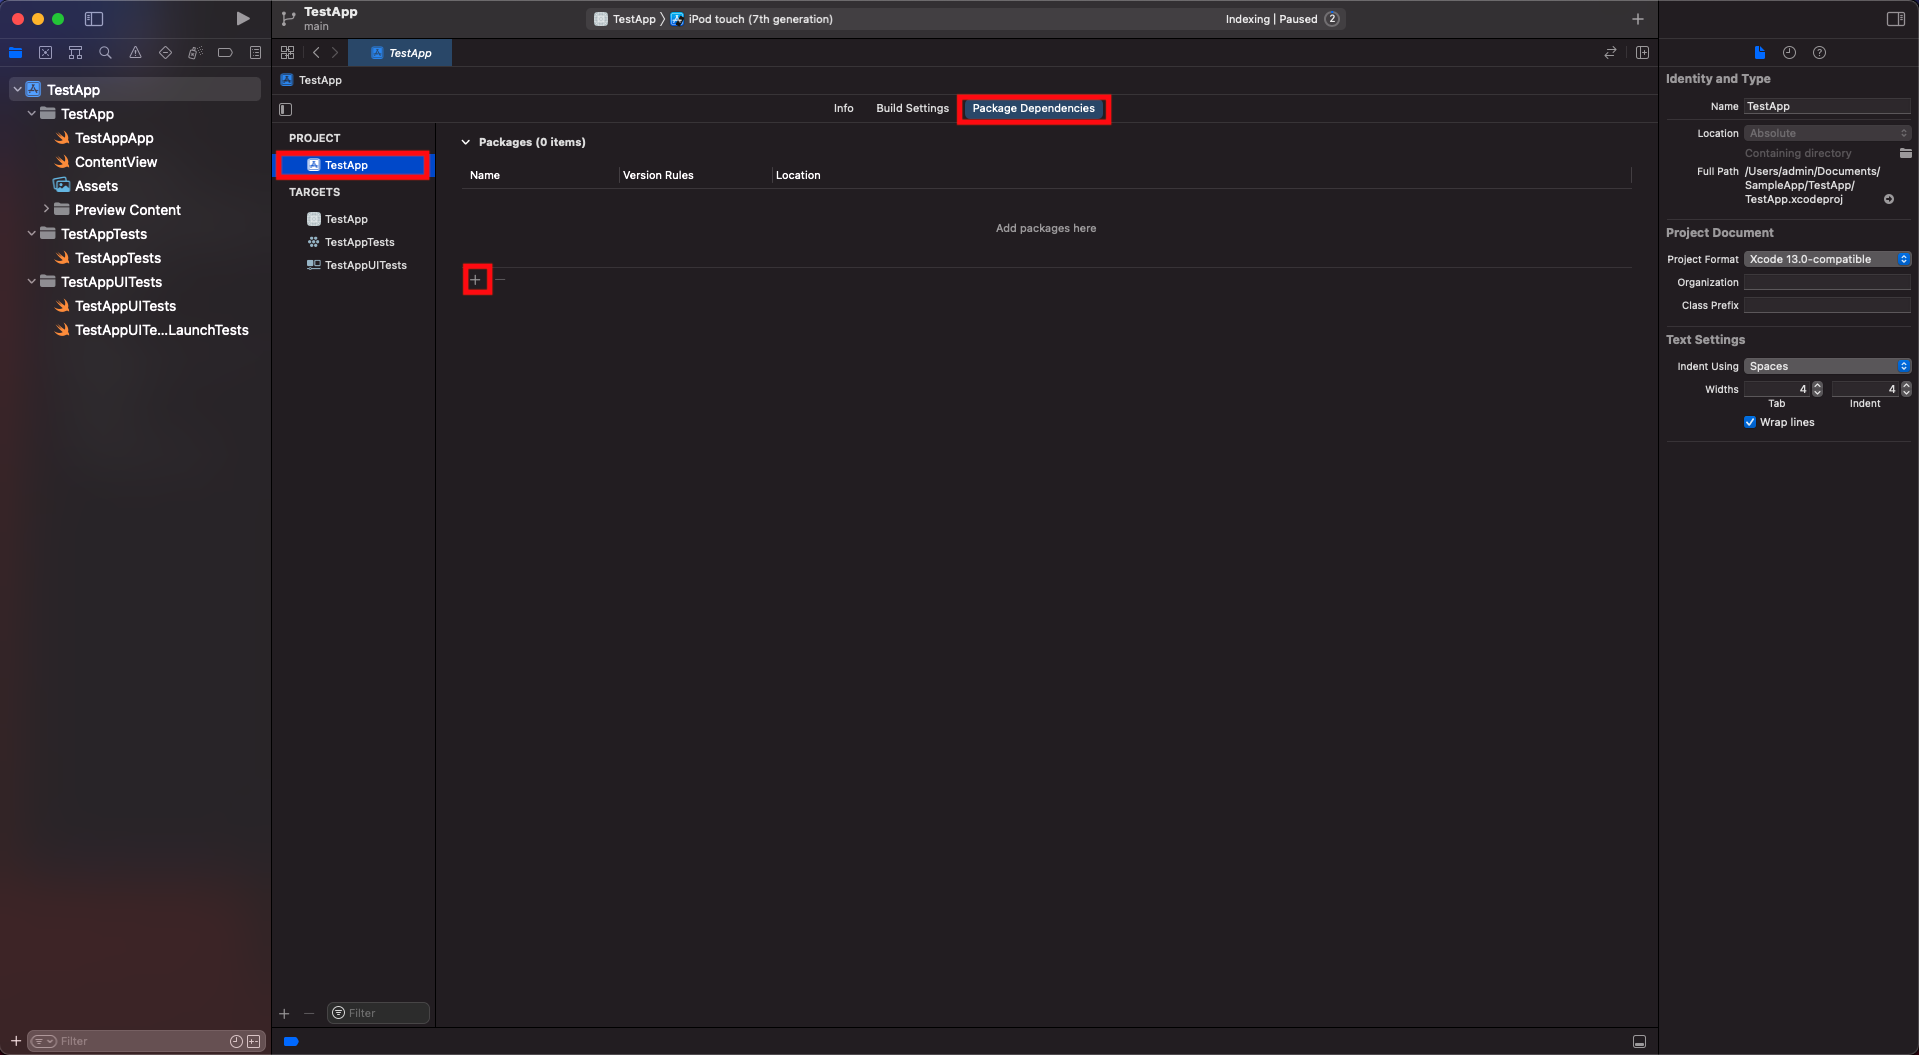
- Once the pop-up appears, enter the github repository address in the search bar
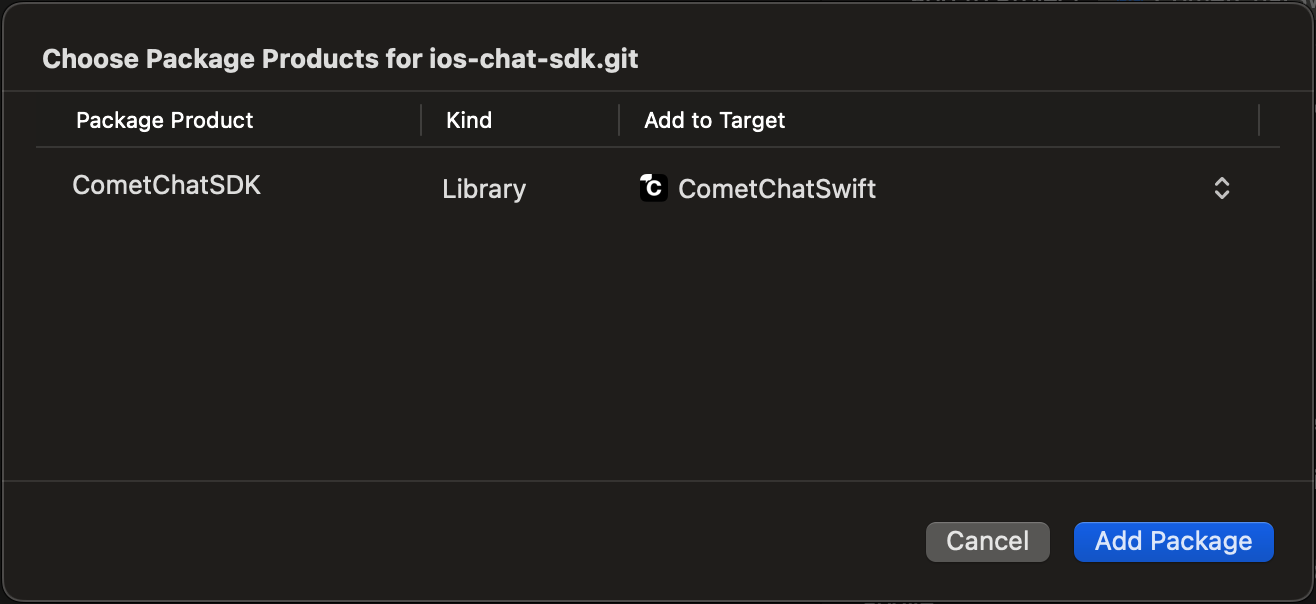
https://github.com/cometchat/chat-sdk-ios.gitand set dependency rule toUp to Next Major Versionand set version as4.1.0. Then click on the Add Package button.
CometChatSDKmust be checked in the Package Product column and click on the Add Package button. This will add Package Dependencies menu in Xcode.
Request Authorization
Prepare your app for this requirement by providing justification strings. The justification string is a localizable message that you add to your app’sInfo.plist file to tell the user why your app needs access to the user’s photo library, Camera, Microphone. Then, App prompts the user to grant permission for access, the alert displays the justification string you provided, in the language of the locale selected on the user’s device. You can do this as follows:
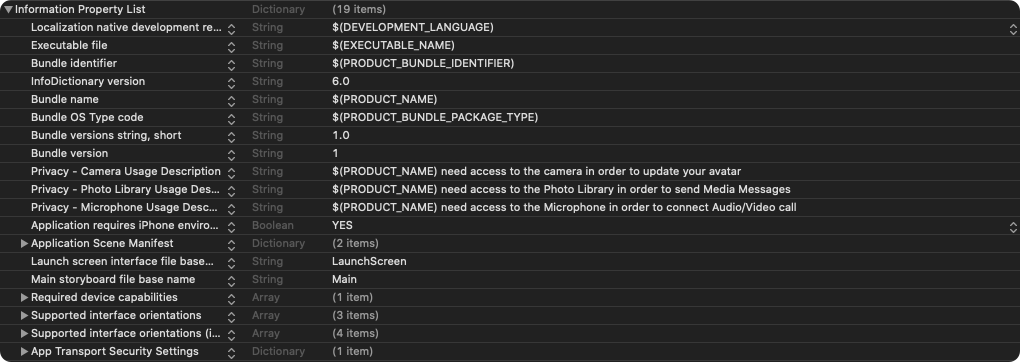
- Info.plist
Setup Bitcode
You can set the Enable Bitcode setting to YES present in build settings in your XCode project.
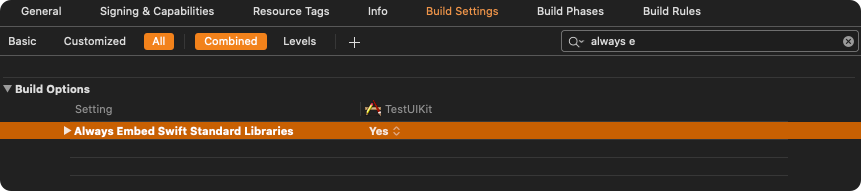
Swift Standard Libraries
CometChatSDKframework build on Swift, you have to ensure the required libraries are embedded. This can be done by setting the “Always Embed Swift Standard Libraries” checkbox in your target’s build settings to “Yes”:
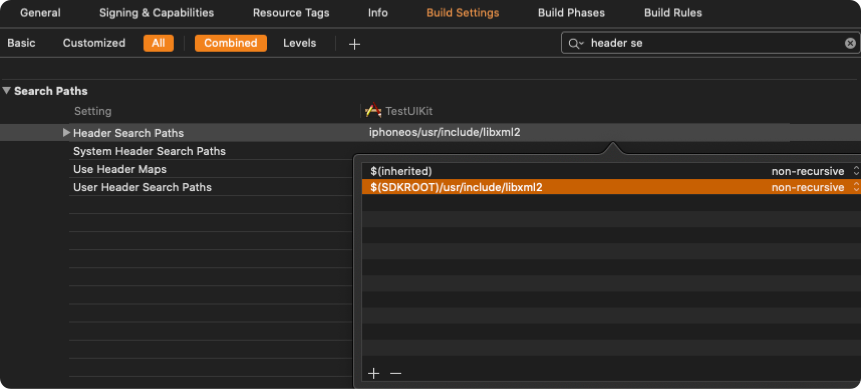
Set Header Search Path
Set theHeader Search Paths to $SDKROOT/usr/include/libxml2.
Initialize CometChat
Theinit() method initializes the settings required for CometChat.
The init() method takes the below parameters:
- appID - You CometChat App ID
- appSettings - An object of the AppSettings class can be created using the AppSettingsBuilder class. The region field is mandatory and can be set using the
setRegion()method.
AppSettings class allows you to configure three settings:
- Region: The region where you app was created.
- Presence Subscription : Represents the subscription type for user presence (real-time online/offline status)
- autoEstablishSocketConnection(boolean value): This property takes a boolean value which when set to true informs the SDK to manage the web-socket connection internally. If set to false, it informs the SDK that the web-socket connection will be managed manually. The default value for this parameter is true. For more information on this, please check the Managing Web-Socket connections manually section. The default value for this property is true.
- overrideAdminHost(adminHost: string): This method takes the admin URL as input and uses this admin URL instead of the default admin URL. This can be used in case of dedicated deployment of CometChat.
- overrideClientHost(clientHost: string): This method takes the client URL as input and uses this client URL instead of the default client URL. This can be used in case of dedicated deployment of CometChat.
didFinishLaunchingWithOptions: method of the AppDelegate class.
- Swift
- Objective C
appId with your CometChat App ID in the above code.
| Parameter | Description |
|---|---|
| appID | CometChat App ID |
| appSetting | An object of the AppSettings class. |