Enable Push notifications
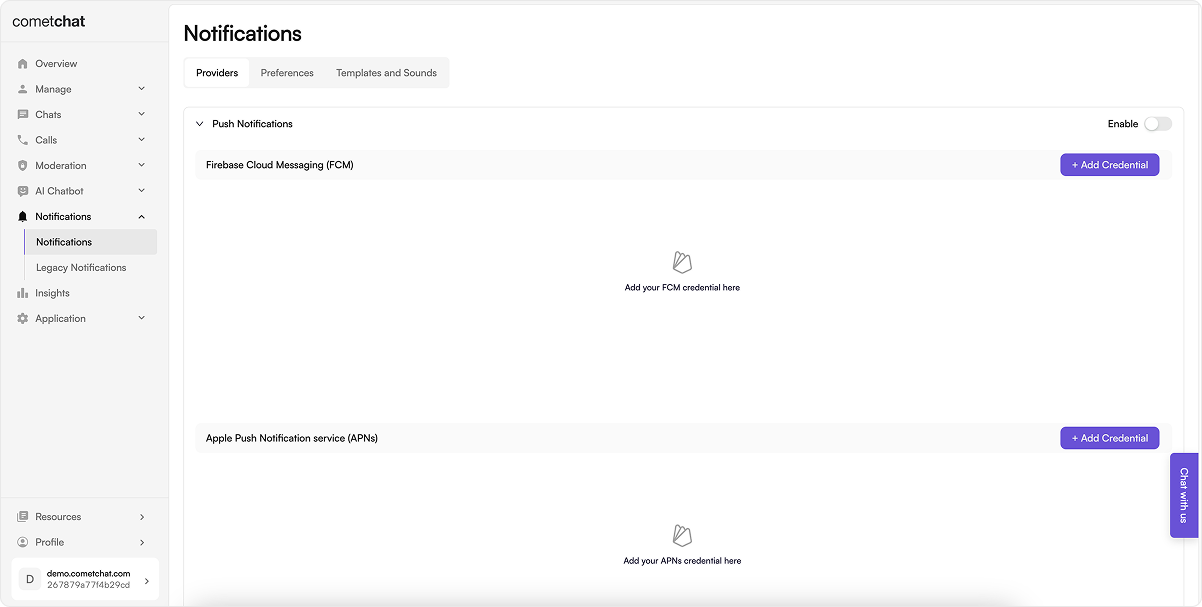
- Login to CometChat dashboard and select your app.
- Navigate to Notifications > Notifications in the left-hand menu.
- Enable the Push notifications feature.
- Continue to configure Push notifications by clicking on “Configure”.
Add Providers
Firebase Cloud Messaging (FCM) and Apple Push Notification Service (APNS) are the two primary supported providers for sending push notifications.Add FCM credentials
Pre-requisite
Generate a service account key for your Firebase application by navigating to the “Service accounts” section within the “Project settings” of the Firebase Cloud Messaging Dashboard. Generate new private key and download the JSON file. This will be required in the next steps.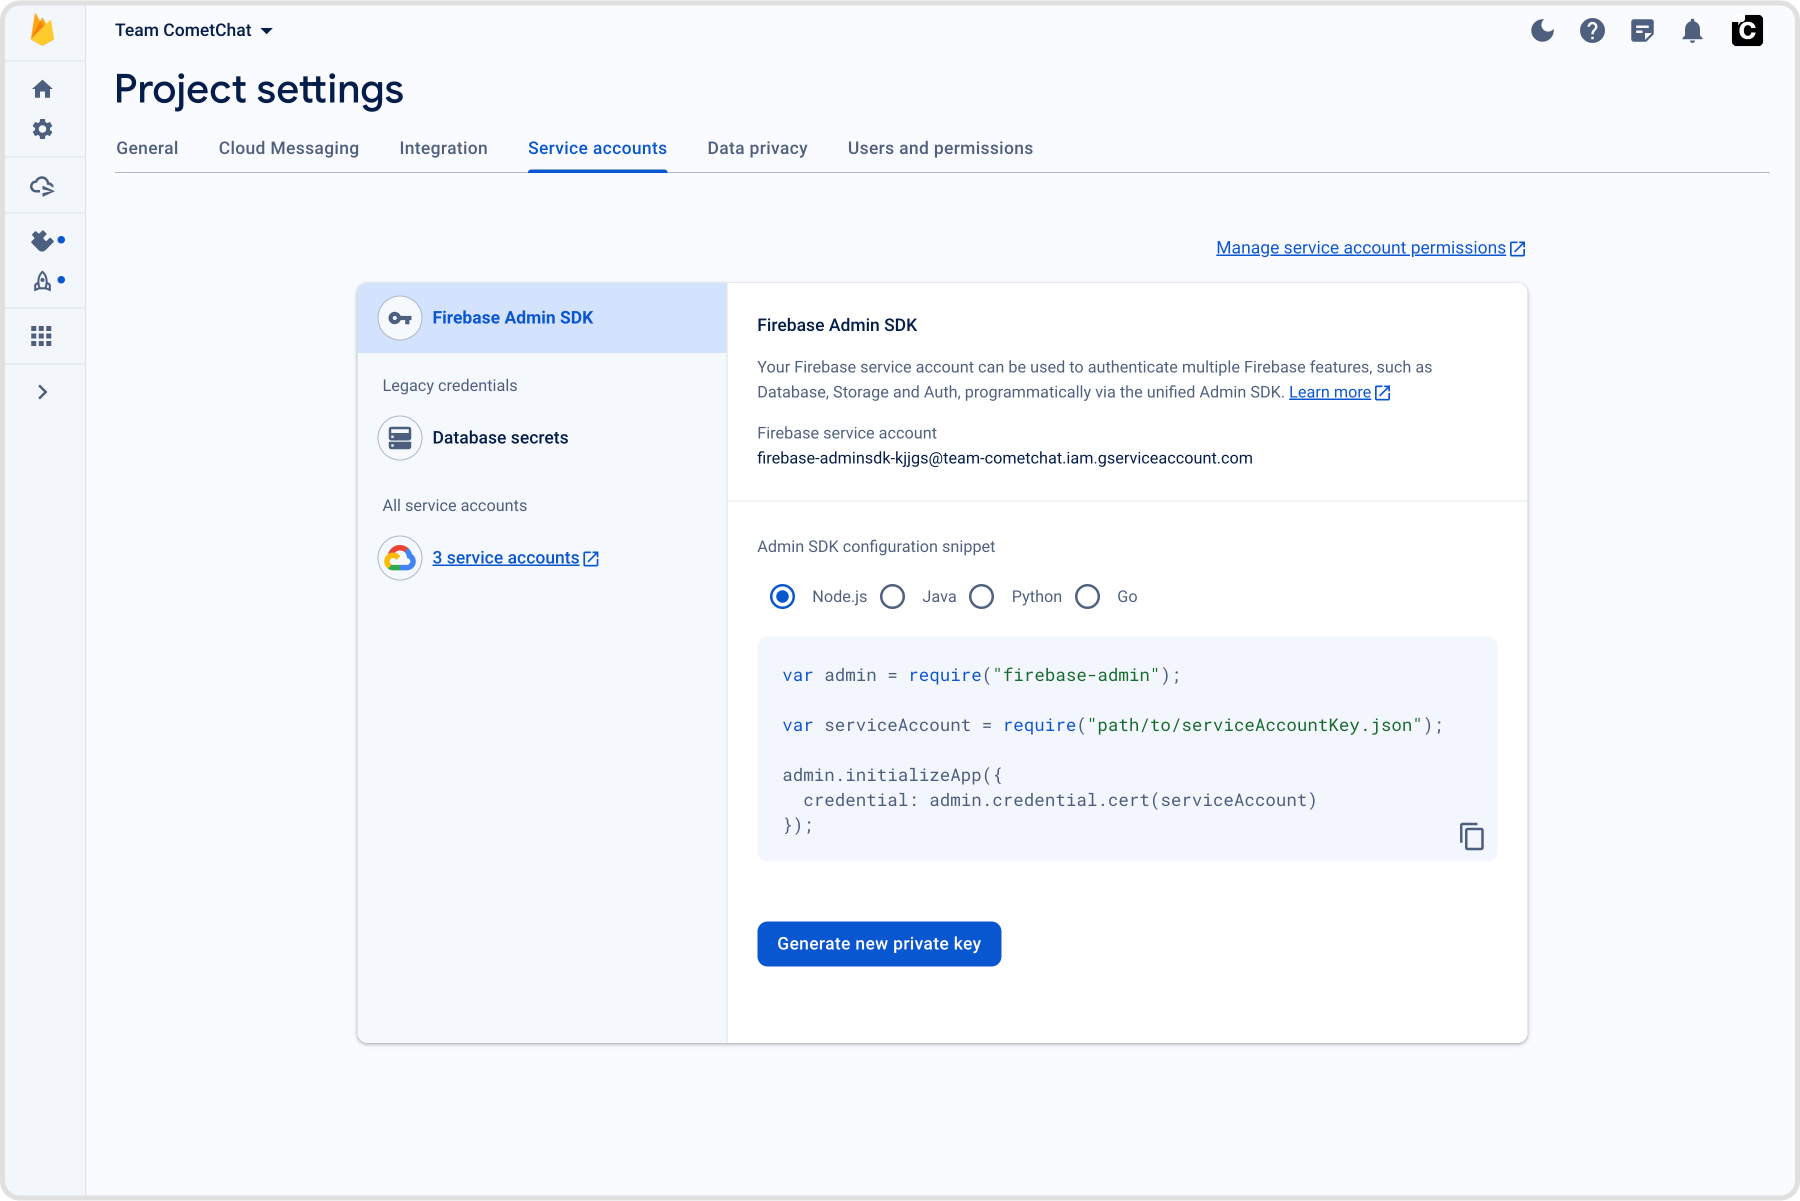
Add credentials
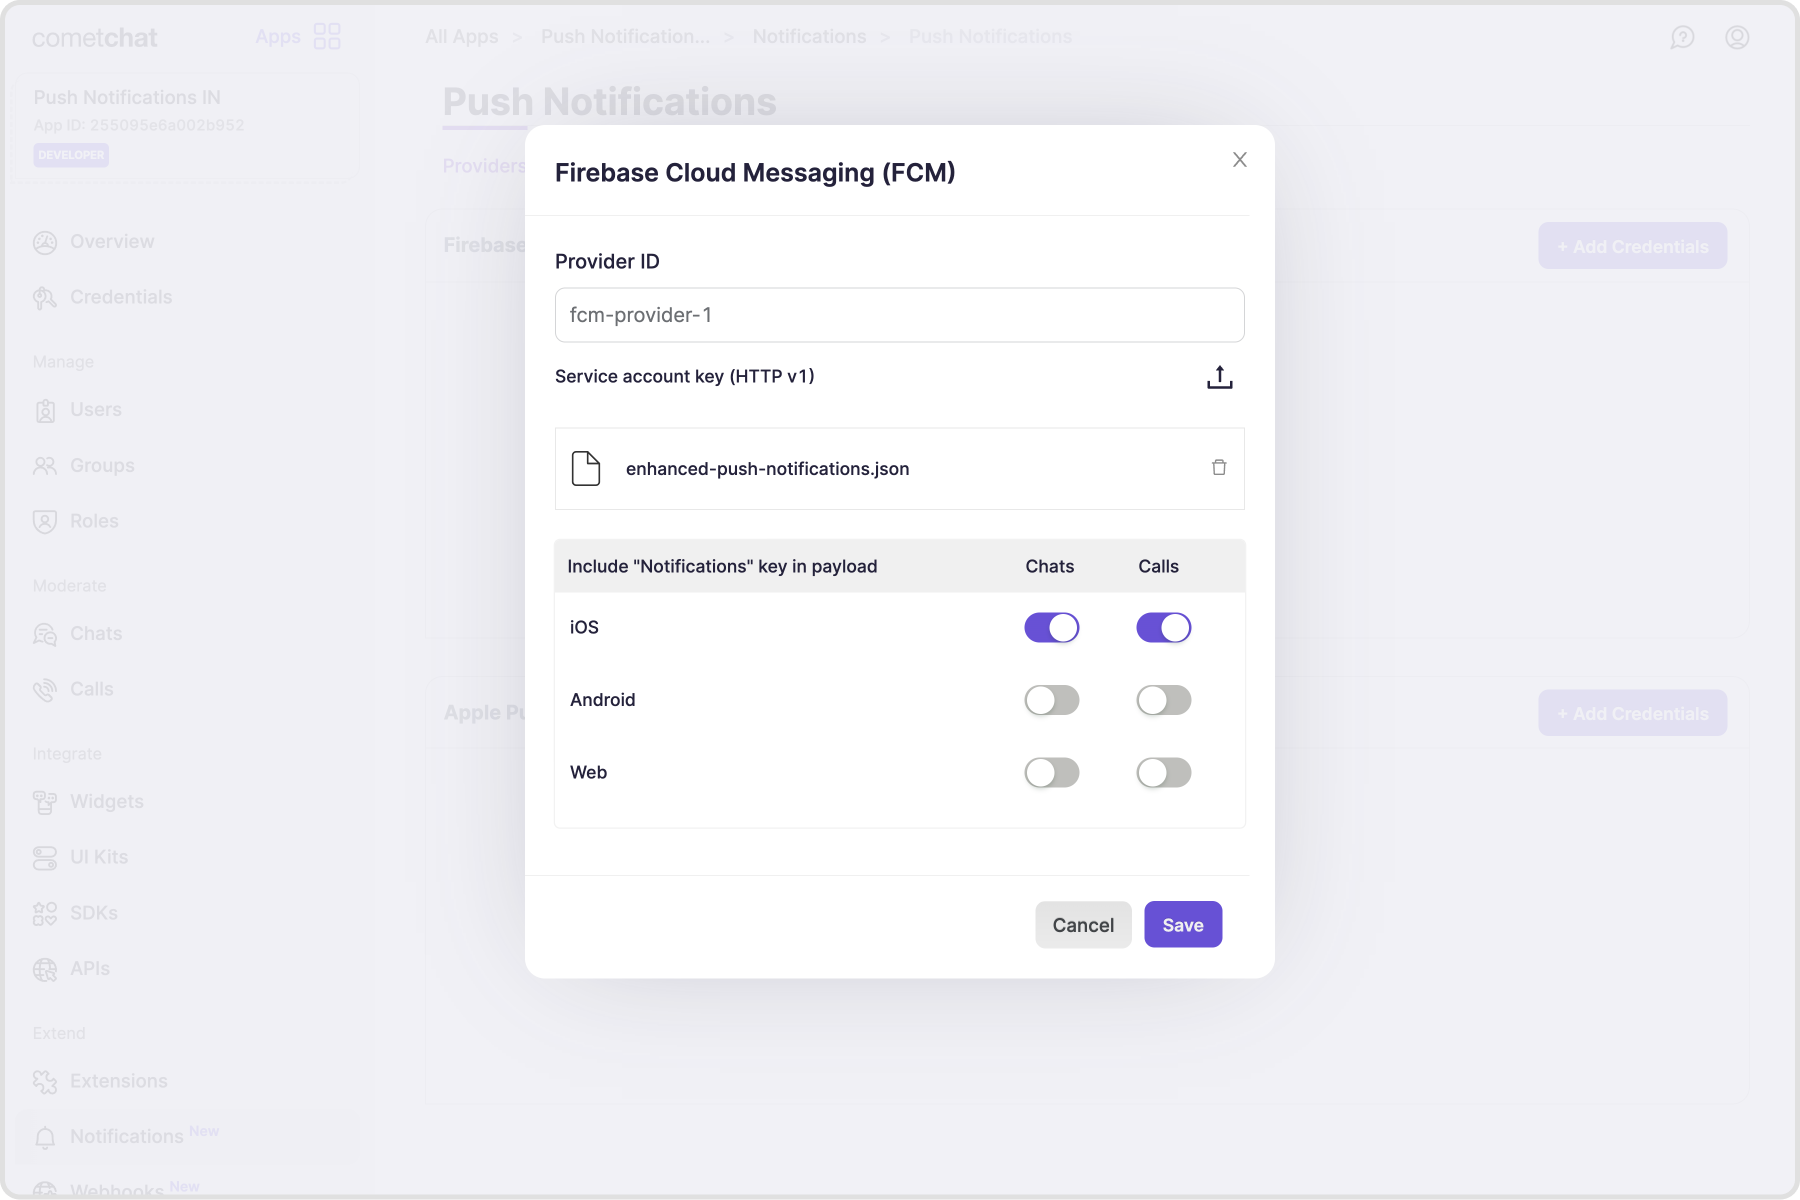
- Select the ”+ Add Credentials” button.
- In the dialogue that appears, provide a unique, memorable identifier for your provider.
- Upload the service account JSON file you previously acquired.
- Specify whether the push payload should include the “notification” key. Additional information on this configuration is available in FCM’s documentation - About FCM messages.
Add APNS credentials
Pre-requisite
- To generate a .p8 key file, go to Apple developer account, then select “Certificates, IDs & Profiles”.
- Select Keys and click on the ”+” button to add a new key.
- In the new key page, type in your key name and check the Apple Push Notification service (APNs) box, then click “Continue” and click “Register”.
- Then proceed to download the key file by clicking Download.
- Make note of the Key ID, Team ID and your Bundle ID. These are required in the next steps.
Add credentials
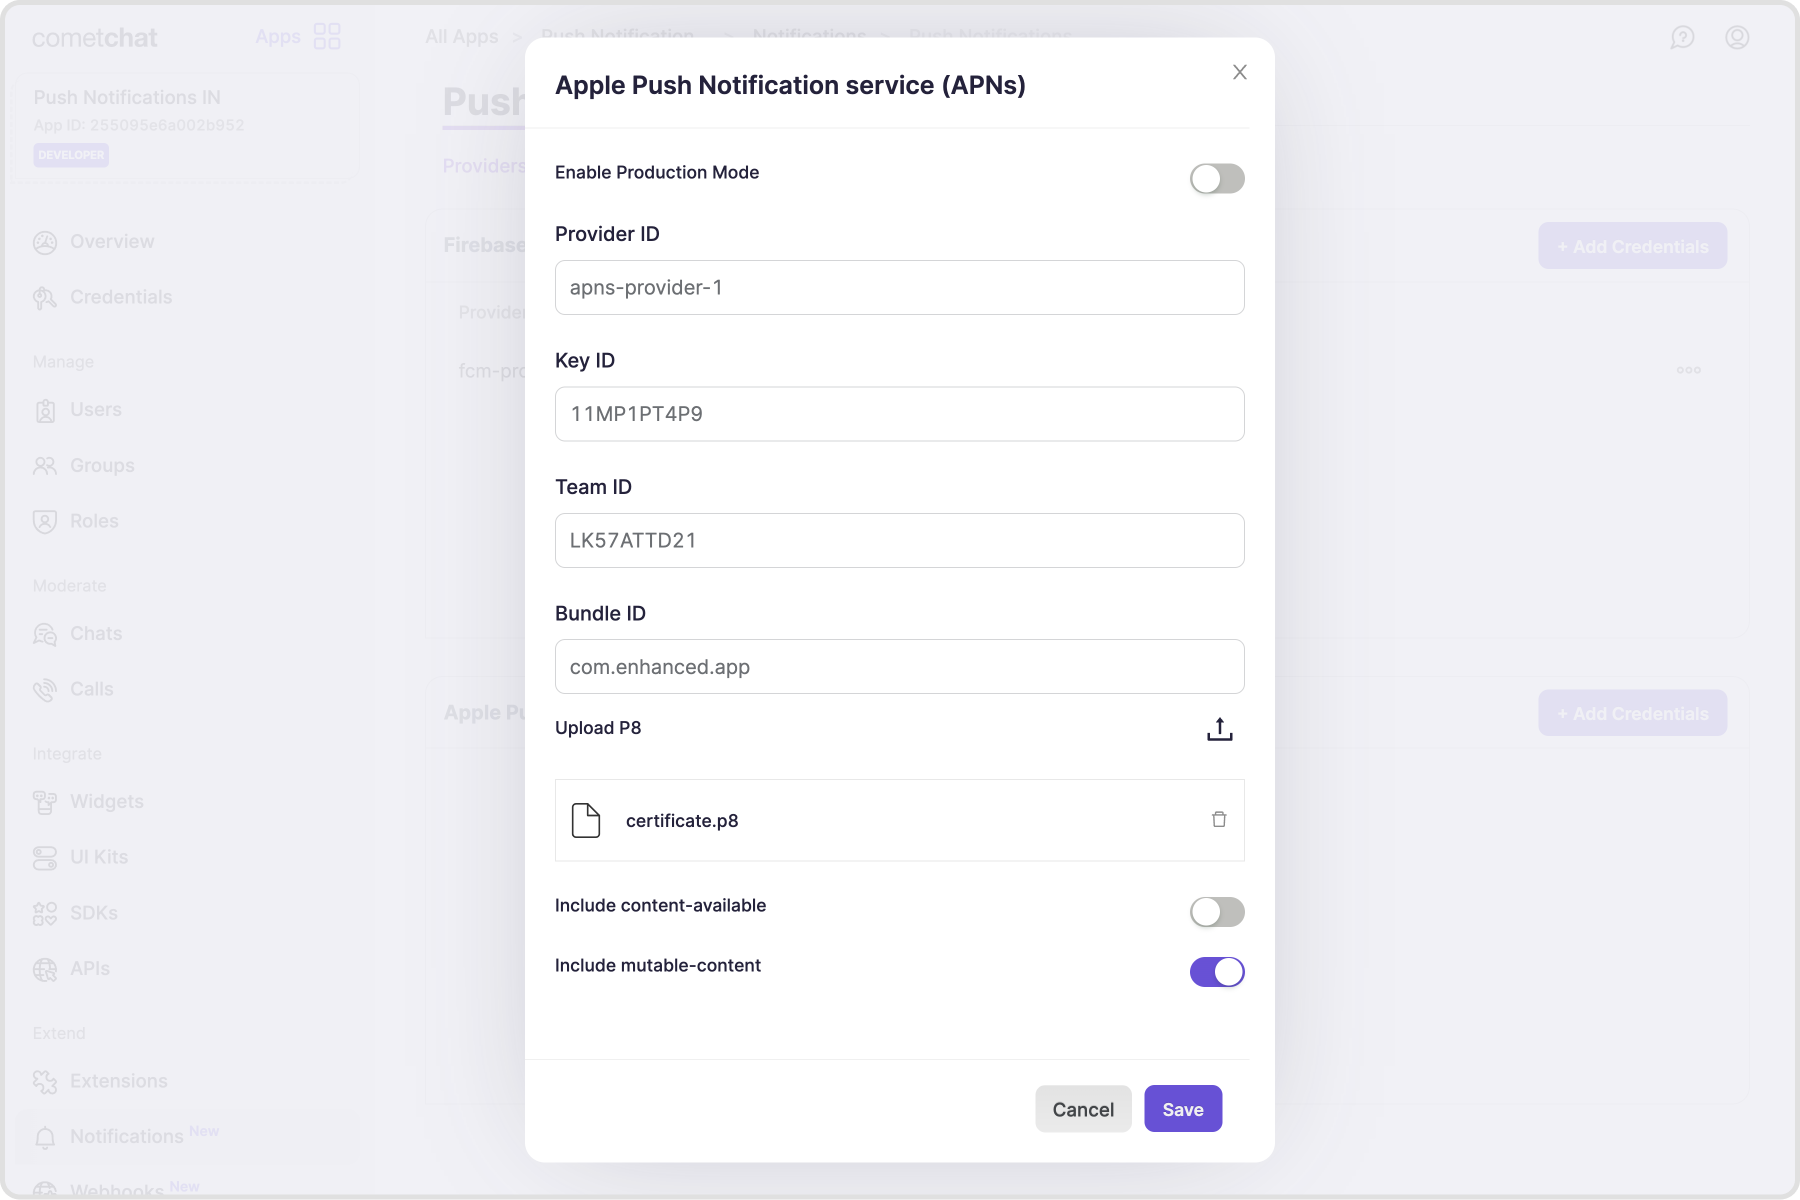
- Select the ”+ Add Credentials” button.
- Enable the toggle if your app is in the Production. For apps under development, the toggle has to be disabled.
- In the dialogue that appears, provide a unique, memorable identifier for your provider.
- Store the Key ID, Team ID, Bundle ID for your app.
- Upload the .p8 file
- Enable “Include content-available” if you want to receive background notifications. However, this is not recommended as the background notifications are throttled. Additional information is available in Apple’s documentation - Pushing background updates to your App
- Enable “Include mutable-content” if you want to modify the notification before it is displayed to the user. Additional information is available in Apple’s documentation - Modifying content on newly delivered notifications
Add Custom provider credentials
Custom providers allow you to make use of providers apart from FCM and APNs. This is implemented using webhook URL which gets all the required details that can be used to trigger Push notifications.Pre-requisite
- Your webhook endpoint must be accessible over
HTTPS. This is essential to ensure the security and integrity of data transmission. - This URL should be publicly accessible from the internet.
- Ensure that your endpoint supports the
HTTP POSTmethod. Event payloads will be delivered viaHTTP POSTrequests inJSONformat. - Configure your endpoint to respond immediately to the CometChat server with a 200 OK response. The response should be sent within 2 seconds of receiving the request.
- For security, it is recommended to set up Basic Authentication that is usually used for server-to-server calls. This requires you to configure a username and password. Whenever your webhook URL is triggered, the HTTP Header will contain:
- Your frontend application should implement the logic to get the push token and register it to your backend when the user logs in and unregister the push token when the user logs out.
- To enable multi-device logins, you can map the push tokens to the user’s auth tokens. Where each new login makes use of a new auth token.
Add credentials
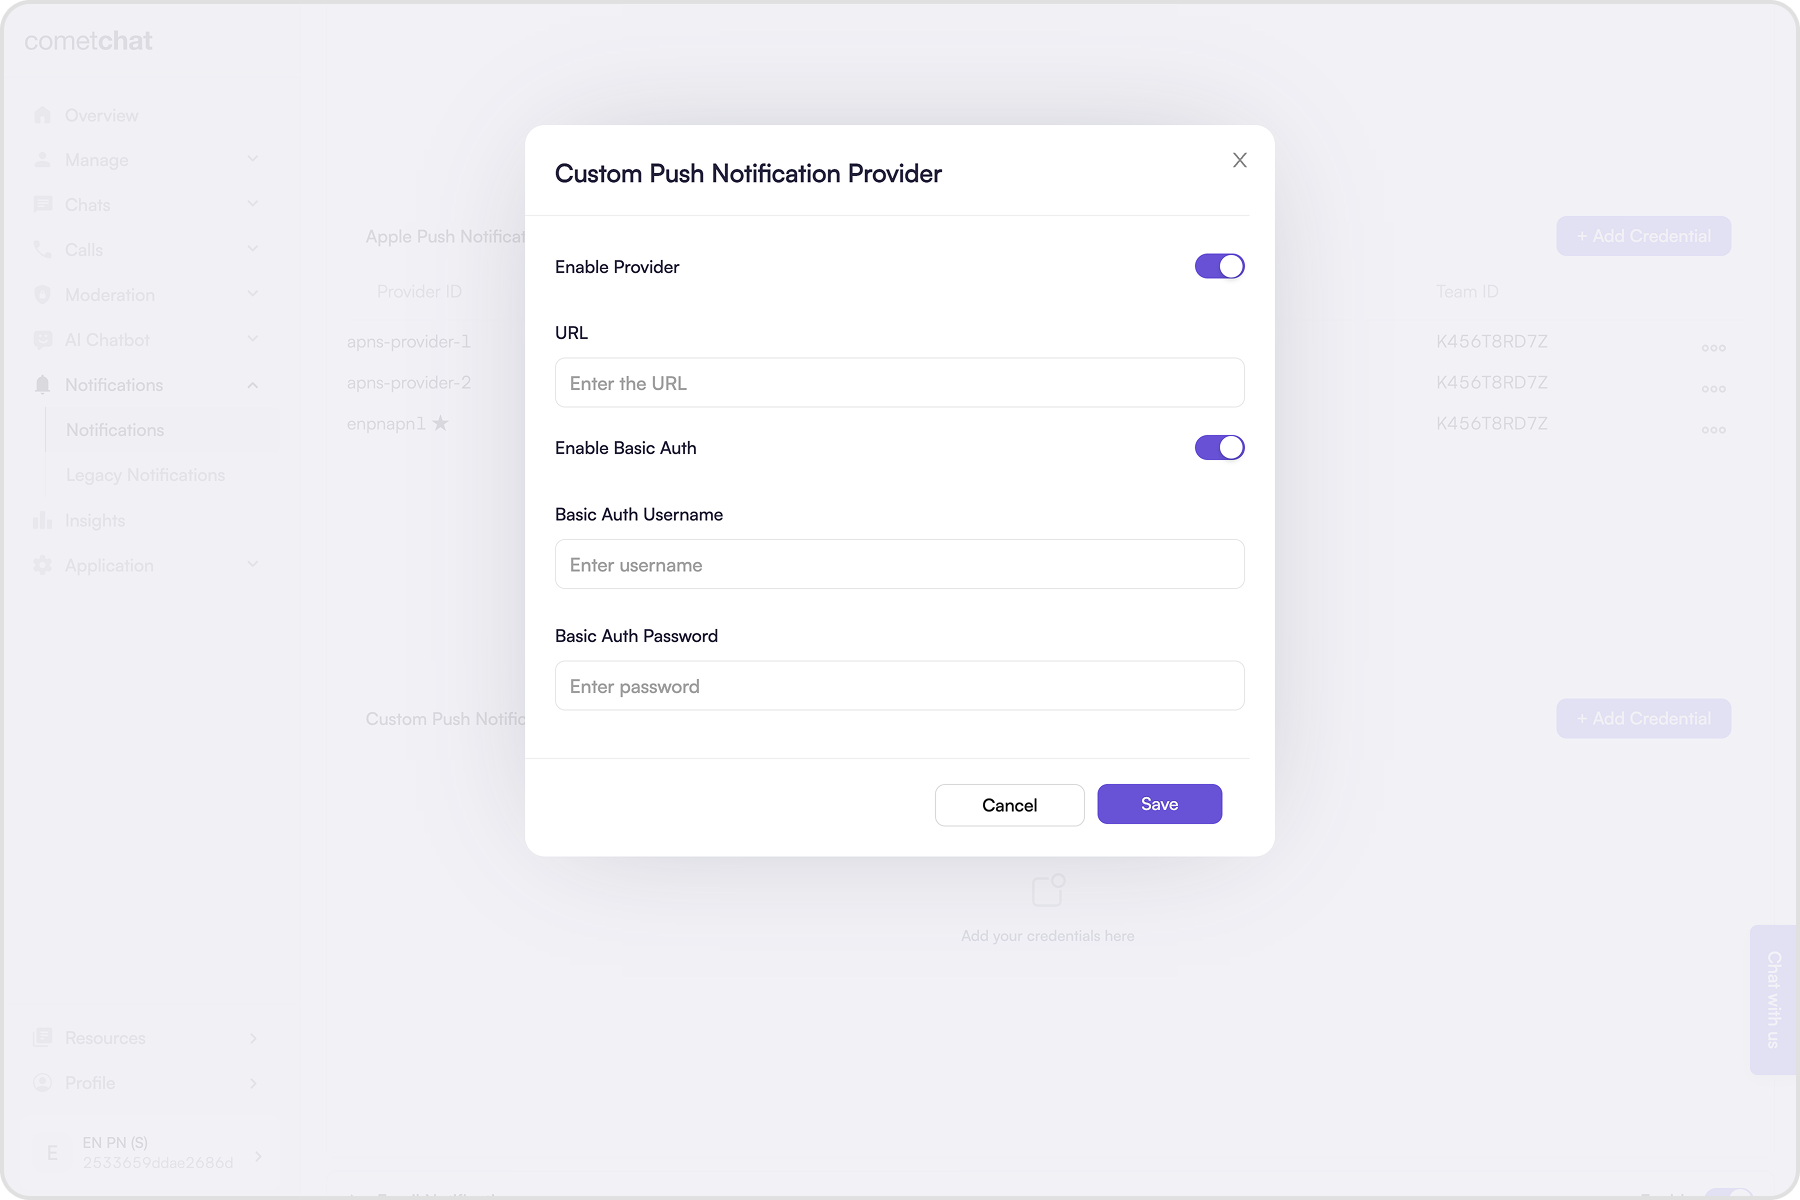
- Click on the ”+ Add Credentials” button.
- Enable the provider.
- Enter the publically accessible Webhook URL.
- It is recommended to enable Basic Authentication.
- Enter the username and password.
- Save the credentials.
How does it work?
The Custom provider is triggered once for an event in one-on-one conversation. In case of notifying the members of a group, the custom provider is triggered once for each user present in that group. For example, if there are 100 members in the group, your webhook will receive 100 HTTP requests. Once for each member of the group. Below are the sample payloads for different events:- Chat notification payload
- Call notification payload
- Reaction notification payload
- Group action notification payload
Sample server-side code
Tokens management
Register push token after login
Push tokens, obtained from the APIs or SDKs provided by the platforms or frameworks in use, must be registered on behalf of the logged in user with the CometChat backend. For this purpose, CometChat SDKs v4+ offer the following functions: Push token registration should be completed in two scenarios:- Following the success of
CometChat.login()& receiving user’s permission to receiver Push notifications. - When a refresh token becomes available.
CometChatNotifications.registerPushToken() method from the SDK. This method accepts the following parameters.
| Parameter | Type | Description |
|---|---|---|
pushToken | String | The pushToken can contain:• Firebase (FCM) token • Device token (iOS only) • VoIP token (iOS only) |
platform | String | The platform can take the following values:• PushPlatforms.FCM_ANDROID • PushPlatforms.FCM_FLUTTER_ANDROID • PushPlatforms.FCM_FLUTTER_iOS • PushPlatforms.APNS_FLUTTER_DEVICE • PushPlatforms.APNS_FLUTTER_VOIP • PushPlatforms.FCM_iOS • PushPlatforms.APNS_iOS_DEVICE • PushPlatforms.APNS_iOS_VOIP • PushPlatforms.FCM_WEB • PushPlatforms.FCM_REACT_NATIVE_ANDROID • PushPlatforms.FCM_REACT_NATIVE_iOS • PushPlatforms.APNS_REACT_NATIVE_DEVICE • PushPlatforms.APNS_REACT_NATIVE_VOIP • PushPlatforms.FCM_IONIC_CORDOVA_ANDROID • PushPlatforms.FCM_IONIC_CORDOVA_iOS • PushPlatforms.APNS_IONIC_CORDOVA_DEVICE • PushPlatforms.APNS_IONIC_CORDOVA_VOIP |
providerId | String | The providerId should match with:• Any one of the FCM provider identifiers in case of an FCM token. • Any one of the APNS provider identifiers in case of Device or VoIP tokens. |
- JavaScript
- Android
- iOS
- Flutter
Unregister push token before logout
Typically, push token unregistration should occur prior to user logout, using theCometChat.logout() method.
For token unregistration, use the CometChatNotifications.unregisterPushToken() method provided by the SDKs.
- JavaScript
- Android
- iOS
- Flutter
Handle incoming Push notifications
Push notifications should be managed primarily when the app is in the background or in a terminated state. For web and mobile applications, the Firebase Cloud Messaging (FCM) SDK offers handler functions to receive Push Notifications. For iOS applications, the FCM SDK can be used as described previously, or alternatively, PushKit can be implemented for better integration and management of chat and call (VoIP) notifications. The push payload delivered to the user’s device includes the following information, which can be customized to suit the desired notification style:- Details available in the payload
Sample apps
Check out our sample apps for understanding the implementation.React - Push notifications sample app
Push notifications sample app for the webView on Github
React Native - Push notifications sample app
Push notifications sample app for React NativeView on Github
iOS - Push notifications sample app
Push notifications sample app for iOSView on Github
Android - Push notifications sample app
Push notifications sample app for AndroidView on Github
Flutter - Push notifications sample app
Push notifications sample app for FlutterView on Github