React UI Kit Sample App
Reference implementation of React UI Kit, FCM and Push Notification Setup.
What this guide covers
- CometChat dashboard setup (FCM provider + Provider ID) and Firebase web config + VAPID key.
- Service worker + Firebase Messaging wiring for foreground/background pushes.
- Token registration/unregistration with
CometChatNotificationsand navigation on notification click. - Testing and troubleshooting tips for web push.
How CometChat + FCM work on web
- Provider ID: Tells CometChat which Firebase credentials to use when sending to your web app.
- Tokens:
getTokenreturns a browser token (per origin/device). Register it after login:CometChatNotifications.registerPushToken(token, CometChatNotifications.PushPlatforms.FCM_WEB, providerId). - Handlers: Foreground messages come via
messaging.onMessage; background usesfirebase-messaging-sw.jswithonBackgroundMessage. - Navigation: Service worker sends a postMessage or focuses the client; the app routes to the right view.
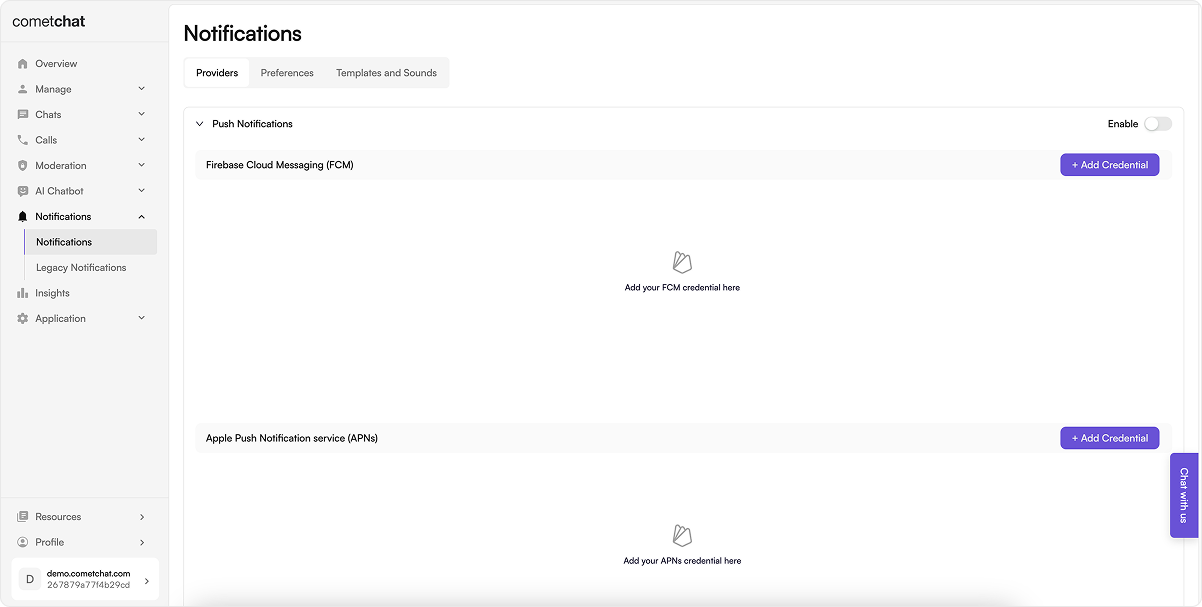
1. Dashboard: enable push + add FCM provider
- Go to Notifications → Settings and enable Push Notifications.
- Add/configure an FCM provider and copy the Provider ID (used in code).
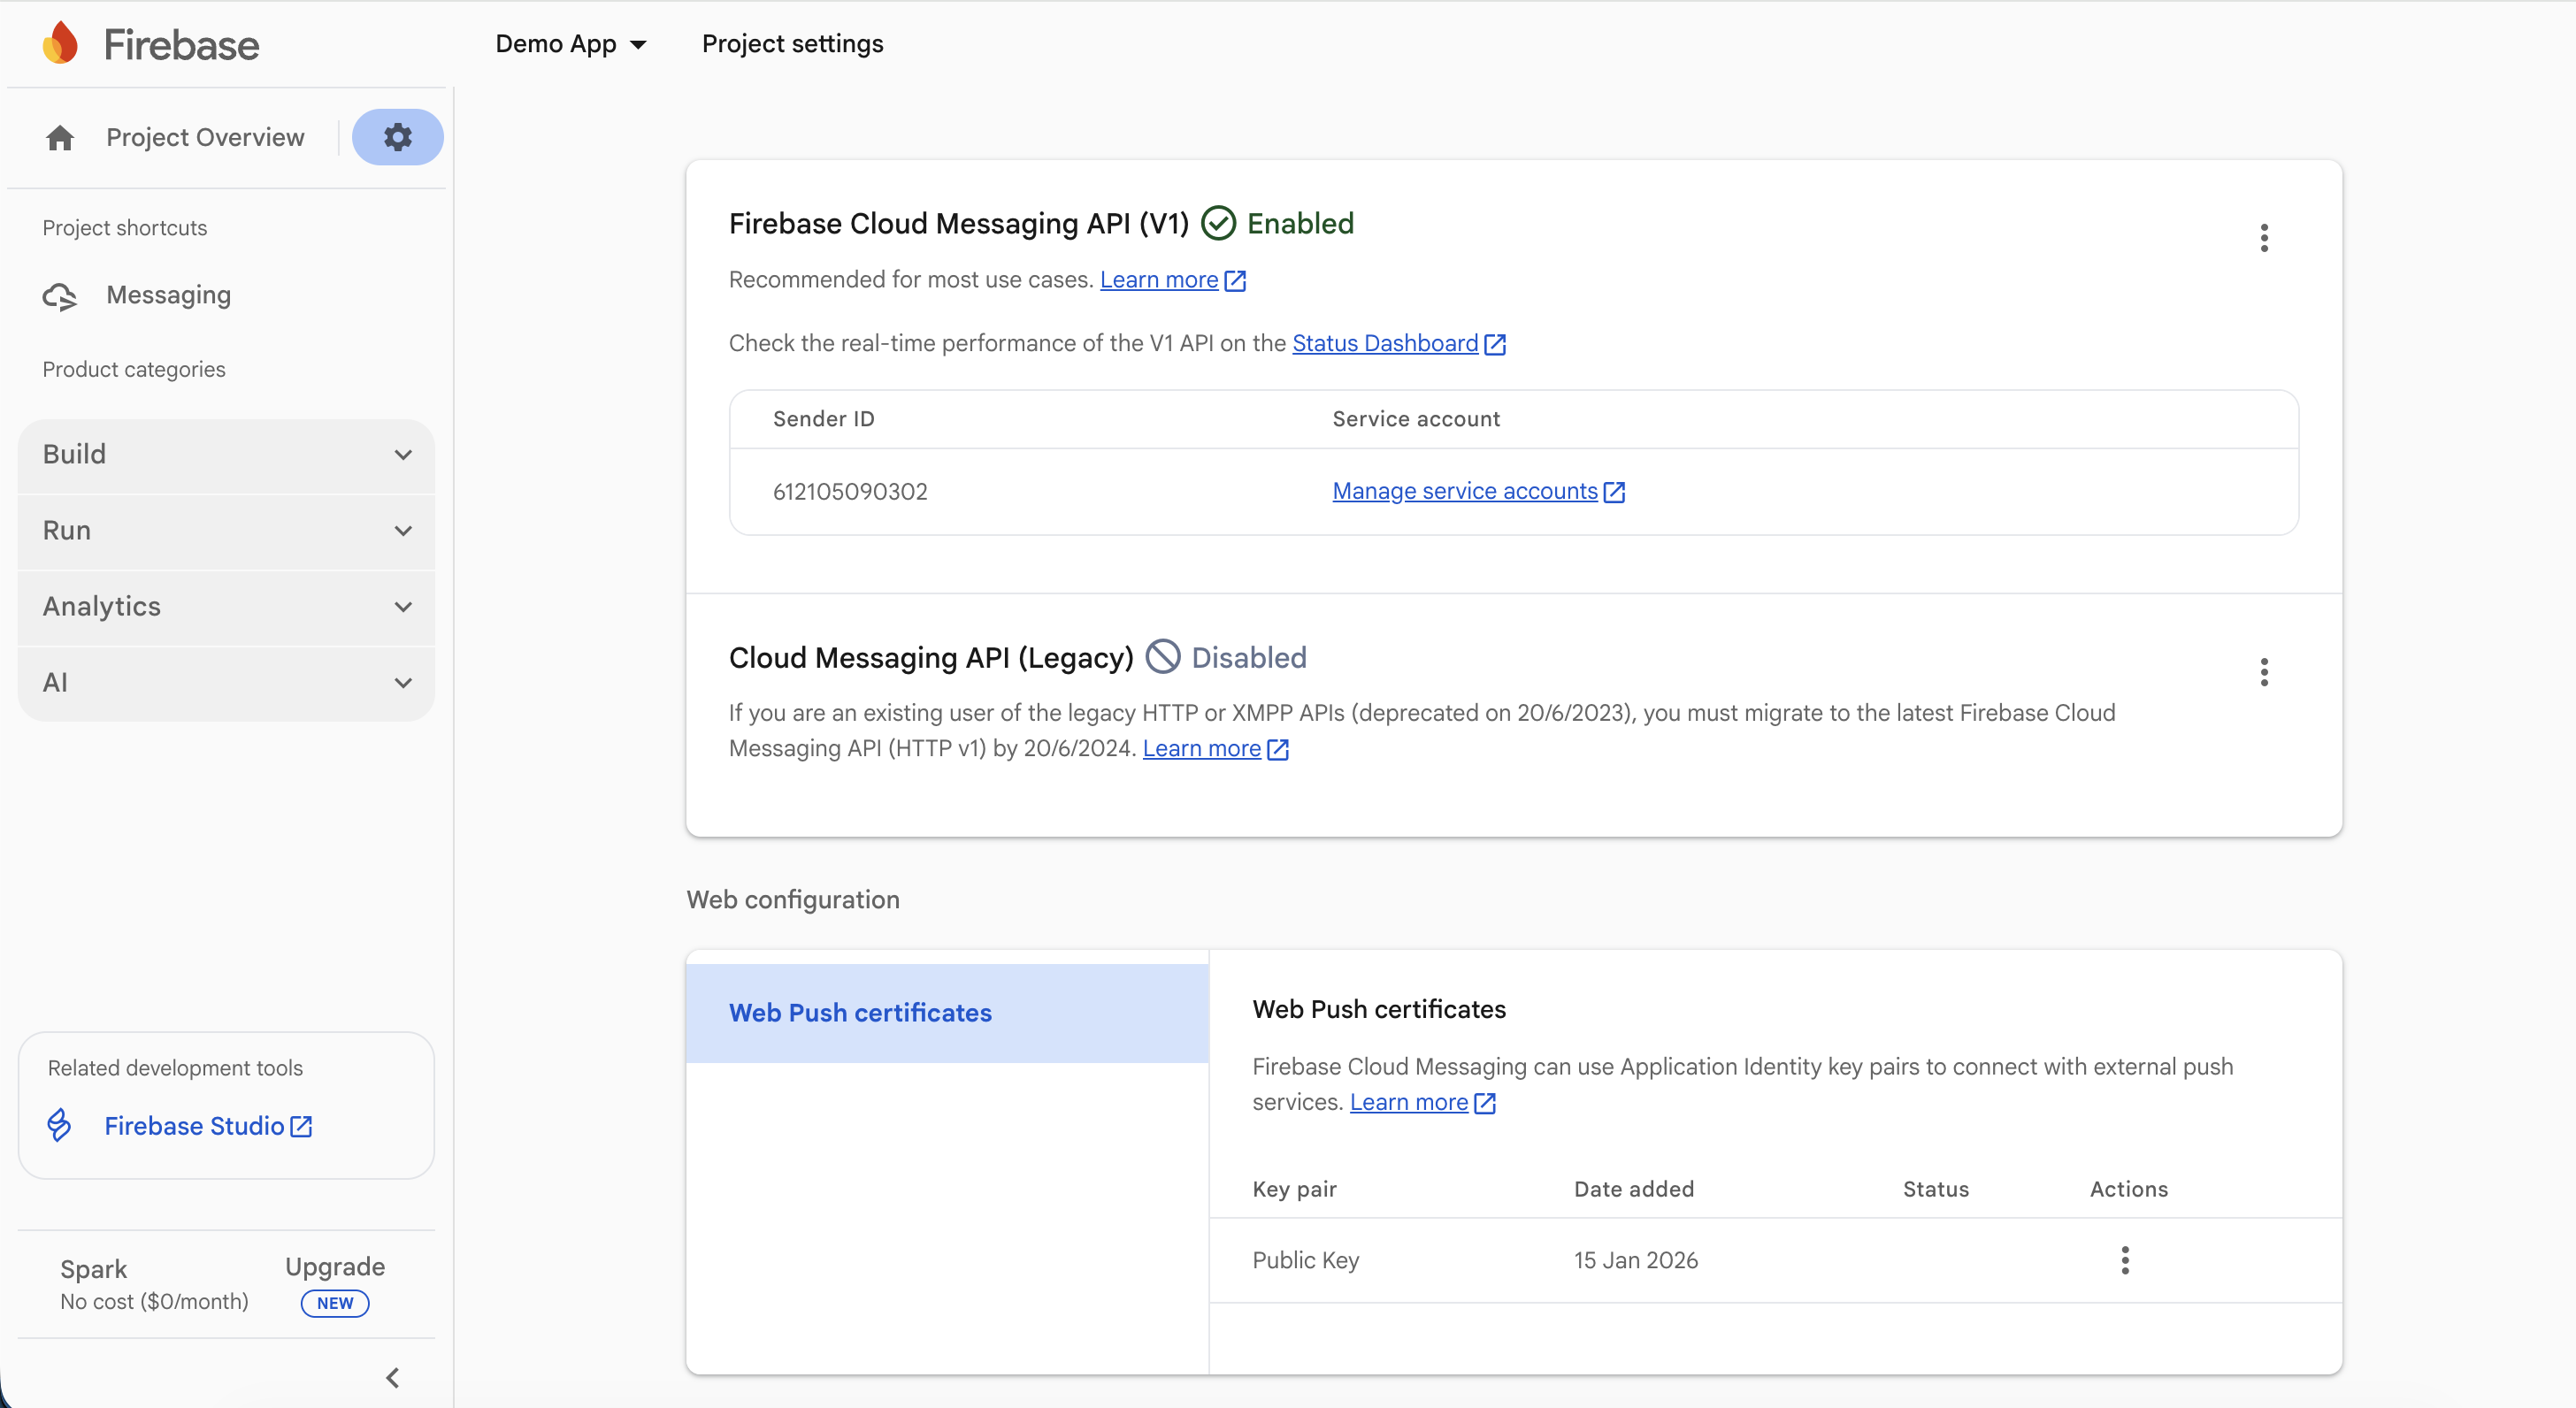
2. Firebase setup (web app + VAPID)
- In Firebase Console, create/select a project.
- Add a Web app (
</>), copy the Firebase config object. - In Project settings → Cloud Messaging, generate/copy the VAPID key under Web Push certificates.
3. Install dependencies
Install firebase SDK:4. Constants
File:src/AppConstants.js (or equivalent)
Set the CometChat Constants from your dashboard and Firebase config + VAPID key.
4. Configure Firebase (frontend)
File:src/firebase.js (or equivalent)
This code:
- Initializes Firebase app and messaging.
- Requests notification permission, fetches FCM token, and registers it with CometChat after login.
- Sets up foreground message handler to show notifications.
getToken calls.
5. Service worker (background pushes)
File:public/firebase-messaging-sw.js
This code:
- Initializes Firebase app in the service worker.
- Handles background messages with
onBackgroundMessage. - Manages notification clicks to focus the app and send data for navigation.
- Ensure your app registers the service worker (e.g., in
index.tsx) and listens formessageevents to navigate.
index.tsx) and listens for message events to navigate.
6. Request permission + register token after login
In your app initialization (e.g.,App.tsx):
This code:
- Requests notification permission.
- Fetches FCM token and registers it with CometChat after user login.
- Handles token refresh by re-registering if it changes.
- Run after the user logs in; retry on failure.
- On logout:
CometChatNotifications.unregisterPushToken()before ending the session. - Handle token refresh by calling
getTokenagain and re-registering if it changes.
- Initializes CometChat UI Kit.
- Initializes Firebase messaging.
- Logs in the user if not already logged in.
- Mounts the React app.
- Registers the push token after login.
7. Foreground + background handling
- Foreground:
messaging.onMessage→ show aNotificationor in-app toast; deep link using payload data. - Background/killed: service worker
onBackgroundMessageshows the notification;notificationclickfocuses the tab and sends a message for navigation. - Suppress duplicates if the conversation is already active.
8. Testing checklist
- Service worker registered (DevTools → Application → Service Workers shows “activated”).
- Permission prompt appears and is granted (
Notification.permission === "granted"). - Login → token fetched →
registerPushTokensucceeds (check console/logs). - Foreground message shows a notification; click navigates to the right chat.
- Background/tab inactive message shows a notification; click focuses tab and routes correctly.
- Logout →
unregisterPushTokenruns without errors.
9. Troubleshooting
| Symptom | Quick checks |
|---|---|
| No notification | Service worker registered? Permission granted? VAPID key matches Firebase project? FCM Provider ID set in code? |
| Token registration fails | Run after login; confirm Provider ID; ensure correct Firebase config domain/origin; check console errors. |
| Click does nothing | Ensure notificationclick handler posts a message or opens the client; app listens for postMessage to navigate. |
| Foreground only | Verify onBackgroundMessage in service worker; confirm service worker file is in /public and registered. |
| Wrong project | Config/VAPID from a different Firebase project will invalidate tokens—recreate tokens after updating. |