Overview
The CometChat Swift UI Kit lets developers integrate text chat and voice/video calling features into iOS apps seamlessly.
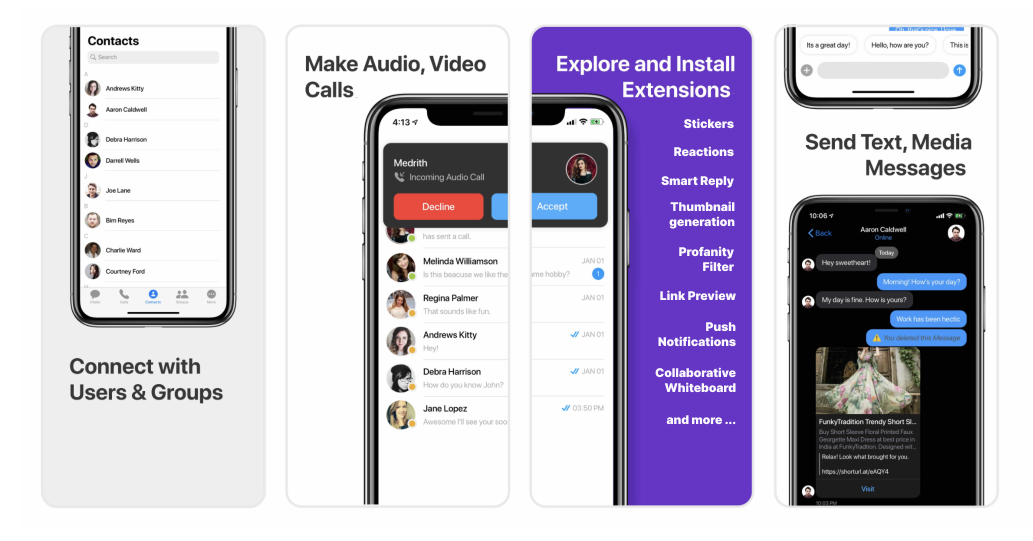
The iOS UI Kit’s Swift UI components are completely customizable. Included is a fully polished UI and the complete business logic. We provide the source code, which you can adapt it to fit your needs.
I want to checkout iOS UI Kit.
Follow the steps mentioned in the README.md file.
Kindly, click on below button to download our iOS Chat UI Kit.
iOS Chat UI KitView on GithubI want to integrate UI Kit with my App
I want to explore sample apps.
Import the app into Xcode and follow the steps mentioned in the README.md file.
Kindly, click on below button to download our Swift Sample App.
Swift Sample AppView on GithubOr else, you can also checkout our Objective-C Sample App.
Objective-C Sample AppView on GithubPrerequisites
Before you begin, ensure you have met the following requirements:
- You have installed the latest version of Xcode. (Above Xcode 12 Recommended)
- Please note, CometChat's iOS Chat UI Kit works for iOS devices from iOS 11 and above.
If you're building the new project, the please add below line in AppDelegate.swift> > var window: UIWindow?
Please install the latest pod version on your Mac to avoid integration issues> > Please follow the below steps:> > 1. sudo gem update cocoapods --pre> 2. pod update> 3. clean> 4. build
Installing the iOS Chat UI Kit
1. Setup 🔧
i. Register on CometChat 🧑💻
- To install iOS Chat UI Kit, you need to first register on CometChat Dashboard. Click here to sign up.
ii. Get Your Application Keys 🔑
- Create a new app
- Head over to the QuickStart or API & Auth Keys section and note the App ID, Auth Key, and Region.
iii. Add the CometChat Dependency📦
We recommend using CocoaPods, as they are the most advanced way of managing iOS project dependencies. Open a terminal window, move to your project directory, and then create a Podfile by running the following command
Create podfile using the below command.
- bash
$ pod init
Add the following lines to the Podfile.
- bash
For Xcode 12 and above:

platform :ios, '12.0'
use_frameworks!

target 'YourApp' do
     pod 'CometChatPro', '3.0.919'
     pod 'CometChatCalls', '3.0.0'
end
And then install the CometChat framework through CocoaPods.
- bash
pod install
If you're facing any issues while installing pods then use the below command.
- bash
pod install --repo-update
2. Configure CometChat inside your iOS app
i. Initialize CometChat 🎬
The init() method initializes the settings required for CometChat. We suggest calling the init() method on app startup, preferably in the didFinishLaunchingWithOptions() method of the Application class.
- swift
import CometChatPro

class AppDelegate: UIResponder, UIApplicationDelegate{

   var window: UIWindow?
   let appId: String = "ENTER APP ID"
   let region: String = "ENTER REGION CODE"

func application(_ application: UIApplication, didFinishLaunchingWithOptions launchOptions: [UIApplication.LaunchOptionsKey: Any]?) -> Bool {

let mySettings = AppSettings.AppSettingsBuilder().subscribePresenceForAllUsers().setRegion(region:   region).build()
CometChat(appId: appId ,appSettings: mySettings,onSuccess: { (isSuccess) in
       print("CometChat Pro SDK intialise successfully.")
   }) { (error) in
       print("CometChat Pro SDK failed intialise with error: \\(error.errorDescription)")
    }
    return true
    }
}
Make sure you replace the appId with your CometChat appId and region with your app region in the above code.
ii. Create User 🐣
This method takes a User object and the Auth Key as input parameters and returns the created User object if the request is successful.
- swift
let uid = "user1"
let name = "Kevin"
let authKey = "AUTH_KEY"

let newUser : User = User(uid: uid, name: name)
newUser.avatar = "ENTER AVATAR URL HERE"

CometChat.createUser(user: newUser, apiKey: authKey, onSuccess: { (User) in
      print("User created successfully. \\(User.stringValue())")
  }) { (error) in
     print("The error is \\(String(describing: error?.description))")
}
ii. Log in your User👤
The login() method returns the User object containing all the information of the logged-in user.
- swift
let uid    = "cometchat-uid-1"
let authKey = "ENTER AUTH KEY"

CometChat.login(UID: uid, apiKey: authKey, onSuccess: { (user) in
  print("Login successful: " + user.stringValue())
}) { (error) in
  print("Login failed with error: " + error.errorDescription);
}
- Make sure you replace the authKey with your CometChat Auth Key in the above code.> - We have set up 5 users for testing having UIDs: cometchat-uid-1, cometchat-uid-2, cometchat-uid-3, cometchat-uid-4, and cometchat-uid-5.
3. Add Swift Chat UI Kit to your project
To integrate Swift Chat UI Kit inside your app. Kindly follow the below steps:
i. Simply clone the UIKit Library from the below repository.
- bash
git clone https:__github.com_cometchat-pro_ios-swift-chat-ui-kit.git
ii. After cloning the repository, Navigate to the Library folder and drag and drop the Library folder inside your project's folder.
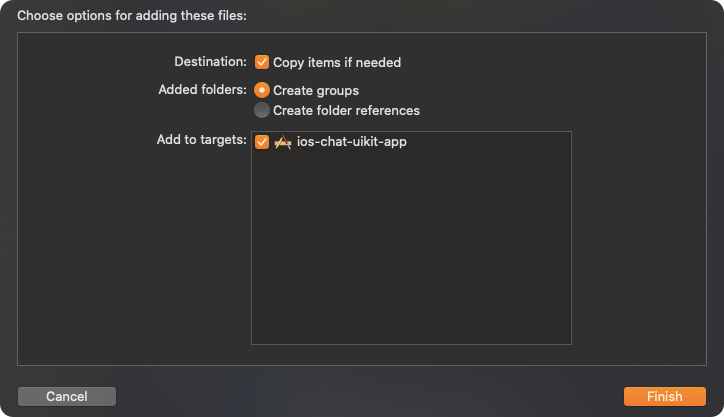
iii. Make sure you've selected ✅ Copy items if needed as well as 🔘 Create group options while adding a `Library inside your project.
iv. If the Library is added successfully, all added folders will be in Yellow color.
4. Launch CometChat
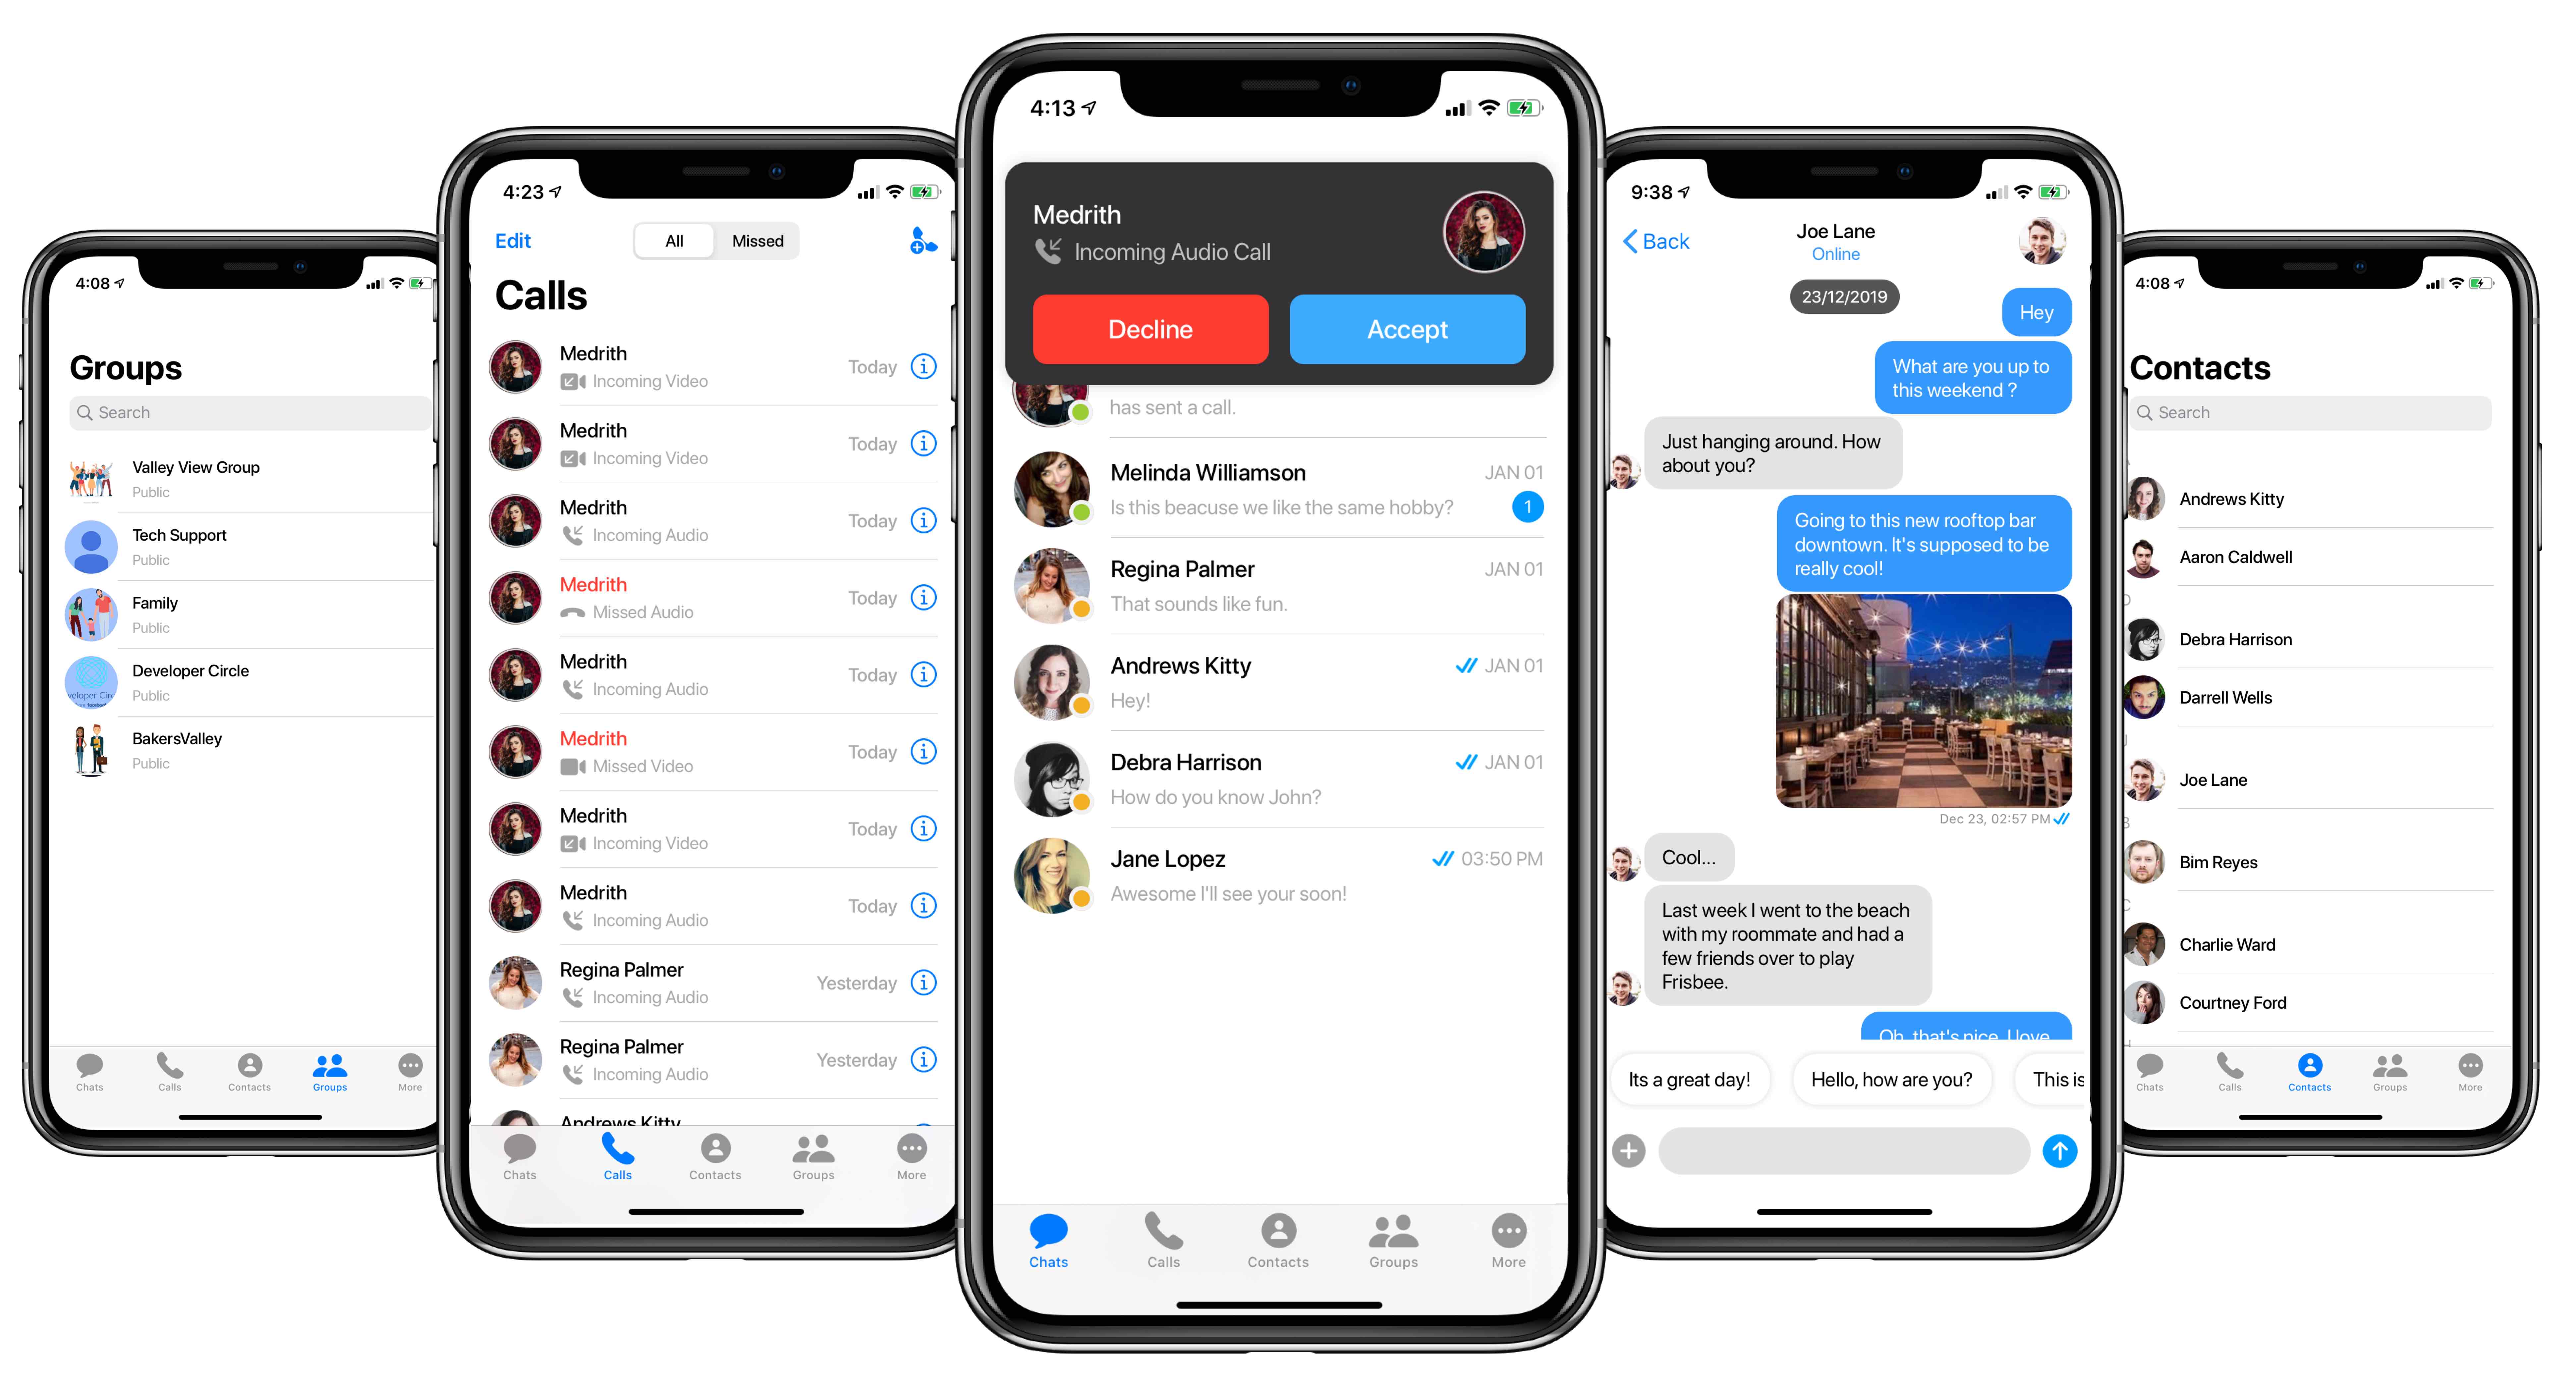
CometChatUI is an option to launch a fully functional chat application using the Swift Chat UI Kit. In the iOS UI Kit all the Swift UI Components are interlinked and work together to launch a fully functional chat on your website/application.
To use CometChatUI user has to launch CometChatUI class. CometChatUI is a subclass of UITabbarController.
- swift
DispatchQueue.main.async {
let cometChatUI = CometChatUI()
cometChatUI.setup(withStyle: .fullScreen)
self.present(cometChatUI, animated: true, completion: nil)
}
Please run the above code snippet in the main thread.
5. Receive Real-time calls (Optional)
To receive real-time call events when the app is in foreground, the user has to register for them in the App Delegate class.
- swift
CometChatCallManager().registerForCalls(application: self)
- This method only allows user to launch the incoming call screen and other calling events when the app is in foreground mode.