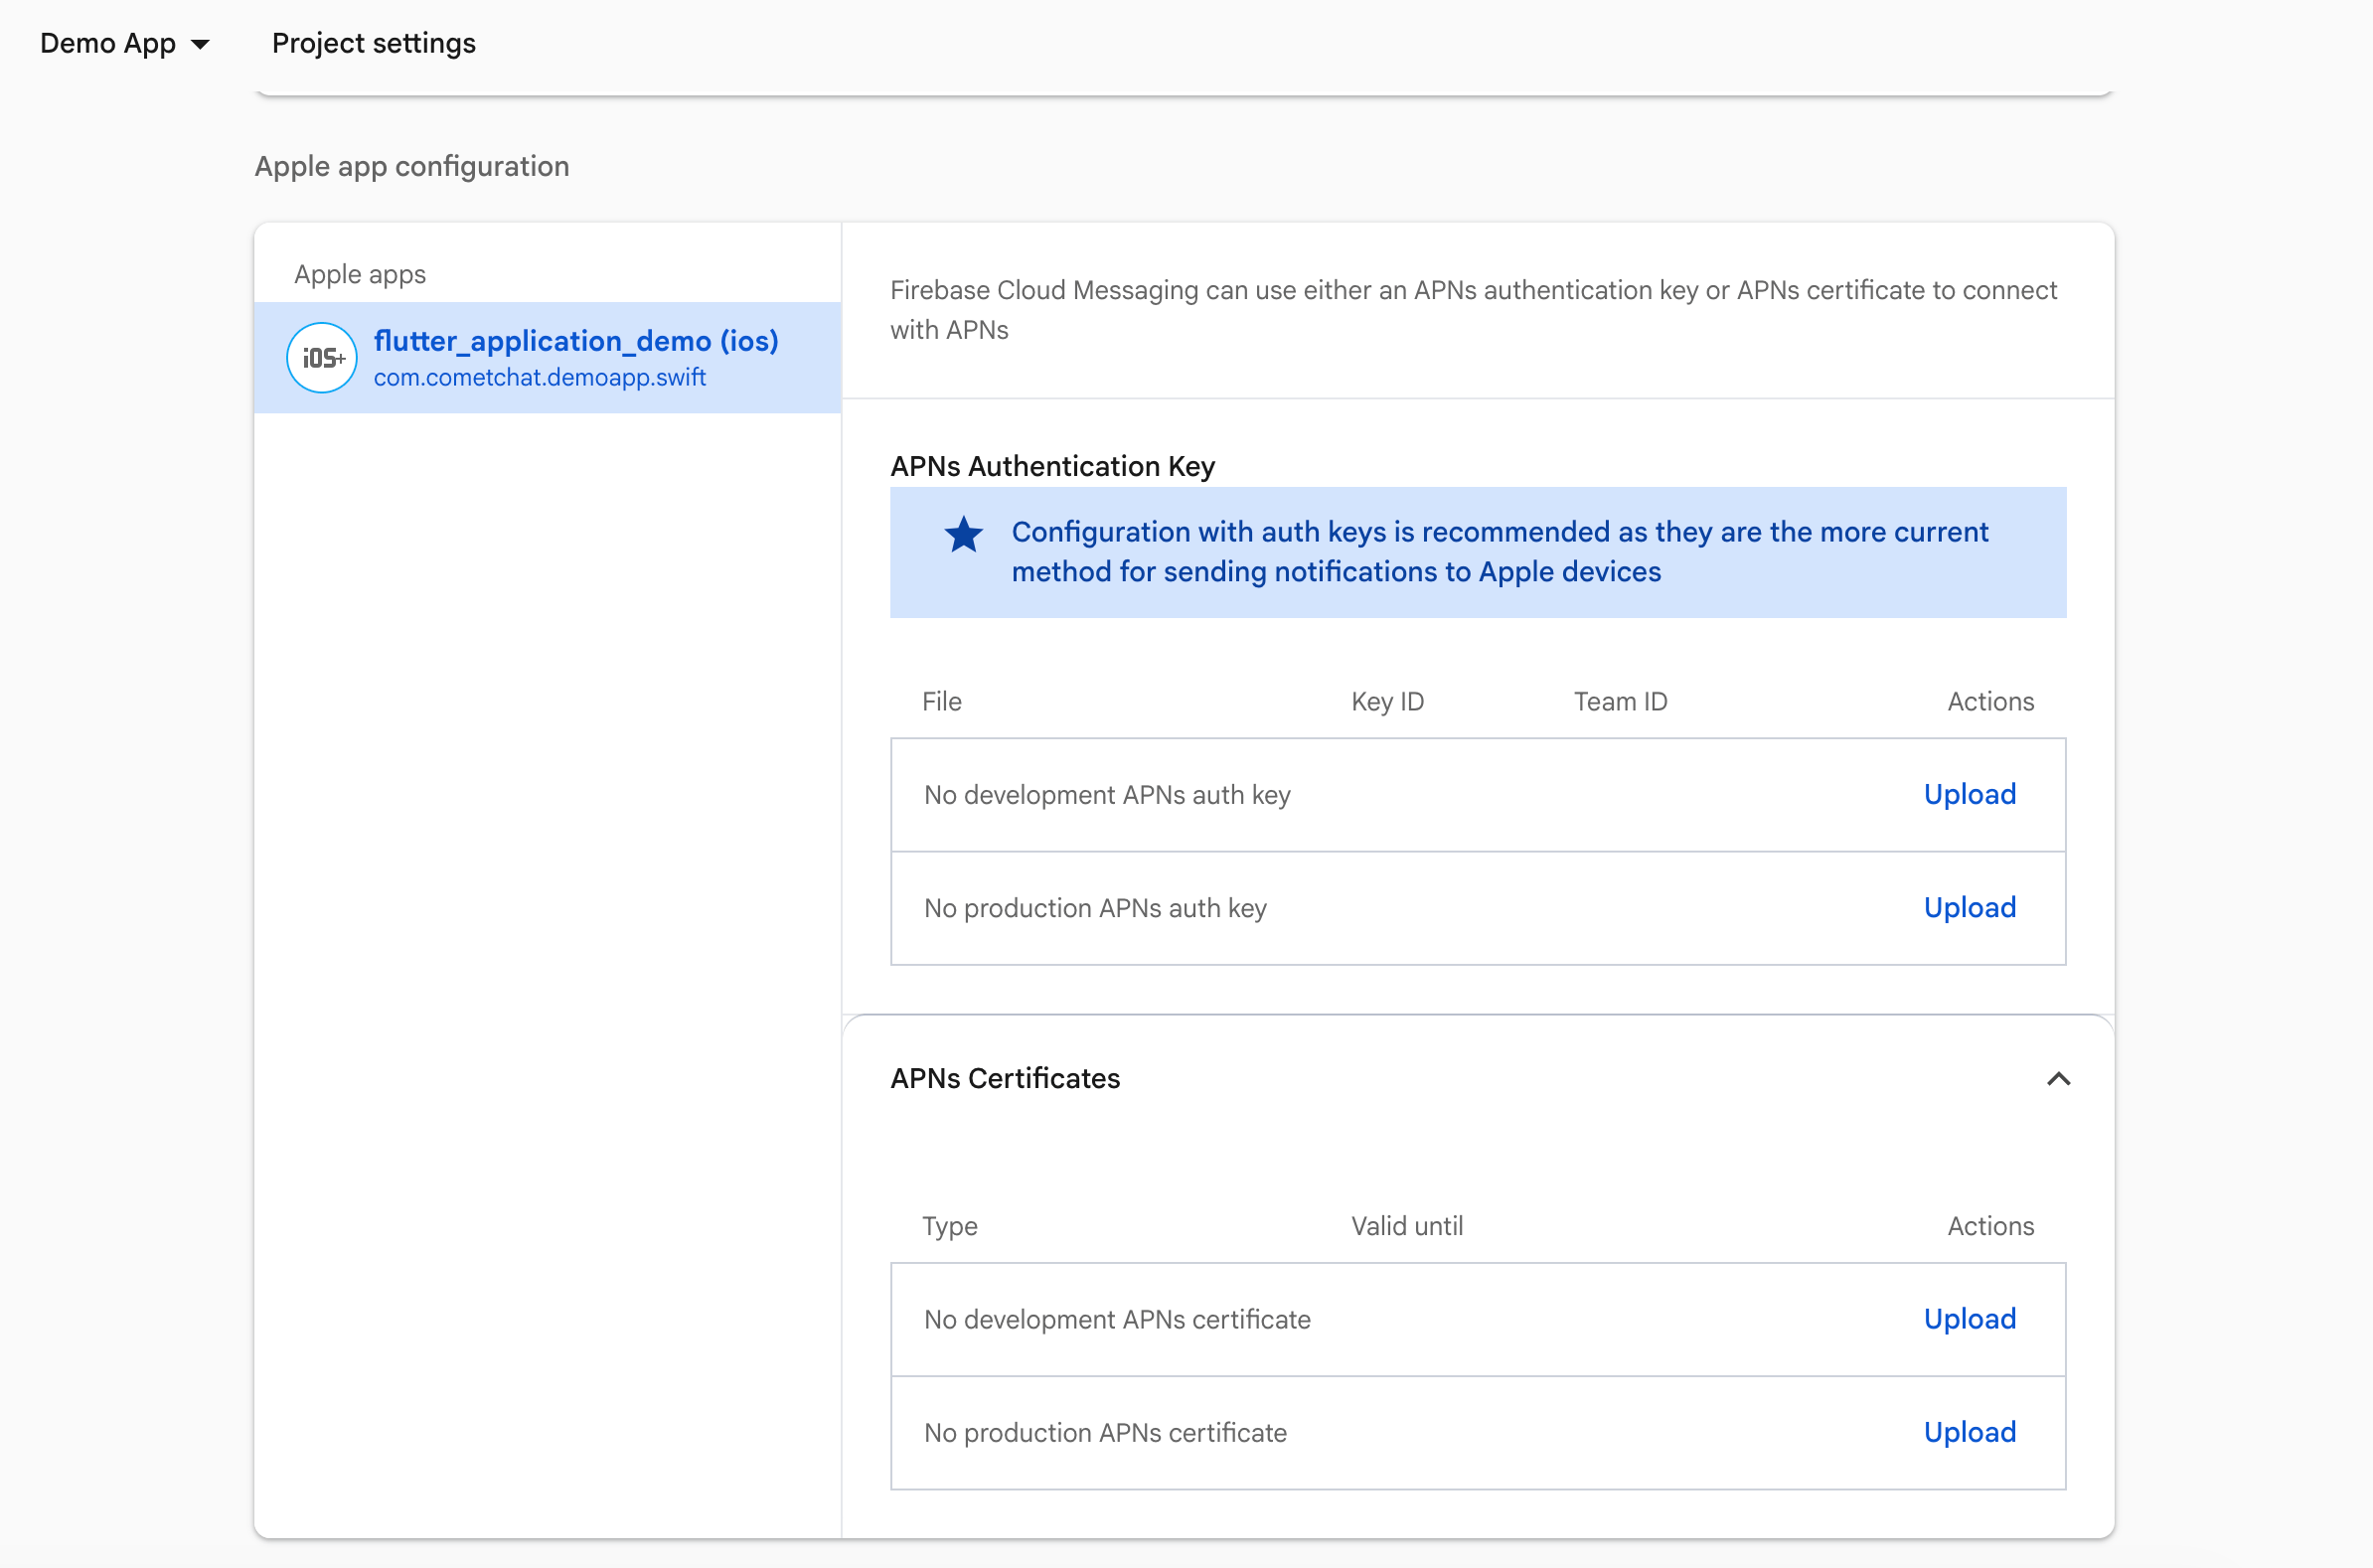
FCM’s role: Firebase issues the iOS FCM registration token and delivers the push payload. On iOS, FCM hands off to APNs using the APNs key/cert you upload in Firebase.
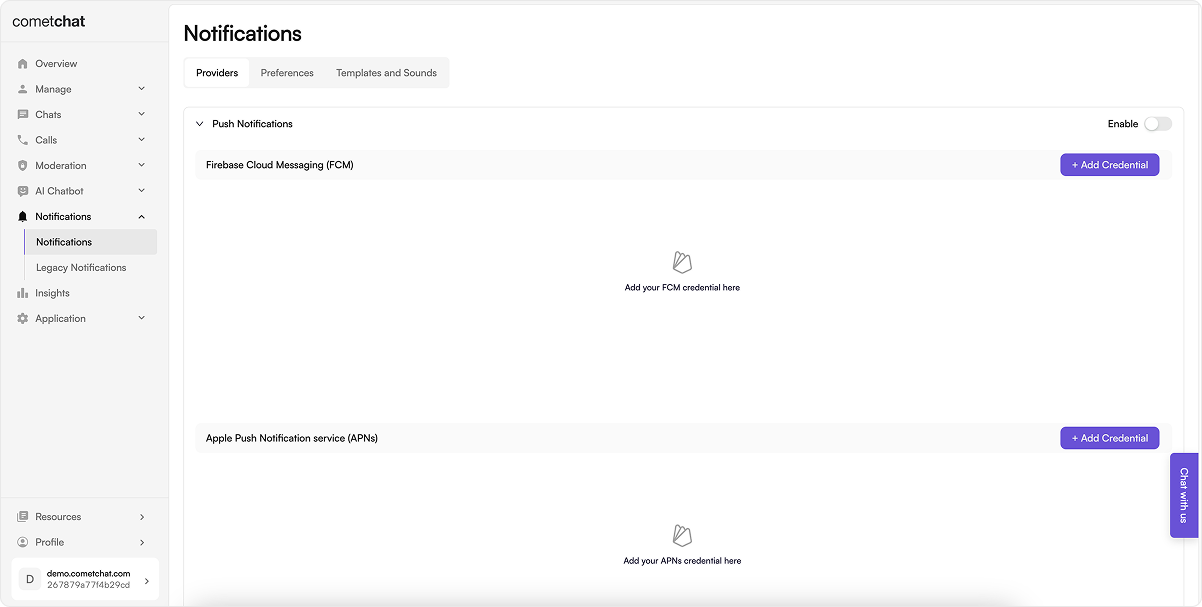
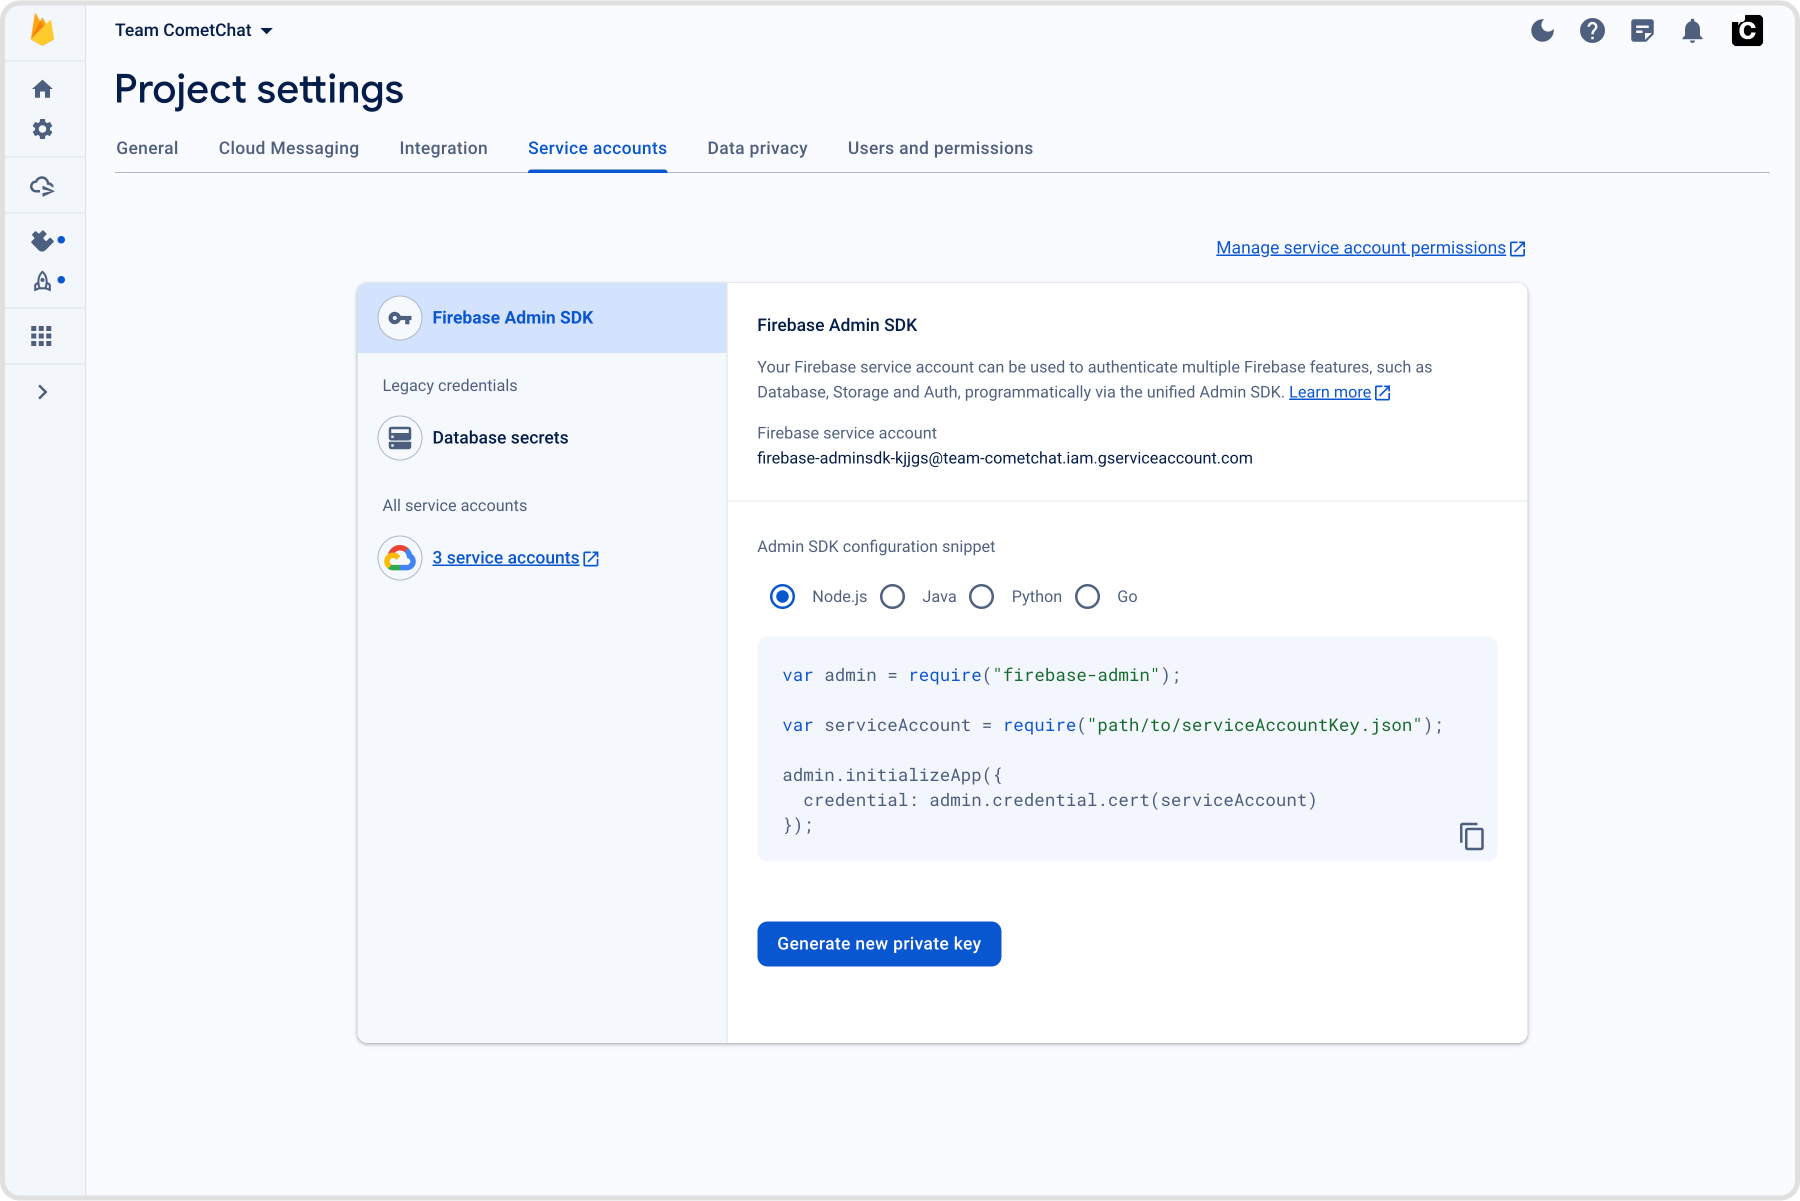
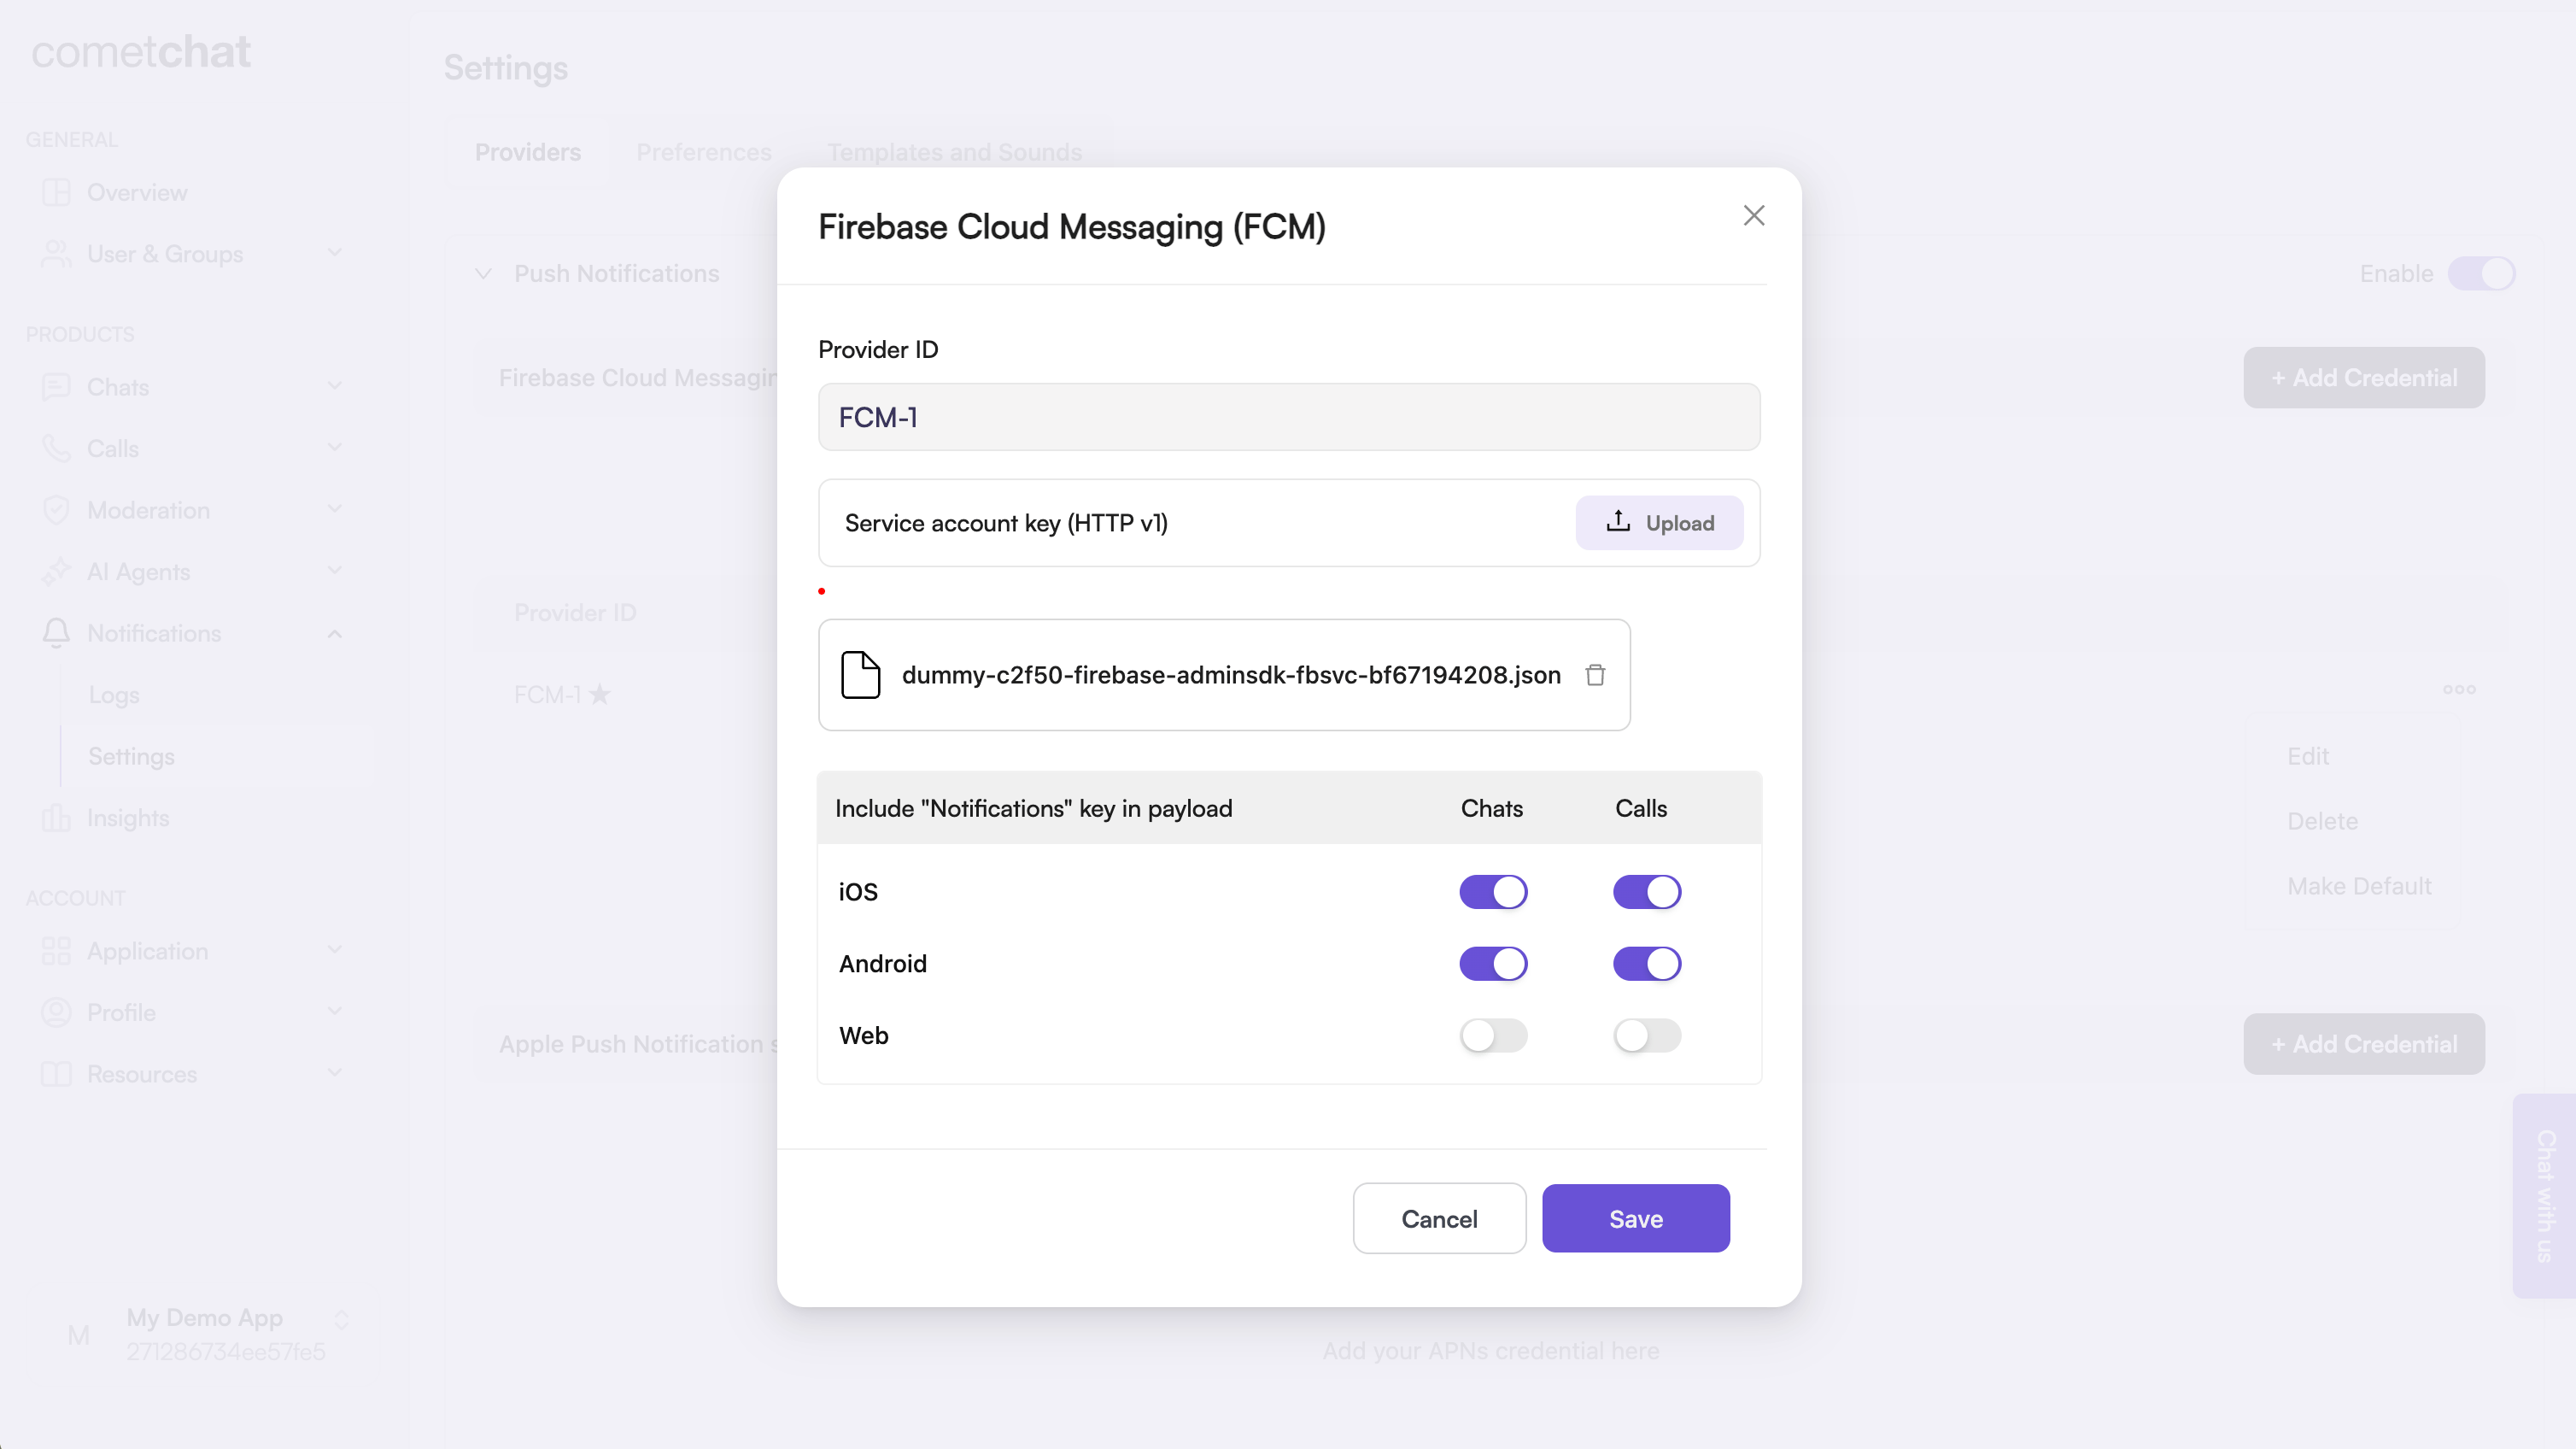
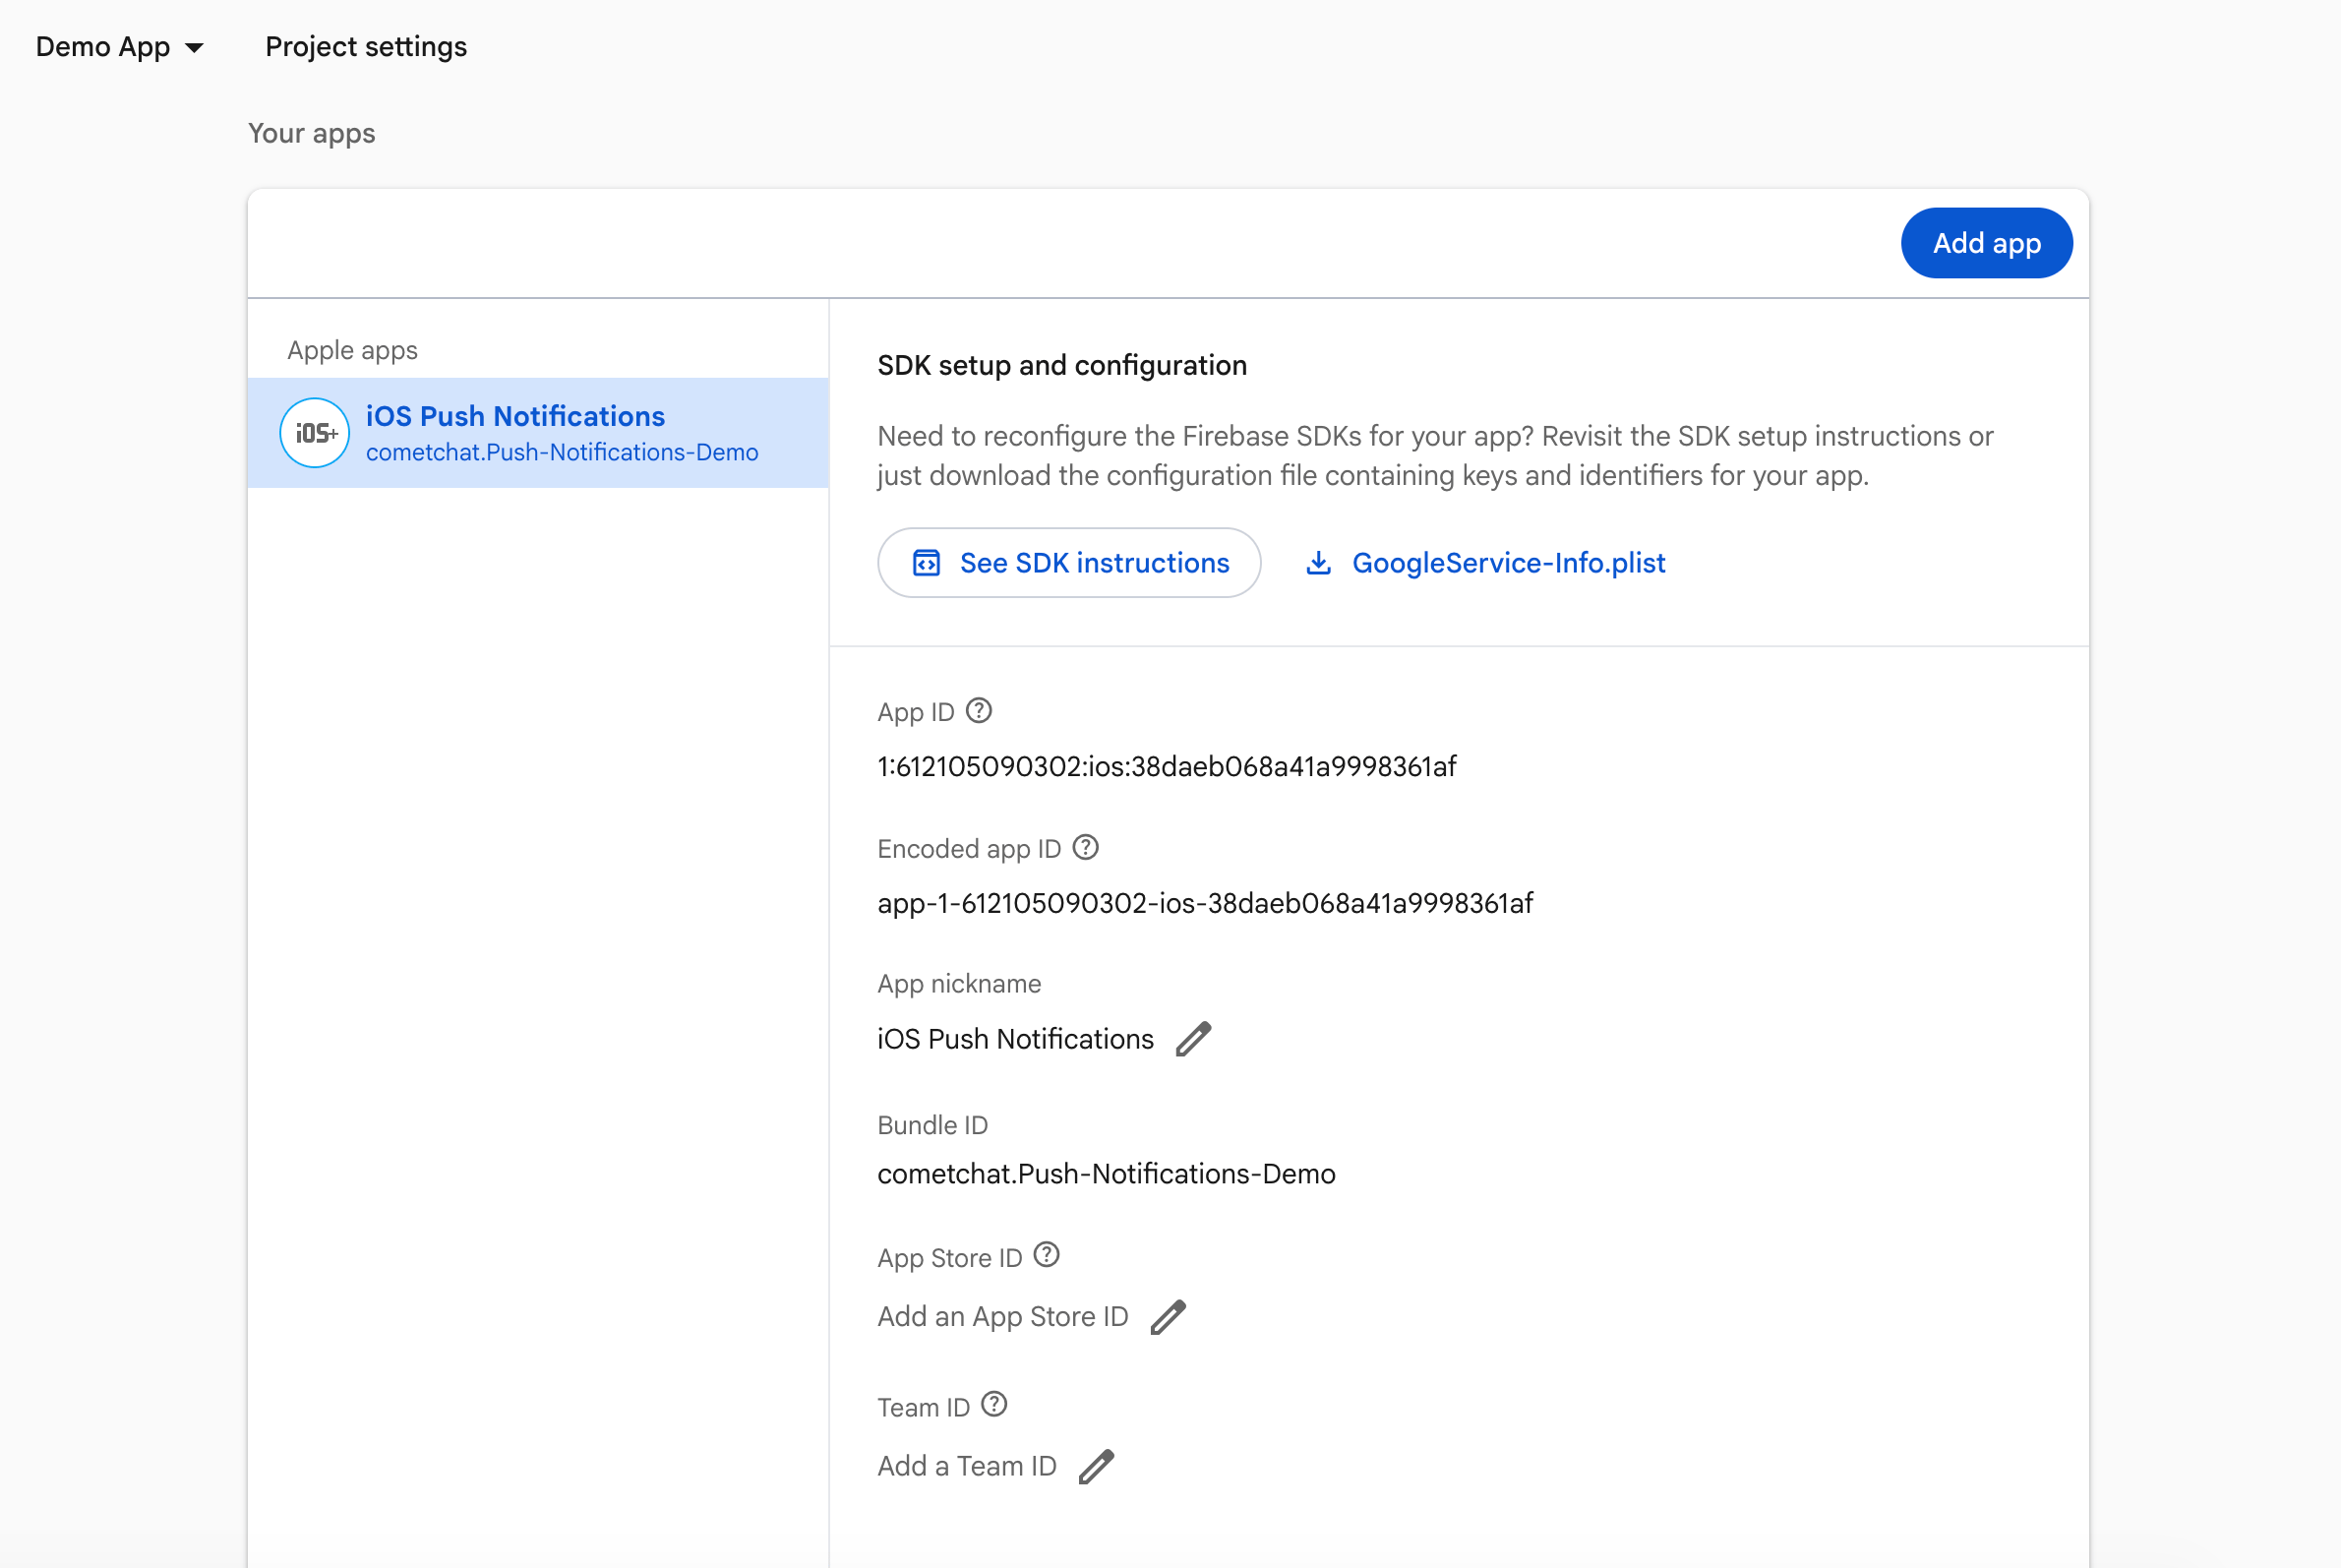
CometChat Notifications’ role: The FCM iOS provider you create in the CometChat dashboard holds your Firebase service account. When you call CometChatNotifications.registerPushToken(..., .FCM_IOS, providerId), CometChat binds that FCM token to the logged-in user and sends pushes to FCM on your behalf.
Flow (same bridge used in android-push-notifications.mdx): Request permission → register for remote notifications → FCM returns the registration token → after CometChat.login succeeds, register that token with CometChatNotifications using the FCM provider ID → CometChat sends payloads to FCM → FCM hands to APNs → UNUserNotificationCenterDelegate surfaces the notification/tap.
import UIKitimport FirebaseCoreimport FirebaseMessagingimport CometChatUIKitSwiftimport CometChatSDK@mainclass AppDelegate: UIResponder, UIApplicationDelegate, UNUserNotificationCenterDelegate, MessagingDelegate { func application( _ application: UIApplication, didFinishLaunchingWithOptions launchOptions: [UIApplication.LaunchOptionsKey: Any]? ) -> Bool { FirebaseApp.configure() Messaging.messaging().delegate = self UNUserNotificationCenter.current().delegate = self UNUserNotificationCenter.current().requestAuthorization( options: [.alert, .badge, .sound] ) { granted, error in print("Notification permission granted:", granted) if let error = error { print("Permission error:", error.localizedDescription) } // Only register for remote notifications if permission granted if granted { DispatchQueue.main.async { print("Registering for remote notifications...") application.registerForRemoteNotifications() } } else { print("Push notification permission denied by user") } } return true } func application( _ application: UIApplication, didRegisterForRemoteNotificationsWithDeviceToken deviceToken: Data ) { Messaging.messaging().apnsToken = deviceToken // Store the token for later registration after login let hexString = deviceToken.map { String(format: "%02.2hhx", $0) }.joined() UserDefaults.standard.set(hexString, forKey: "apnsPushToken") print("APNs token received and stored: \(hexString)") } func application( _ application: UIApplication, didFailToRegisterForRemoteNotificationsWithError error: Error ) { print("Failed to register for remote notifications: \(error.localizedDescription)") } func application( _ application: UIApplication, didReceiveRemoteNotification userInfo: [AnyHashable : Any], fetchCompletionHandler completionHandler: @escaping (UIBackgroundFetchResult) -> Void ) { print("Background notification received:", userInfo) completionHandler(.newData) } func messaging( _ messaging: Messaging, didReceiveRegistrationToken fcmToken: String? ) { guard let fcmToken = fcmToken else { print("FCM token is nil") return } print("FCM Token received:", fcmToken) // Store FCM token as well UserDefaults.standard.set(fcmToken, forKey: "fcmPushToken") if let apnsToken = UserDefaults.standard.string(forKey: "apnsPushToken") { print("Registering APNs token with CometChat: \(apnsToken)") CometChatNotifications.registerPushToken( pushToken: fcmToken, platform: CometChatNotifications.PushPlatforms.FCM_IOS, providerId: AppConstants.PROVIDER_ID, onSuccess: { success in print("APNs token registered with CometChat: \(success)") }, onError: { error in print("APNs token registration failed: \(error.errorCode) - \(error.errorDescription)") } ) } else { print("No stored APNs token found - Check if Push Notifications capability is enabled in Xcode") } } func userNotificationCenter( _ center: UNUserNotificationCenter, willPresent notification: UNNotification, withCompletionHandler completionHandler: @escaping (UNNotificationPresentationOptions) -> Void ) { completionHandler([.banner, .sound, .badge]) } // Call this method AFTER CometChat login succeeds static func registerStoredPushToken() { guard CometChat.getLoggedInUser() != nil else { print("Cannot register push token: User not logged in") return } // Register APNs token if let apnsToken = UserDefaults.standard.string(forKey: "apnsPushToken") { print("Registering APNs token with CometChat: \(apnsToken)") CometChatNotifications.registerPushToken( pushToken: apnsToken, platform: CometChatNotifications.PushPlatforms.APNS_IOS_DEVICE, providerId: AppConstants.PROVIDER_ID, onSuccess: { success in print("APNs token registered with CometChat: \(success)") }, onError: { error in print("APNs token registration failed: \(error.errorCode) - \(error.errorDescription)") } ) } else { print("No stored APNs token found - Check if Push Notifications capability is enabled in Xcode") } // Register FCM token if let fcmToken = UserDefaults.standard.string(forKey: "fcmPushToken") { print("Registering FCM token with CometChat...") CometChat.registerTokenForPushNotification( token: fcmToken, onSuccess: { message in print("CometChat FCM token registered successfully") }, onError: { error in print("CometChat FCM token registration failed:", error?.errorDescription ?? "Unknown error") } ) } else { print("No stored FCM token found") } }}
What this code is doing
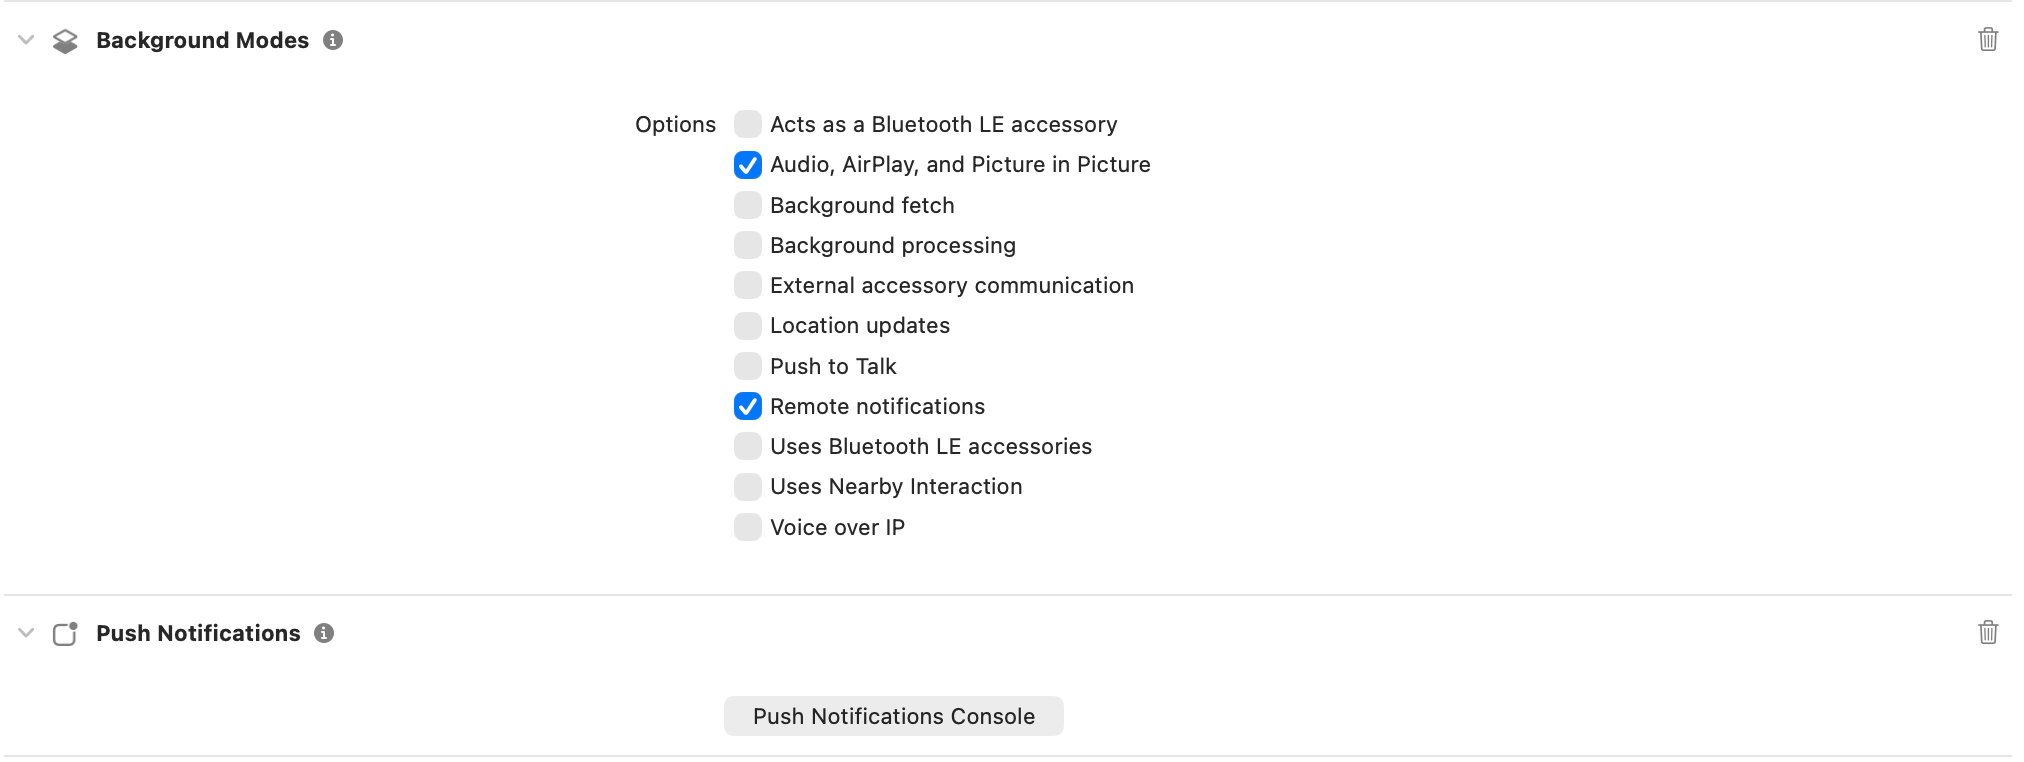
Initializes Firebase, sets MessagingDelegate and UNUserNotificationCenterDelegate, asks for alert/badge/sound permission, and registers for remote notifications.
Sets Messaging.messaging().apnsToken so FCM can map the APNs token and later deliver via APNs.
Stores the FCM registration token and calls registerStoredPushToken() so CometChat can bind the token to your logged-in user (using the Provider ID you configured).
Leaves willPresent to show banners/sounds in foreground instead of silently ignoring the notification.
CometChat’s Enhanced Push Notification payload includes an unreadMessageCount field (a string) representing the total unread messages across all conversations for the logged-in user. Use this to set the app icon badge and enrich local notifications.
The unreadMessageCount field is sent as a string in the payload. Always parse it to an integer and validate it’s non-negative before updating the badge.